First, let me say this is a wonderful kit. I've thoroughly enjoyed it so far. I can only imagine that if they sold a version where the parts are prepped and primed, all we'd have to do is the fun part.
A couple of observations while building the ailerons. YMMV.
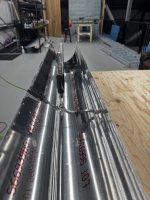
1. Cleco together both the left and right sides, including the pivot brackets to make sure you have it correct. It's not hard, but potentially very difficult to fix later. Double check that the countersinks are on the correct side.

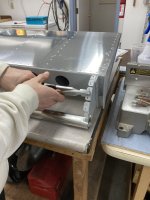
2. I made a small wooden block jig to dimple the leading edge skin with the DRDT-2. For 12 holes it works. (UPDATE: Scroll down and Troy suggests Instead of blocking up the die, you can just flip the skin and then blocking is not required. I haven't tried it but sounds like a great idea!)

3. Check that the nutplate is for 10-32 size screw.
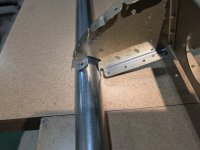
4. Once you have the front ribs built up, check that everything aligns properly and that the AN3 screw screws in properly - all the way. On one of the ailerons the hole in the rib (not the fatter bracket) did not line up exactly and therefore caused some binding on the nutplate. That caused the rivet securing the nutplate to snap. A huge issue if the front skin was riveted on. Fortunately the counterweight tube is on B/O so I do have access to fix it. The planned repair is to slightly enlarge the hole (in the thin rib material only, not on the bracket) and replace the broken rivet.


Curious if anyone else has run into this.
A couple of observations while building the ailerons. YMMV.
1. Cleco together both the left and right sides, including the pivot brackets to make sure you have it correct. It's not hard, but potentially very difficult to fix later. Double check that the countersinks are on the correct side.
2. I made a small wooden block jig to dimple the leading edge skin with the DRDT-2. For 12 holes it works. (UPDATE: Scroll down and Troy suggests Instead of blocking up the die, you can just flip the skin and then blocking is not required. I haven't tried it but sounds like a great idea!)
3. Check that the nutplate is for 10-32 size screw.
4. Once you have the front ribs built up, check that everything aligns properly and that the AN3 screw screws in properly - all the way. On one of the ailerons the hole in the rib (not the fatter bracket) did not line up exactly and therefore caused some binding on the nutplate. That caused the rivet securing the nutplate to snap. A huge issue if the front skin was riveted on. Fortunately the counterweight tube is on B/O so I do have access to fix it. The planned repair is to slightly enlarge the hole (in the thin rib material only, not on the bracket) and replace the broken rivet.
Curious if anyone else has run into this.
Last edited:

 a while back but I can't find it right now; Van's actually sent me replacement smaller nuts in one of my backorder shipments. Doesn't look like it's made it onto the wiki yet, either.
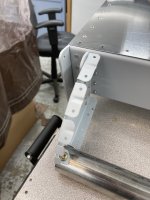


") .
.