Over the last 6 months I've been trying to learn and understand as much as possible about how sticky valves form and what one can do to mediate the issue. I've watched many U-tube videos and Mike Busch seems to have a very good Morning Sickness 101 presentations. I'm convinced based on several members that I should be able to get a "tell" before I would have a major problem (One good reason to let my EFIS fully boot and start recording data before engine start) and that is watching to see if all cylinder EGT's increase at the same rate and time. What I can't seem to find are pictures showing what one's valve seat and guide look like when valves are sticking. Mikes videos talk about the importance of a borescope but there are no pictures what it looks like. I did find one picture that looks like the stem is slightly varnished at best and no different than what my stems and guide look like on all 4 cylinders of mine! Checking from the top I get and makes sense to show lack of turning or the dreaded green streaks. Does anyone have pics of their stems and guides that had a sticking valve? Mike seems to feel borescope and not the wobble test is a better test, but I have no idea what I'm looking at.
Last edited:


")
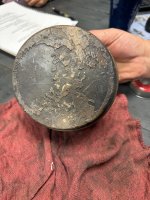
 But agree the clearance is slim to none. A little coat of varnish would pretty well lock it up.