

Van's Air Force

The definitive Van's Aircraft support community! Buying, building or flying an RV? Join our exclusive family of mentors and enthusiasts!

RV-8 Canopy Fairing: Transition from Windscreen to Slider?

N804RV

Well Known Member
Friend
How many layers of cloth did you lay up over the aft edge of the windscreen to fair the slider? Did you lay it up all at once? Or did you just do a few at a time?

I'm having severe analysis paralysis after laying up the filet around the bottom of the windscreen. Any thoughts or suggestions would be appreciated. I have the instructions from the plans. But I'm afraid of laying it all up at once and epoxying the slider shut.
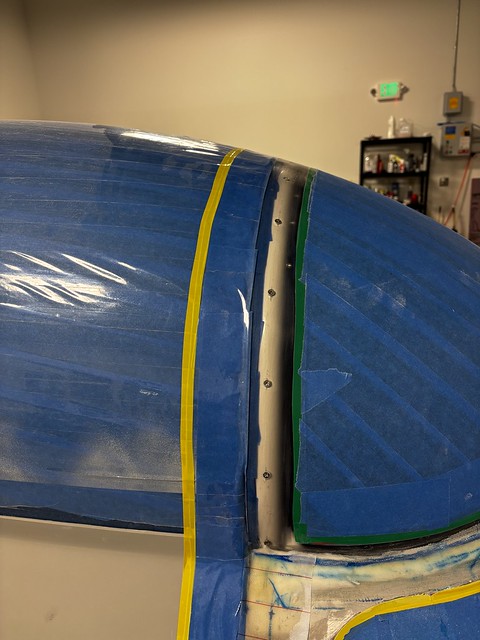
55228500325_d921248555_z.jpg
 
How many layers of cloth did you lay up over the aft edge of the windscreen to fair the slider? Did you lay it up all at once? Or did you just do a few at a time?

I'm having severe analysis paralysis after laying up the filet around the bottom of the windscreen. Any thoughts or suggestions would be appreciated. I have the instructions from the plans. But I'm afraid of laying it all up at once and epoxying the slider shut.

55228500325_d921248555_z.jpg
I used 4 layers of 3" tape, (I forget the cloth weight) all in one layup. It's pretty strong. Tie 2 lengths of small diameter rope to either side of the front lower part of the metal canopy frame and run these ropes out through the aft fuselage, they will make opening the canopy afterwards much easier.
 
I'm afraid of laying it all up at once and epoxying the slider shut.
I did this - not fun. It was very difficult getting into it once 'dry'. I don't recommend it.

I hired a professional fiberglass person (friend-of-a-friend, works on boats, did NICE work) plus another friend who had done his before to help me. It was too important and difficult to do on my own. But I don't remember how many layers. I just know after it was laid up and dry, and after getting the canopy open (finally), there was a LOT of sanding and filling on the skirt and the windscreen. Isn't there always?

Ken - I'm curious, are you building another plane? Or redoing the canopy on your existing -8?
 
...
Ken - I'm curious, are you building another plane? Or redoing the canopy on your existing -8?

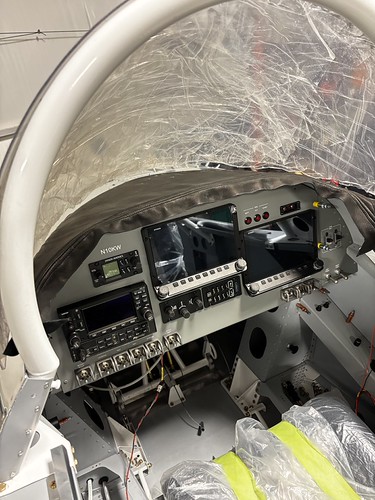
Building. This is my forever project. I have a really low builder # because I bought the tail kit and then stored it till after I retired. Its all slow build and scrounged except for the Dynon stuff.

55219255812_1152fb3346.jpg

55067528361_8f21351065.jpg
 
Try non vented peel ply on rolling canopy, lay up and then peel ply on top. Once dry remove top peel ply and then the rolling canopy will need slight power to open. I used inner handle installed on outside(reverse of instructions) just to open it after layup dries. The peel ply I used for this was more plastic like than the fabric peel ply. It helps smooth the outer layer for less sanding and does not bind to canopy nor first fiberglass layer too bad. I used 2 fiberglass layers and 1 carbon fiber to help strengthen and I used 2” or 3” wide strips.
Good luck
 
Ken,

Some thoughts:
- I used a bid or two of medium weight glass to start.
- On top of that I added a couple of bids or carbon fiber. I find carbon fiber easier to work with on such stuff.
- I strongly recommend using a different process on the roll bar to windshield screws. I consider the Van’s instructions to be a precursor to cracks. I open up the glass screw holes to 3/16” or so using a unibit. After that the holes get counter sunk to fit a #6 screw tinnerman. The tinnerman spreads out the screw clamping force over a much wider, and uniform area. I do the same for any pop rivet to glass fastener as well (like the pop rivets on the forward part of the canopy that go into the canopy frame).
- For release, I used black electrial tape on the canopy, covered with a thin layer of paste wax as the release agent. Making the wheel pant intersection fairings I learned that heavy duty hair spray is a decent release agent as well (as in instead of the paste wax).

I did this on two builds. It does create anxiety when you need to apply some muscle to get the canopy open once it all sets up.

For those still in the beginning canopy process, there is a trick to make sure your canopy fasteners are perpendicular to the canopy frame (the glass being flat on the round steal tubes with no gaps to create a hot spot). Too much to type but anyone interested you can DM me.

Cal
 
I laid down a strip of aluminum tape, then spread on some mold-release wax on the tape. I didn't have any big issues with getting the layups to release from the canopy -- just some gentle pressure and it popped apart.

For the layup itself, I made five layers:
--BID Fiberglass--
--Carbon Fiber--
--BID Fiberglass--
--Carbon Fiber--
--BID Fiberglass--

This might be overkill, but I figured I'd make sure it was good and strong. That area tends to get leaned on when people get in and out.

The hardest part for me was sanding the edges of the layup to smoothly meet the windshield. I have an ungodly number of hours of sanding logged on my windshield fairings and the "canopy pocket" area.
 
Laid up 5 plies of 8oz 3" wide tape for the windscreen transition fairing, then went out of town for a bit. I didn't have any problems opening the slider after it cured. I did as @nzrv8 suggested and tied a length of small diameter rope to the slider aft cross tube and ran it out the back, along the slider track. With one person pulling on the rope and me tugging on the handle and lifting on the edge of the skirt it popped open pretty easily.

Getting back in the shop, I started sanding on it, then panicked when I thought I'd sanded right through and damaged the windscreen. So, I pulled off the painter's tape, leaving the 2 layers of edge tape. Much relieved to find only one small abrasion that can be polished out when I get a round toit.

Lesson learned: I'm gonna make the 2 layers of 'edge' tape (colored electrical tape) wider with another strip and also add a layer of packing tape over the painter's tape.

Anyone else go through similar?


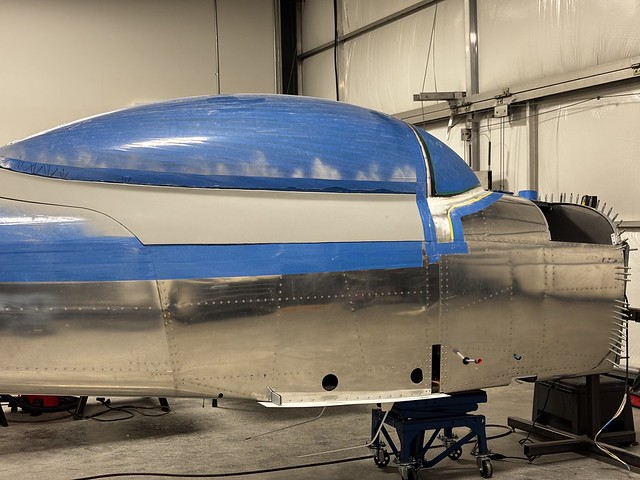
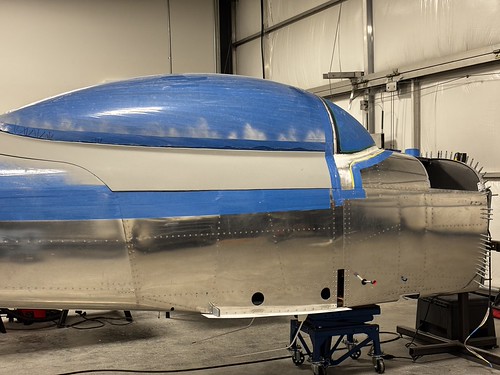
Before laying up the windscreen fairing.
55219255812_1152fb3346_z.jpg


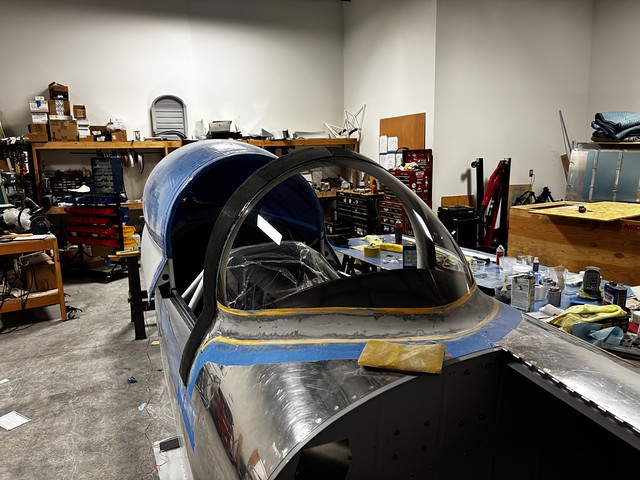
After panicking and pulling off blue painter's tape:
55285284950_d9de7450de_z.jpg
 
Last edited:
Back
Top