TheBoatLife
Member
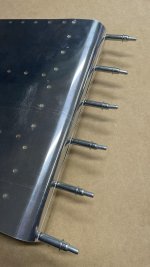
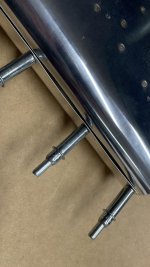
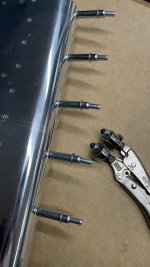
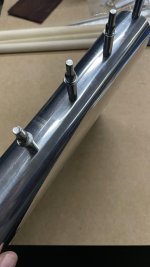
I can't seem the get this seam to be flush down the leading edge of the practice kit.
Is this a matter of not rolling the top piece at enough of a curve, or improper drilling of the holes? I drilled from the middle towards the edges.
I also managed to improve it from my initial attempt but there's still a seam I can't get flush. Tried to show it in two different pictures...
Thanks for the advice