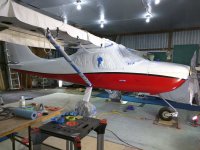
So, I thought I could freehand the curved stripe on the fuselage of my -14A. I did, but it turned out pretty crappy. Lots of variations in width. Not acceptable. So, before I sand it all off and do it again, I would like to know if there is a method a shade tree painter like me can use to get the curves precisely correct. I will try to fabricate a template somehow if there is no other way. I also thought about measuring many many many offsets from a straight line to create an accurate curve. Lasers of some kind?