

Van's Air Force

The definitive Van's Aircraft support community! Buying, building or flying an RV? Join our exclusive family of mentors and enthusiasts!

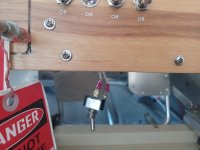
First NS electrical troubleshooting problem, so proud to solve it.

Steve Crewdog

Well Known Member
Patron
So last night I did the final instrument panel mounting, which means to take it off from now on is a huge problem. Today I'm showing my build sensei how great everything works and...... no beacon power. He asks me a couple questions, I get out my schematics, figure out where power is coming to-from, show him and trace it. First time really using a voltmeter to solve a problem so he gives me some guidance because I'm nervous and don't want to fry everything so close to being done.

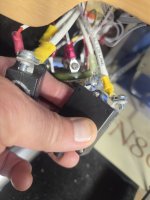
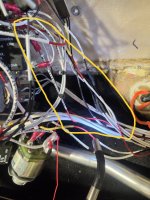
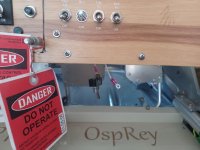
Start at the power buss, power is Ok. Feel under the dash, nothing obviously loose but nothing shocks me so that's a win. Send a borescope up behind it and it looks like everything it attached, but I can't get a probe to the switch to see if there's power so I have to undo the switch, drop it out and a wire is missing. Ok, no broken terminal, feel around and find the wire hanging loose. Gently extend the switch and the loose wire out, reattach it, put it all back together, and it works now .YAY!

Sorry for sharing, but electrical is my Achilles Heel, and I know I didn't exactly have a major problem to find a solution to and fix, but to a guy who has spent the last 4? 5? 6? years redoing his system, having a problem literally the first day and finding out what was wrong and fixing it... Thanks to everyone who has helped me over the years with advice.

Things learned:
All the time I spent writing up the electrical diagram paid off.
I should have made the service loop/slack bigger.
Yes, a blade terminal would have not come off, but they're also a real pain to get off.
Is there a thread sealant for screw-type terminal switches?


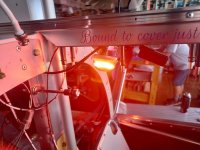
(no the beacon is not mounted in the cockpit, I had to take the fairing it's mounted to off to hook something up. The service loop at the beacon is long enough to let it hang that far down.)
 

Attachments
  • first troubleshooting (1).jpg
    first troubleshooting (1).jpg
    118.3 KB · Views: 82
  • first troubleshooting (2).jpg
    first troubleshooting (2).jpg
    103.5 KB · Views: 83
  • first troubleshooting (3).jpg
    first troubleshooting (3).jpg
    129.8 KB · Views: 82
Last edited:
You have done well, Grasshopper... Okay, you may be too young to get that reference. But nice job troubleshooting, regardless. It won't be the last time.

A small lock washer--either the split kind or the "star" kind--might be your best bet on switches. They come with some switches and circuit breakers. Get a bunch of extras, as they have a tendency to fall off during installation, never to be seen again. Don't use Loctite or something made for standard hardware, as it can get in the way of electrical flow and/or cause heat from high resistance.
 
You have done well, Grasshopper... Okay, you may be too young to get that reference. But nice job troubleshooting, regardless. It won't be the last time.

A small lock washer--either the split kind or the "star" kind--might be your best bet on switches. They come with some switches and circuit breakers. Get a bunch of extras, as they have a tendency to fall off during installation, never to be seen again. Don't use Loctite or something made for standard hardware, as it can get in the way of electrical flow and/or cause heat from high resistance.
Oh, he’s not to young, he could be grasshoppers dad
 
So last night I did the final instrument panel mounting, which means to take it off from now on is a huge problem. Today I'm showing my build sensei how great everything works and...... no beacon power. He asks me a couple questions, I get out my schematics, figure out where power is coming to-from, show him and trace it. First time really using a voltmeter to solve a problem so he gives me some guidance because I'm nervous and don't want to fry everything so close to being done.

Start at the power buss, power is Ok. Feel under the dash, nothing obviously loose but nothing shocks me so that's a win. Send a borescope up behind it and it looks like everything it attached, but I can't get a probe to the switch to see if there's power so I have to undo the switch, drop it out and a wire is missing. Ok, no broken terminal, feel around and find the wire hanging loose. Gently extend the switch and the loose wire out, reattach it, put it all back together, and it works now .YAY!

Sorry for sharing, but electrical is my Achilles Heel, and I know I didn't exactly have a major problem to find a solution to and fix, but to a guy who has spent the last 4? 5? 6? years redoing his system, having a problem literally the first day and finding out what was wrong and fixing it... Thanks to everyone who has helped me over the years with advice.

Things learned:
All the time I spent writing up the electrical diagram paid off.
I should have made the service loop/slack bigger.
Yes, a blade terminal would have not come off, but they're also a real pain to get off.
Is there a thread sealant for screw-type terminal switches?


(no the beacon is not mounted in the cockpit, I had to take the fairing it's mounted to off to hook something up. The service loop at the beacon is long enough to let it hang that far down.)
Seriously -- good work. Kudos on using the correct type of ring terminals (TE/AMP - PIDG). Add a locking washer between the screw heads and the ring terminal tongues -- either split washer or internal teeth star washer.
 
Second electrical problem, chasing an alternator gremlin.

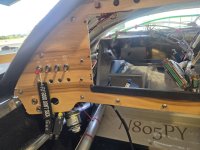
Note to other builders: practice repairing things at home before you drive that rivet, close up that panel, etc. Thought I had left enough slack in the alternator/generator wiring to drop the cbs and I could not figure out why they weren't coming out further, so I took the Dynon out to get to them and see what was going on, (proving that my planning to be able to easily remove the Skyview to get access worked.). The opening allowed me to discover that I had ran the wire from the master solenoid to the #1 fuel pump around the CB wires, not allowing them to drop out fully for repair. (Luckily, my dog is here to watch repair videos and make suggestions.) And I had the CBs wired correctly, so it's something else... grrrr.......

A bit frustrated, but as a friend put it, it's better to discover these things at home with all my tools and my hangar available than on the road to Oshkosh or Sun n' Fun.
 

Attachments

  • Field repair practice (1).jpg
    Field repair practice (1).jpg
    174.6 KB · Views: 22
  • Field repair practice (2).jpg
    Field repair practice (2).jpg
    296.1 KB · Views: 19
  • Field repair practice (3).jpg
    Field repair practice (3).jpg
    273.3 KB · Views: 20
  • Field repair practice (4).jpg
    Field repair practice (4).jpg
    311.8 KB · Views: 18
Last edited:
Seriously -- good work. Kudos on using the correct type of ring terminals (TE/AMP - PIDG). Add a locking washer between the screw heads and the ring terminal tongues -- either split washer or internal teeth star washer.
What Brian ^ said. Personally I prefer the star type internal tooth for switch terminals.

For what it's worth...Condition Inspection. Two switch issues found.
1. When I dropped one of my access panels a switch screw fell out. Oh crap. I used a light to inspect laying under the panel. Thank God. Just an unused terminal. So I fugure I should inspect more. Visual and with my hands.
2. Master terminal was so loose, I could rotate the wire. OMG! Glad I found that one.

Extra...
When I tested the taxi lights, starboard didn't work. Great. After removal, the problem was obvious. Dead short blew out the wire. I had pinched the cable installing the wing tip. I had to haul it home and replace the harness. Moral...take your time.
 
Seriously -- good work. Kudos on using the correct type of ring terminals (TE/AMP - PIDG). Add a locking washer between the screw heads and the ring terminal tongues -- either split washer or internal teeth star washer.

Home Depot aircraft parts zinc washers ok, or should I use SS, or something else? Is stainless mo' bettah for electrical, or does it matter?
 
Second electrical problem, chasing an alternator gremlin.

Note to other builders: practice repairing things at home before you drive that rivet, close up that panel, etc. Thought I had left enough slack in the alternator/generator wiring to drop the cbs and I could not figure out why they weren't coming out further, so I took the Dynon out to get to them and see what was going on, (proving that my planning to be able to easily remove the Skyview to get access worked.). The opening allowed me to discover that I had ran the wire from the master solenoid to the #1 fuel pump around the CB wires, not allowing them to drop out fully for repair. (Luckily, my dog is here to watch repair videos and make suggestions.) And I had the CBs wired correctly, so it's something else... grrrr.......

A bit frustrated, but as a friend put it, it's better to discover these things at home with all my tools and my hangar available than on the road to Oshkosh or Sun n' Fun.

Alternators are terrifyingly simple devices :)

Get out your trusty volt meter -- hook the black lead/probe to the airframe, use the red lead/probe and see if there's voltage present at each of the nodes along the circuit to the alternator. If no volts are present, you've found the problem.

Another trick -- turn the Alternator Field on, and hold a compass near the alternator -- if its going to work, the compass needle will swing toward the alternator. You can use a wrench, or screwdriver to see if its magnetic also. This demonstrates that the field circuit and rotor is energized ... about 95% of the battle. (Some regulators only switch the field at about 30% when the alternator isn't spinning, so it'll be a weaker magnetic field/attraction.)
 
Thank you, Bj. Is the with the engine running or shut down?

When I run the engine the Alternator light does not go off, so I thought I'd check the wiring first.
 
Back
Top