Mike Schollmeyer
Member
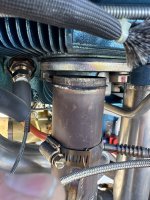
Flying my new RV14A home yesterday with 45 hours on the IO-390-EXP. Landed at the first leg of the trip, full power take off and then heard a steady banging from the engine at 1,000 feet AGL. CO2 alarm from the G3X. Closed cabin heat, opened cabin vents, reduced thrust and CO2 levels started falling. Removed the cowl and found that the entire weld holding the flange to the pipe had failed under cylinder 2.
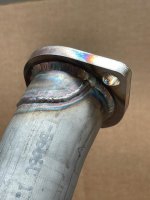
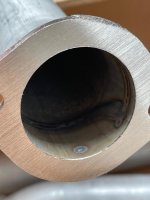
Took it off, sent it to Vetterman to weld it back up. Inspected the other three flanges and I think the welds on those are too thin. Once I get the RV home, I will remove the remaining three flanges and have them beefed up as well.
I believe that Vans has a video showing how they changed the exhaust on the 390-EXP to get 5 more hp out of the engine. Has anyone out there seen a failure like this? This engine and kit were from 2022.