
Van's Air Force
You are using an out of date browser. It may not display this or other websites correctly.
You should upgrade or use an alternative browser.
You should upgrade or use an alternative browser.
RV-15 #150116
- Thread starter catmandu
- Start date

Saber25
Well Known Member
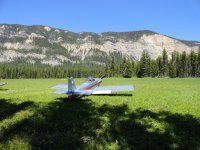
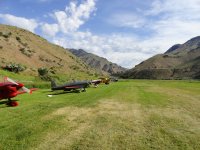
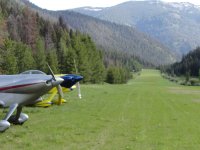
The RV4 is a poor man's fighter. The 15 looks like a very nice transport high wing similar to a scaled down C-180 or 170. I've had the RV4 into numerous backcountry strips in Idaho, Oregon and Washington to name a few States Miss Fusion has taken us on camping trips. Back in the day, we'd camp at Van's grass strip and then only the 4 and a few sixes represented Van's greatest kit planes.
Attachments
They still doBack in the day, we'd camp at Van's grass strip and then only the 4 and a few sixes represented Van's greatest kit planes.
")
The 15 will certainly open up other options than camping in a farm field.
FTFY. When I first flew our -6A, I was happy to find the experience familiar. But we are now looking forward to building something slightly different that retains that same RV feel.The RV single digit series are a poor man's fighter.
After a reset in the delivery schedule, we finally made the trek to Aurora on 3/13/26 to pick up our wing kit.


We had hoped to do a factory tour, but heavier rains were forecast later in the morning so we just got on the highway.
Ten hours later we were home, but waited until the next morning to unload the trailer. Popped the top off the crates and went to work on the inventory. It took two of us three hours, not including the trip taking the SUV full of packing paper to the dump to recycle.


There were some discrepancies between the packing sheet, the invoice, and our inventory as to what was missing, so it was worth doing a thorough inventory. For the hardware bins, we actually counted any items under 100. For those with items over 100, we counted 100 and then weighed them, then weighed the total number of items and did the math. That probably got us withing one or two items for the total count, which we can live with.
We had hoped to do a factory tour, but heavier rains were forecast later in the morning so we just got on the highway.
Ten hours later we were home, but waited until the next morning to unload the trailer. Popped the top off the crates and went to work on the inventory. It took two of us three hours, not including the trip taking the SUV full of packing paper to the dump to recycle.
There were some discrepancies between the packing sheet, the invoice, and our inventory as to what was missing, so it was worth doing a thorough inventory. For the hardware bins, we actually counted any items under 100. For those with items over 100, we counted 100 and then weighed them, then weighed the total number of items and did the math. That probably got us withing one or two items for the total count, which we can live with.
Last edited:
After a lot of prep work in the living room while watching NCAA Men's Tournament games, we started small and attacked the ailerons.
First cleco:

First rivet:

After a bit of time getting the Numatix squeezer to work for us (bleed, bleed, and bleed again!), the learning curve ramped up and things moved along nicely. Only about ten rivets had to be drilled out and reset.
Now we are forced to stop as we are missing two aileron brackets and two aileron skins, so the skeletons go into storage on top of the fuel tank crates to make some room to assemble the flaps.

First cleco:
First rivet:
After a bit of time getting the Numatix squeezer to work for us (bleed, bleed, and bleed again!), the learning curve ramped up and things moved along nicely. Only about ten rivets had to be drilled out and reset.
Now we are forced to stop as we are missing two aileron brackets and two aileron skins, so the skeletons go into storage on top of the fuel tank crates to make some room to assemble the flaps.
Last edited:
On to the flaps. No early week basketball to watch, and our son was home for a week of remote work and did not care for the sounds of prep work in the background of his Zoom calls. So it was some slightly chilly deburring in the hangar, but not too bad. We took the excellent advice to cleco everything for both flaps together before any assembly and that helped tremendously.

Once we established the location and orientation of the brackets, we did the required countersinking and then primed the brackets. We have decided on a minimal prime mindset: only where dissimilar metals meet, and the thicker alclad parts like brackets that get the edges worked over pretty good with the scotchbrite wheel.
LOVE the Numatx squeezer!

We failed on pages 36-09 and 36-10 to notice the use of universal vice countersunk rivets, even though they are “interior” brackets. Luckily a minor mistake that will only cost some quality time with our new rivet cutter to replace the AN426AD3-3.5 rivets we erroneously used. But a good lesson to read the instructions thoroughly and cross reference labels and parts twice.
All the nose ribs had a pucker on top that needed to be addressed. Quick work with some duckbill pliers and fluting pliers. We used the nose of the flap skin as a template to make sure the holes were in a straight line as we made the adjustments.


We introduced some puckers of our own while riveting the ribs to the spar. After a conversation with builder support, our fears of doing things wrong were put to rest, and we worked on some technique modifications to minimize the puckers as much as we could. We still needed to drill out a few rivets, but only one such replacement got goobered up so bad that we had to upsize the rivet to fill the hole.
Again we got to a stopping point awaiting back ordered parts, so the flap skeletons have joined their aileron brethren in storage.

On to wing part prep. Yay.
Once we established the location and orientation of the brackets, we did the required countersinking and then primed the brackets. We have decided on a minimal prime mindset: only where dissimilar metals meet, and the thicker alclad parts like brackets that get the edges worked over pretty good with the scotchbrite wheel.
LOVE the Numatx squeezer!
We failed on pages 36-09 and 36-10 to notice the use of universal vice countersunk rivets, even though they are “interior” brackets. Luckily a minor mistake that will only cost some quality time with our new rivet cutter to replace the AN426AD3-3.5 rivets we erroneously used. But a good lesson to read the instructions thoroughly and cross reference labels and parts twice.
All the nose ribs had a pucker on top that needed to be addressed. Quick work with some duckbill pliers and fluting pliers. We used the nose of the flap skin as a template to make sure the holes were in a straight line as we made the adjustments.
We introduced some puckers of our own while riveting the ribs to the spar. After a conversation with builder support, our fears of doing things wrong were put to rest, and we worked on some technique modifications to minimize the puckers as much as we could. We still needed to drill out a few rivets, but only one such replacement got goobered up so bad that we had to upsize the rivet to fill the hole.
Again we got to a stopping point awaiting back ordered parts, so the flap skeletons have joined their aileron brethren in storage.
On to wing part prep. Yay.
Wing parts prep went as expected: too long and too tedious. We then spent time in a totally different direction: deconstructing a home. We rewarded ourselves with a job well done on both fronts by moving on to building the mixer boxes.
We started Section 25, the Inboard Mixer Box, laying all the left and right wing parts out in mirror as that had served us well thus far. Again, a little lack of attention during inventory: it seems we ended up with two left aileron bellcrank ribs (green) and no right wing rib stiffener (red).

Rats! Another stopping point. But wait. It suddenly dawned on me that the extra rib we had provided the perfect piece of stock to make the missing stiffener, matched drilled holes and everything! The left hand stiffener provided the perfect template for the cut line.


Better lucky than good, as Dad always said.

Things went quite easily after that. It was so satisfying to finally be able to complete an entire section of the KAI's and put our signatures to paper. Feels like we are real builders now!
On to Section 23, the Outboard Mixer Box. This time we encountered a stock issue: the Revision 1 KAI's call for twelve total NAS1097AD3-3.5 rivets for the nut plates on both inner and outer mixer boxes, but only eight total are provided in the inventory. Our two engineering educated minds felt AN4263-3.5 rivets were a suitable substitute, but a quick call to builder support confirmed it just to be sure. We updated the Wiki.
Our minimalist priming plan does include nut plates that are wet primed when mounted. It dawned on me during this bit of construction that this can be accomplished on the nut plate side vice the aluminum side for a much cleaner look. A small piece of woven split loom provided the perfect handle, as well as protection for the threads in the nut plate.

Another section complete, another set of satisfying signatures. Off to storage with these.

Two crates of backordered parts are on the way (alas, no wing spars) and we hope to pick up the empennage kit this week, so more signatures soon, we hope.
We started Section 25, the Inboard Mixer Box, laying all the left and right wing parts out in mirror as that had served us well thus far. Again, a little lack of attention during inventory: it seems we ended up with two left aileron bellcrank ribs (green) and no right wing rib stiffener (red).
Rats! Another stopping point. But wait. It suddenly dawned on me that the extra rib we had provided the perfect piece of stock to make the missing stiffener, matched drilled holes and everything! The left hand stiffener provided the perfect template for the cut line.
Better lucky than good, as Dad always said.
Things went quite easily after that. It was so satisfying to finally be able to complete an entire section of the KAI's and put our signatures to paper. Feels like we are real builders now!
On to Section 23, the Outboard Mixer Box. This time we encountered a stock issue: the Revision 1 KAI's call for twelve total NAS1097AD3-3.5 rivets for the nut plates on both inner and outer mixer boxes, but only eight total are provided in the inventory. Our two engineering educated minds felt AN4263-3.5 rivets were a suitable substitute, but a quick call to builder support confirmed it just to be sure. We updated the Wiki.
Our minimalist priming plan does include nut plates that are wet primed when mounted. It dawned on me during this bit of construction that this can be accomplished on the nut plate side vice the aluminum side for a much cleaner look. A small piece of woven split loom provided the perfect handle, as well as protection for the threads in the nut plate.
Another section complete, another set of satisfying signatures. Off to storage with these.
Two crates of backordered parts are on the way (alas, no wing spars) and we hope to pick up the empennage kit this week, so more signatures soon, we hope.
Last edited:
With the arrival of two crates via freight, and a trip to Aurora to claim parts and tail kits, we are pretty sure we have all our back orders.

We decided to start small and finish the ailerons. The one backordered bracket was riveted to the skeleton and it was time to skin them. We took the simple route to dimple the leading edges, shipping crates are not only tables but tool supplies and supports!


With skins in place and two of us in the hangar, it became apparent it was time to break out the second rivet puller.

It is so very satisfying to get to the end of a day and end up with completed parts ready to be installed.

Flap completion next on the list.
We decided to start small and finish the ailerons. The one backordered bracket was riveted to the skeleton and it was time to skin them. We took the simple route to dimple the leading edges, shipping crates are not only tables but tool supplies and supports!
With skins in place and two of us in the hangar, it became apparent it was time to break out the second rivet puller.
It is so very satisfying to get to the end of a day and end up with completed parts ready to be installed.
Flap completion next on the list.
Last edited:
Oops, this build log has been neglected. Time to catch up.
Test fitting the flap leading edge revealed a couple places where nose rib flanges needed even more work, even after a significant amount of material had been removed. Turning the sides of the flange down with duckbill pliers helped tremendously.


Made a trip to the aviation aisle at Home Depot to get supplies to put the final bend into the flap trailing edges. Three dowels to maintain the radius and two 12 foot pieces of poplar to apply a uniform squeeze.


The skin did not lay down quite flat enough after the first squeeze which was apparent by the slight deformation around the last cleco. A check with the ruler confirmed it. A second more aggressive squeeze put things in order.


A second more aggressive squeeze put things in order. I had read that 35 grams of proseal was a proper amount for the mating surface between the two skins, but if you're messy like me 40 grams per flap is a better number.

Finally got to put the eBay bargain tool to work!

There were a couple of times that the pneumatic pull of the rivet did not feel quite right. Luckily it was on an end rib and it was very apparent what had happened. Using a hand puller the second time around with a little influencing from a pick made for a proper connection.


The first dropped container happened during a refill. Fortunately, because we used smaller containers and the parts were blind rivets, the carnage was kept to a minimum.

Flaps complete and in storage, onward to the empennage.

Test fitting the flap leading edge revealed a couple places where nose rib flanges needed even more work, even after a significant amount of material had been removed. Turning the sides of the flange down with duckbill pliers helped tremendously.
Made a trip to the aviation aisle at Home Depot to get supplies to put the final bend into the flap trailing edges. Three dowels to maintain the radius and two 12 foot pieces of poplar to apply a uniform squeeze.
The skin did not lay down quite flat enough after the first squeeze which was apparent by the slight deformation around the last cleco. A check with the ruler confirmed it. A second more aggressive squeeze put things in order.
A second more aggressive squeeze put things in order. I had read that 35 grams of proseal was a proper amount for the mating surface between the two skins, but if you're messy like me 40 grams per flap is a better number.
Finally got to put the eBay bargain tool to work!
There were a couple of times that the pneumatic pull of the rivet did not feel quite right. Luckily it was on an end rib and it was very apparent what had happened. Using a hand puller the second time around with a little influencing from a pick made for a proper connection.
The first dropped container happened during a refill. Fortunately, because we used smaller containers and the parts were blind rivets, the carnage was kept to a minimum.
Flaps complete and in storage, onward to the empennage.
