I’ll throw this in the General forum since it might be of interest to both Rocket and RV-4 builders….
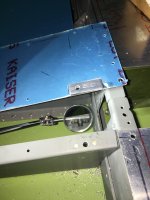
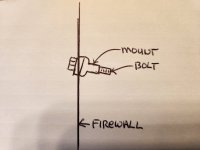
I matched-drilled the motor mount on our F1 Rocket project to the firewall today - a really easy fit with the four corners perfectly aligned to the pilot holes in the fuselage. Likewise, the two middle holes on the lower crossbar ended up right in the center of the structural pads built into the fuselage structure. Teh only issue to a perfect fit is that the slope of the firewall bump-out is not a perfect match to the engine mount bushings for the two center holes. I always expected to have to put a shim washer (or two) in there to take up and fitting tolerances - but the top of the 1.25” diameter “pad” on the mount is about 1/8” out from the firewall, while the bottom is more like 1/16”. Sure, I could crank down on the bolt and deform things a little - but that’s not the rut way to do it. What I need is a 3/8” (hole) washer with an OD of 1.25” and a taper int eh thickness. A little perusing of machinist sites didn’t have any clever ways to make one….so I’ll throw it out to the RV world - anyone got a neat trick for this? I am pretty sure I can “trial and error” a way to an answer - but I’ll take any ideas from someone who’s been there before….
(Note: The gap looks twice as wide as it actually is because of the firewall’s mirror shine….)