

Van's Air Force

The definitive Van's Aircraft support community! Buying, building or flying an RV? Join our exclusive family of mentors and enthusiasts!

Solid or Pop Rivets - 9A Elevator Spar

skelrad

Well Known Member
Friend
Working on the right elevator (9A) and the instructions say that the underside of the spar/skin can use pop rivets vs solid rivets. But they do mention that many (but not all) of the rivets can be solid if you have a long enough yoke to reach through the bearing cutouts in the skin. The decision has to be made ahead of time since the holes get drilled different sizes depending on which adventure you choose.

Is there any advantage to using some solid rivets where possible? It's all on the bottom of the elevator, so I'm not sure how often they'll be seen. Although really, it seems like if looks are the issue, a consistent row of pop rivets would look better than half and half anyway.

I lean towards just using the pop rivets, if for no reason than to limit the frustration factor anywhere I can. Any reason not to?
 
Some Solid, some pull rivets

In my elevators, I did a combo of solids near the bearing cutouts where I could reach with the squeezer, and the rest were pull rivets (I think the MK-319-BS ones).
 
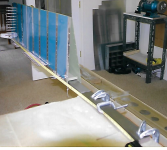
All solid rivets. I made myself a 'bucking bar' of 3/4" x 2" steel x 66" long with a custom shaped end with polished faces bolted on. This fit through the opening in the elevator. Taped the bar with duct tape to protect the inside of the elevator. Clamped one end of the bucking bar to the workbench. It was pretty easy to index the elevator to each subsequent rivet using the tail of the adjacent cleco. Worked excellent!
 
All solid rivets. I made myself a 'bucking bar' of 3/4" x 2" steel x 66" long with a custom shaped end with polished faces bolted on. This fit through the opening in the elevator. Taped the bar with duct tape to protect the inside of the elevator. Clamped one end of the bucking bar to the workbench. It was pretty easy to index the elevator to each subsequent rivet using the tail of the adjacent cleco. Worked excellent!
Hi Terry ,do you have any pictures of this ,how did you get round the horn , how did you check the rivit heads ?
Thanks john
 
The long bucking bar went in from the end opposite the elevator horn before the elevator counterweight rib was installed. The tape measure was used to index the head of the bucking bar so it was centered over the next rivet hole. I visually inspected as many rivet shop heads as I could, then did the rest by "feel" and sound.
1778706476557.png
 
The long bucking bar went in from the end opposite the elevator horn before the elevator counterweight rib was installed. The tape measure was used to index the head of the bucking bar so it was centered over the next rivet hole. I visually inspected as many rivet shop heads as I could, then did the rest by "feel" and sound.
View attachment 117501
looks like planning ahead is a good idea ,i rivited the tib ribs on all reddy
 
Back
Top