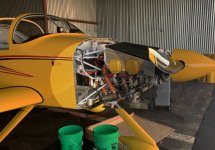
I'm mostly through the firewall forward stuff, except for the biggies (cowl, spinner, prop, airbox/snorkel), and the great thing about FF is you can kind of do things in whatever order you want, with a few exceptions. You're right, though, it's at this point most of the great "reference" build logs online get kind of vague and incomplete. Probably people are excited to be almost done and spend more time building than writing!
Vans FF documentation comes with what looks like a complete checklist, which is what I've been following. Here's what I did so far according to my build log, please don't rely on it--use Van's documentation obviously.
Prior to mounting the engine mount
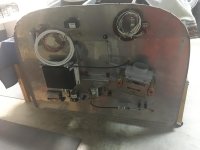
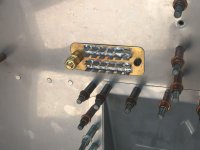
I made sure the firewall was entirely done before attaching the engine mount, including the holes for attaching the breather tube and oil pressure line, the battery + box + cables, the firewall-mounted solenoids, the firewall mounted sensor manifold (final-install the fittings before you bolt the manifold to the fw!), the cabin heat vent mechanism, and all the wire passthroughs. Like some others here, I went with the fiberfrax insulation under a thin sheet of titanium foil. That was done long ago.
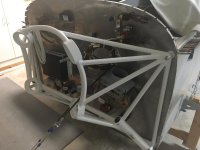
Then attached the engine mount.
Prior to mounting the engine
Once you have the engine, there are some things you need to do before mounting it: I had to re-clock the prop governor control arm in order for the push-pull cable orientation to make sense. I also pre-attached the cable bracket and rod end to the governor because it would be hopeless to try to do this once the engine was mounted. I needed to install the 45 degree restrictor fitting to the oil pressure port, as they say this can't be installed with the engine mounted. I needed to remove the right magneto to do this, some have managed to do it with the magneto in place. I attached the fittings onto the fuel pump inlet and outlets, capped the fuel return port (I don't need it). They also have you install the fittings that go to and from the oil cooler at this time. I found that Lycoming already included a fitting for the connection TO the cooler, and had to add a fitting for the FROM connection. I
wish I would have also final installed the oil cooler hoses at this time because they are a pain in the neck after the engine is mounted!
Then mounted the engine. Get a helper, preferably someone who did this before (thanks, wjb). And an engine hoist. And beer. It really wasn't hard at all.
After mounting the engine
From here, I did the following:
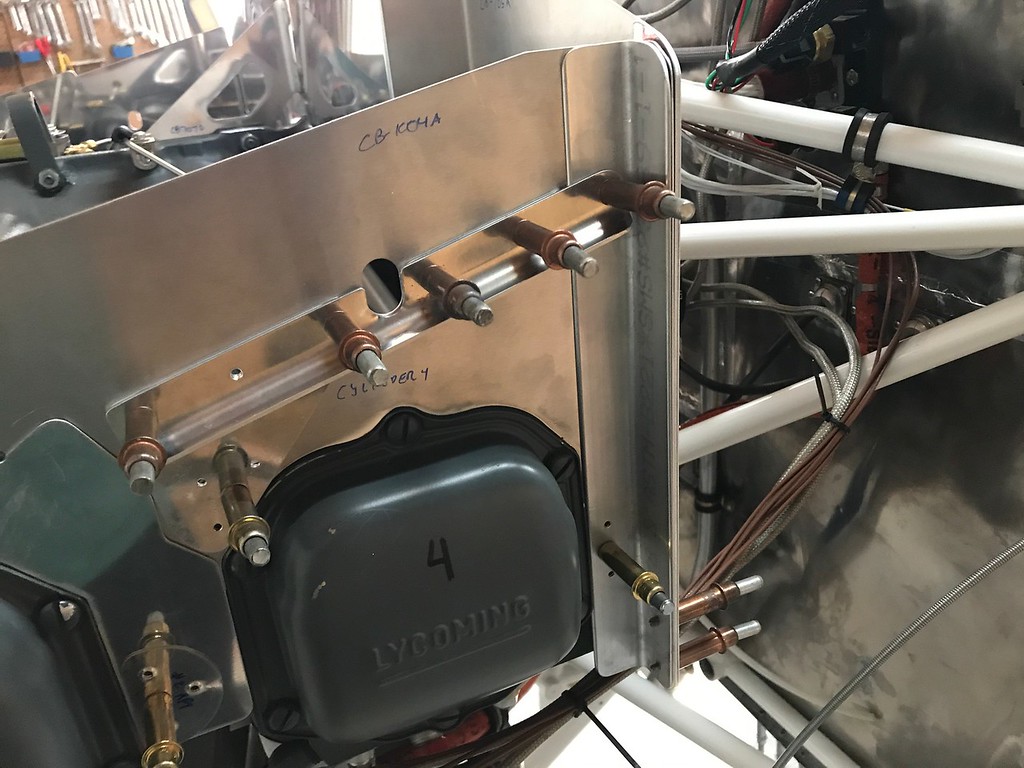
- Attached all the sensor hoses: fuel pressure, oil pressure, manifold pressure
- Attached the fuel lines from the firewall to the pump and from the pump to the servo
- Made and installed crank case breather line
- Installed the fuel overflow fitting and tube
- Installed oil temp probe
- Installed but did not final-tension the alternator
- Sealed up all the inter-cylinder baffles with Permatex ultra black. Do this before the exhaust is on
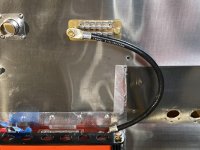
- Secured all my wire runs in the engine compartment
- Installed tach sensor to my right mag
- Made all the various doublers and angles for the baffles and filed the baffles to fit better around the cylinders. The baffle work is a little premature at this point--I'm going to want to fit the cowl before trimming them. I'll also need to have the baffles trimmed before cutting the hole for the oil cooler, so will have to wait for that too. If your oil cooler is baffle mounted, consider reinforcing it with an angle because according to VAF they all crack. Do some forum searches, you'll find the threads. Consider making the air dams removable. Same--forum search.
- Installed mixture and throttle cables
- Made the mixture and throttle linkages and installed the fuel servo/throttle body
- Hung exhaust
- Installed heat muff and ran fresh air tube from muff to firewall
- Made sniffer valve drain tube and installed sniffle valve
- Installed CHT and EGT probes
- Installed ignition wires (all wiring besides ground strap done at this point)
And that's where I'm standing right now. Still have a lot to go:
- Red cube flow transducer (see below)
- Cowl
- Spinner and prop
- Ground strap
- Air intake snorkel + alternate air door
- Plumb fresh air to heat muff
- Finish baffling
- Mount oil cooler
- Oil door and fill tube
- ...and probably more that I'm overlooking in this list.
I've got some un-annotated
pictures here. Not sure how helpful they'll be. I'm not much of an educator and don't feel I have the ability to write a good build log like the Usual Suspects out there on the web. This is also my first time through so the veterans here probably know all these steps colder than I do. The thing I have the most anxiety about is getting all the torques right--it seems like every fastener and fitting has a different torque call-out, and they're not all listed in the same document.
One thing you'll find: Every time you remove something from the engine, a whole bunch of preservative oil-goop will pour out. Have lots of rags around. I'll need to fully drain this at some point before putting the actual engine oil in. Still need to learn how I'm supposed to do that.
Last but not least: I've been doing this throughout the RV build, but it's doubly critical when working FF: Any step you skip, write it down so you remember to do it later. I have an entire "deferred steps" list in my build log where I keep these. For example, anything I leave hand-tight goes in the deferred steps list.
Looking forward to finally starting the engine one day! Might not be long... Hope this helped.
NOTE: For the red cube, I've decided to mount it up by the fuel divider, like some other folks here. Tom at TS Flightlines is patiently helping me get a solution in place that I'm happy with but I'm still measuring and getting exactly the right fittings and hardware I need for this. This device is one of the great under-documented parts of the build that everyone on VAF does differently, so your mileage will vary from everyone else.


")