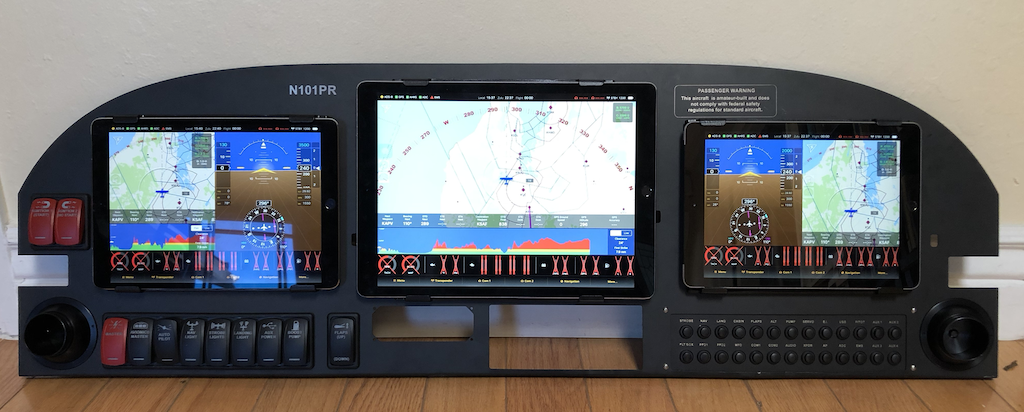
So back at the beginning of the year I posted a tentative panel design and got quite a bit of useful feedback from the VAF community. The design was (is) intended as a showcase of the iPad EFIS that I've been working on for the past three years. Here's what happened next...
Last month I finally got the EFIS hardware and software to the point that it was ready to move to the next stage of testing. For the past year I've been flying with the display for my EIFS (an iPad) on a RAM mount. It was my primary source of flight and nav data, but I still had the Dynon and steam gauges for backup. In almost 80 hours of flying, the numbers had matched up - airspeed sensor is working. Altimeter is working. GPS is working. The time had come to take it to the next level.
The next level can be summed up best by an old joke. If you're familiar with a bacon and egg sandwich, you know that it requires contributions from both a chicken and a pig. The saying goes that while the chicken is "involved" the pig is "committed." It was time to move from chicken to pig.
Getting to pig stage involved removing the panel. The Dynon SkyView - gone. The Garmin GNS-430 - outta there. The steam gauges - history. The switches came out. All of the wiring came out. In the end it was more-or-less tabula rasa. About the only survivors from the original panel were some Klixon breakers. In the end it was a pretty sad sight...
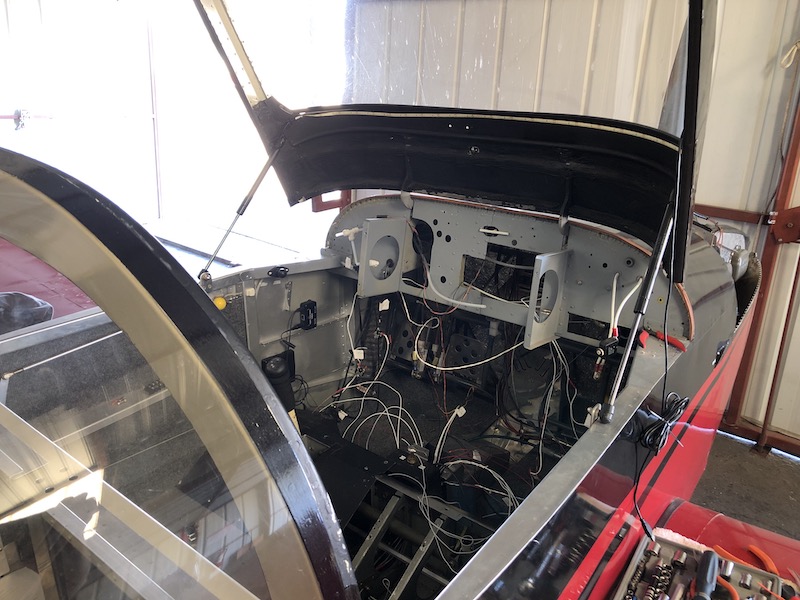
The next step was to rewire everything from the lights to the starter switch, to the autopilot. All told, the process took about 50 hours of work. Some of this was replacing wire (everything is now Tefzel). Some of this was the learning curve (you have to make space for things like antenna leads, power leads...). In the end, it was actually less painful than I thought. I ended up adding service loops and removable pigtails to make it easier to remove the panel. I also had to work around a sub-panel that had been chopped up to allow various legacy avionics to fit.
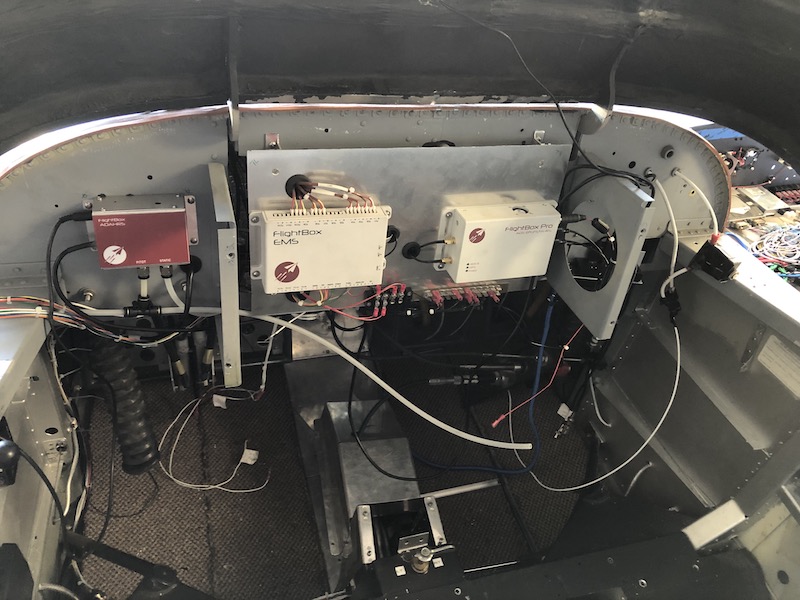
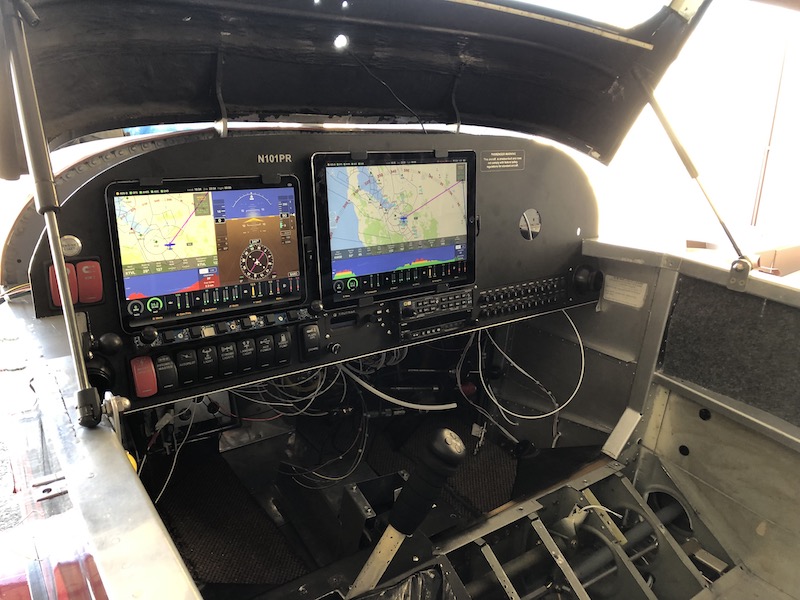
Once all the new stuff was installed, I mounted a few other bits - the VAL 2KR Comm radio, the Trig remote transponder (a survivor from the SkyView system). The PS Engineering PMA8000BTi audio panel and the Apollo / Garmin SL-40 COM both moved to the new panel. Once everything was mounted up, I installed the panel (for the first of about 10 times).
While I had the seats, floor, and pretty much everything else out, I installed a TruTrak Vizion autopilot. This replaced the Dynon autopilot, and fortunately Dynon used the same mounting structures as TruTrak, so the installation was relatively painless. The only challenge was building and running the harness, which took about five hours between pitch and roll. Running the pitch harness through the very limited space in the floor tunnel was probably the most challenging bit. (Many thanks to my friend Eugene for helping out with the harness and for holding the fan in place while I worked in the tail cone in 100? heat.)
When all was said and done, the new hardware was working. The autopilot passed its ground check. The engine monitor was showing rational cold values. The iPad chargers were charging and coolers were cooling. The next step as to haul it out of the hangar and see if the engine would start. Fortunately that turned out to be a non-event. The new mag switches and starter button worked. The new engine monitor showed what I expected to see. All was good.
I taxied around for ten or fifteen minutes and nothing exploded.
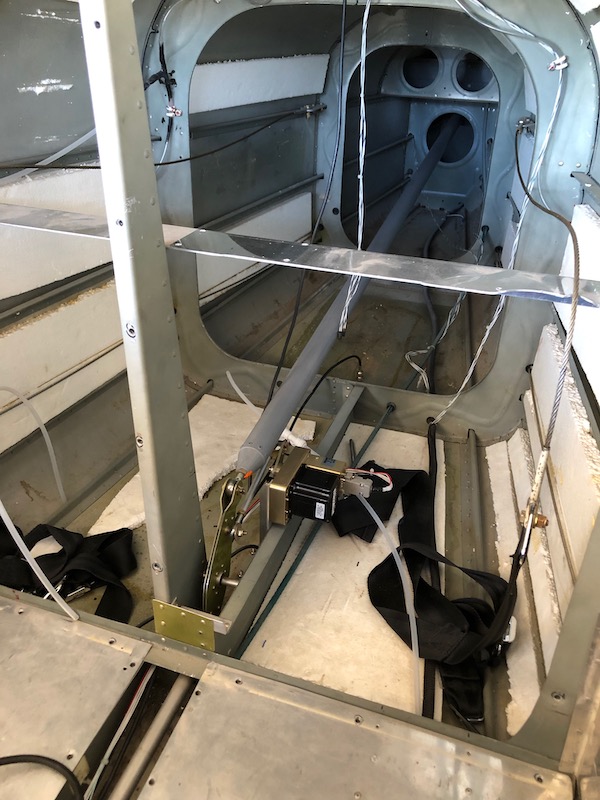
At that point the last step was to re-route the throttle and mixture cables. The builders had opted to install both on a vertical riser that ran from the top of the fuel pump shroud to the bottom of the panel. The riser also held the manual trim control. As you may be able to see in the picture above, I had separated the throttle and mixture section from the trim section. My A&P friend Robert did most of the work of moving the controls to a very nice 9" milled aluminum throttle bracket from SteinAir. (At some point I plan on replacing the manual trim control with electric trim but for now the manual wheel remains.)
The next day I ran the entire system through an extensive ground check. I re-tested the autopilot. I ran a basic pitot / static check (no leaks). Once I was sure it was about as good as it was going to get, I took it up for a brief test flight. In about forty minutes a was able to confirm that everything was working. Instruments were all in the expected ranges. Autopilot track and nav modes worked as advertised. Flight characteristics where not noticeably different. Here's a quick video showing the system in action:
https://www.youtube.com/watch?time_continue=1&v=Md6_hLj8YzU
Since then I've put another three hours on it, all nominal.
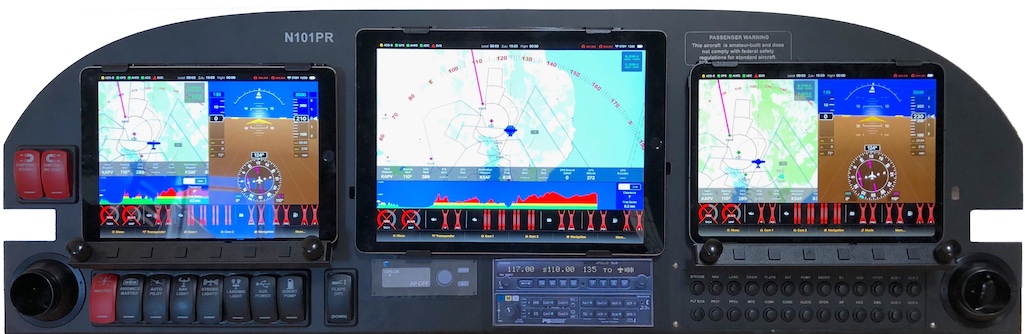
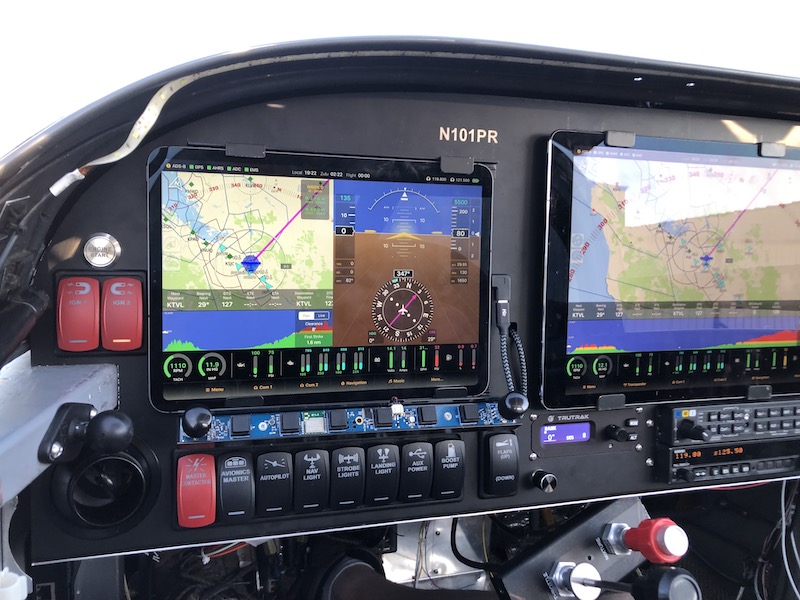
So in about 70 hours, over the course of two weeks, N101PR underwent a pretty dramatic transformation. All in all I'm happy with the results. The new panel does a great job of showing off FlightView (the new EFIS). The airplane is roughly 20 pounds lighter. The power draw is minimal. The new layout is more intuitive. The new autopilot is a bit smoother. The new air vents provide a much needed boost in ventilation. Best of all, it's a bit more "my" aircraft. Time well spent.
For those who are interested in the details on FlightView, I'll post something tomorrow. You can also check out the overview on my web site here.
Last month I finally got the EFIS hardware and software to the point that it was ready to move to the next stage of testing. For the past year I've been flying with the display for my EIFS (an iPad) on a RAM mount. It was my primary source of flight and nav data, but I still had the Dynon and steam gauges for backup. In almost 80 hours of flying, the numbers had matched up - airspeed sensor is working. Altimeter is working. GPS is working. The time had come to take it to the next level.
The next level can be summed up best by an old joke. If you're familiar with a bacon and egg sandwich, you know that it requires contributions from both a chicken and a pig. The saying goes that while the chicken is "involved" the pig is "committed." It was time to move from chicken to pig.
Getting to pig stage involved removing the panel. The Dynon SkyView - gone. The Garmin GNS-430 - outta there. The steam gauges - history. The switches came out. All of the wiring came out. In the end it was more-or-less tabula rasa. About the only survivors from the original panel were some Klixon breakers. In the end it was a pretty sad sight...
The next step was to rewire everything from the lights to the starter switch, to the autopilot. All told, the process took about 50 hours of work. Some of this was replacing wire (everything is now Tefzel). Some of this was the learning curve (you have to make space for things like antenna leads, power leads...). In the end, it was actually less painful than I thought. I ended up adding service loops and removable pigtails to make it easier to remove the panel. I also had to work around a sub-panel that had been chopped up to allow various legacy avionics to fit.
Once all the new stuff was installed, I mounted a few other bits - the VAL 2KR Comm radio, the Trig remote transponder (a survivor from the SkyView system). The PS Engineering PMA8000BTi audio panel and the Apollo / Garmin SL-40 COM both moved to the new panel. Once everything was mounted up, I installed the panel (for the first of about 10 times).
While I had the seats, floor, and pretty much everything else out, I installed a TruTrak Vizion autopilot. This replaced the Dynon autopilot, and fortunately Dynon used the same mounting structures as TruTrak, so the installation was relatively painless. The only challenge was building and running the harness, which took about five hours between pitch and roll. Running the pitch harness through the very limited space in the floor tunnel was probably the most challenging bit. (Many thanks to my friend Eugene for helping out with the harness and for holding the fan in place while I worked in the tail cone in 100? heat.)
When all was said and done, the new hardware was working. The autopilot passed its ground check. The engine monitor was showing rational cold values. The iPad chargers were charging and coolers were cooling. The next step as to haul it out of the hangar and see if the engine would start. Fortunately that turned out to be a non-event. The new mag switches and starter button worked. The new engine monitor showed what I expected to see. All was good.
I taxied around for ten or fifteen minutes and nothing exploded.
At that point the last step was to re-route the throttle and mixture cables. The builders had opted to install both on a vertical riser that ran from the top of the fuel pump shroud to the bottom of the panel. The riser also held the manual trim control. As you may be able to see in the picture above, I had separated the throttle and mixture section from the trim section. My A&P friend Robert did most of the work of moving the controls to a very nice 9" milled aluminum throttle bracket from SteinAir. (At some point I plan on replacing the manual trim control with electric trim but for now the manual wheel remains.)
The next day I ran the entire system through an extensive ground check. I re-tested the autopilot. I ran a basic pitot / static check (no leaks). Once I was sure it was about as good as it was going to get, I took it up for a brief test flight. In about forty minutes a was able to confirm that everything was working. Instruments were all in the expected ranges. Autopilot track and nav modes worked as advertised. Flight characteristics where not noticeably different. Here's a quick video showing the system in action:
https://www.youtube.com/watch?time_continue=1&v=Md6_hLj8YzU
Since then I've put another three hours on it, all nominal.
So in about 70 hours, over the course of two weeks, N101PR underwent a pretty dramatic transformation. All in all I'm happy with the results. The new panel does a great job of showing off FlightView (the new EFIS). The airplane is roughly 20 pounds lighter. The power draw is minimal. The new layout is more intuitive. The new autopilot is a bit smoother. The new air vents provide a much needed boost in ventilation. Best of all, it's a bit more "my" aircraft. Time well spent.
For those who are interested in the details on FlightView, I'll post something tomorrow. You can also check out the overview on my web site here.
") A couple questions:
A couple questions: