I have an occasional small drip leak at the fuel sample drain after sampling. I can push the plunger in three or four time and most times stop it. I had recently replaced the drains as I was having this issue before (I know I could have just replaced the o-rings, but decided to replace the whole drains) but I'm still having it. Is there a better way to address this and prevent this type of drip leak besides not sampling the fuel (which will eventually bite me, I know)?

Van's Air Force
You are using an out of date browser. It may not display this or other websites correctly.
You should upgrade or use an alternative browser.
You should upgrade or use an alternative browser.
Small drip leak at fuel sample drain
- Thread starter FlyingBanker
- Start date

Sam Buchanan
been here awhile
Sometimes giving the drain about a quarter twist will stop the drip. Most likely there is a tiny piece of something stuck to the o-ring or lodged on the o-ring seat, best remedy is to remove the drain and clean it.
AZSteve053
Active Member
Please do not discount the idea that you may have some particulate matter in the tank that is flowing out the drain... and keeping it from tightly sealing. Consider getting fuel level really low in that tank, remove the drain & flush tank - you may be surprised with what you find.I have an occasional small drip leak at the fuel sample drain after sampling. I can push the plunger in three or four time and most times stop it. I had recently replaced the drains as I was having this issue before (I know I could have just replaced the o-rings, but decided to replace the whole drains) but I'm still having it. Is there a better way to address this and prevent this type of drip leak besides not sampling the fuel (which will eventually bite me, I know)?
fixnflyguy
Well Known Member
What Sam said. I always spin mine while it is seated after the sample. I also have a spare one in my flyaway kit. They are cheap, but if the tiny o-ring fails, you better have a spare.
robertahegy
Moderator/Tech Counselor
I had quick build tanks that had a lot of metal particulate in them causing drain weep and cut o-rings. Always a good idea to flush tanks.
Buy some replacement fuel resistant o rings, the size you need are 006. Then replace the old drain sumps with the new o rings and swap out the leaky ones. Let about a quart or so of fuel drain out to carry out any sediment in the tank. Always keep the removed sumps as spares and just replace the 35 cent o rings! You actually can swap out the sumps even on full tanks and only spill a few drops, but it’s better to let it flow for a little bit
skylor
Well Known Member
Make sure that the drip is coming from the drain itself and not from a cracked mounting boss...I have an occasional small drip leak at the fuel sample drain after sampling. I can push the plunger in three or four time and most times stop it. I had recently replaced the drains as I was having this issue before (I know I could have just replaced the o-rings, but decided to replace the whole drains) but I'm still having it. Is there a better way to address this and prevent this type of drip leak besides not sampling the fuel (which will eventually bite me, I know)?
Skylor
cajunwings
Well Known Member
That little squirt of a fuel sample isn’t enough flow to move any contaminates that are not right at the drain valve. On my planes every 24 months I remove the quick drains and let 1-2 gallons of fuel flow into a clean bucket. Doesn’t hurt to get the wing you want to drain higher than normal. The ramp in front of my hangar has a slope so I position the plane sideways on this ramp. Standard fuel handling procedures apply. Fire extinguishers  ready for action. I made up some 25’ wires with alligator clamps for grounding when doing fuel tank work. Ground the plane to the bucket and the bucket to a ground point. Hardly ever see anything in the sample cup, but usually see a little water or grit in the 2 gallon sample. If you don’t have a spare quick drain buy 1 or 2 and re-ring the old ones to carry in your fly away kit.
Don Broussard
RV9 Rebuild in Progress (Getting there finally)
57 Pacer
ready for action. I made up some 25’ wires with alligator clamps for grounding when doing fuel tank work. Ground the plane to the bucket and the bucket to a ground point. Hardly ever see anything in the sample cup, but usually see a little water or grit in the 2 gallon sample. If you don’t have a spare quick drain buy 1 or 2 and re-ring the old ones to carry in your fly away kit. Don Broussard
RV9 Rebuild in Progress (Getting there finally)
57 Pacer
Yes the fuel drain o-ring is a maintenance items and needs to be replaced every few years. It is nice to have at least one extra if not an extra set so that it is a simple matter of just swapping out. Others have pointed out other maintenance that may need done at the same time depending on what one is comfortable with. I keep the stuff in my spare parts stock so am ready at any time. I use a small 1-1/4" finishing nail to hold the drain valve open to make changing o-ring easier.

PilotjohnS
Well Known Member
if you notice in Gary's picture above, the o-ring sits against the edge of the hole in the part. On two of mine, this edge had burrs and i could not get it to seal all the time, and it tore up o-rings. I bought two replacements from Vans and they do not have the burr. So when you change the o-rings, check for burrs.
Thanks for all the replies - will give these a shot.
MacCool
Well Known Member
I cleared out my tanks of any potential debris by removing all three valves and draining them into fuel containers through a fuel filtering funnel. I took that opportunity to replace all the valves (CAV-110), re-do an empty weight, and refilling the tanks two gallons at a time, again through the filter funnel, so I could re-calibrate the fuel senders.


rocketman1988
Well Known Member
Just a data point.
I was having issues with the CAV-110 valves on my -10. The tanks were flushed at least three times during the fuel quantity calibration, yet tiny particles of aluminum were still finding their way to the orings…and they were very, very small. They still caused a drip. I also found that rotating the valve stem worked sometimes but other times it made the drip worse as the particle damaged the o ring.
I eventually went to the flush sump drains. It turns out that the design is just a bit different, the I ring is ‘protected’, and the drain hole is about 1 mm higher. I haven’t had a drip since I changed them.
Roadjunkie1
Well Known Member
I fly with two quick drains in my tool bag: one for either wing and one for the gascolator. I have a small supply of "O" rings that are specific for the short drains. I just change them out every few years. The company that makes the other recommends just replacing the entire drain as people have a tendency to screw up the ring when replacing it.
Yeah: that pop rivet looks MUCH better than a........NAIL.........


Yeah: that pop rivet looks MUCH better than a........NAIL.........
scsmith
Well Known Member
flush sump drain? do tell...Just a data point.
I was having issues with the CAV-110 valves on my -10. The tanks were flushed at least three times during the fuel quantity calibration, yet tiny particles of aluminum were still finding their way to the orings…and they were very, very small. They still caused a drip. I also found that rotating the valve stem worked sometimes but other times it made the drip worse as the particle damaged the o ring.
I eventually went to the flush sump drains. It turns out that the design is just a bit different, the I ring is ‘protected’, and the drain hole is about 1 mm higher. I haven’t had a drip since I changed them.
Are you talking about the type that you use a wire peg to open to drain into the sampling cup? Well, I suppose the regular CAV-110 valves use a wire peg too, so that doesn't really clarify much. What do the flush sump drains look like?
Roadjunkie1
Well Known Member
Have a part number...?I eventually went to the flush sump drains. It turns out that the design is just a bit different, the I ring is ‘protected’, and the drain hole is about 1 mm higher. I haven’t had a drip since I changed them.
rocketman1988
Well Known Member
These:flush sump drain? do tell...
Are you talking about the type that you use a wire peg to open to drain into the sampling cup? Well, I suppose the regular CAV-110 valves use a wire peg too, so that doesn't really clarify much. What do the flush sump drains look like?
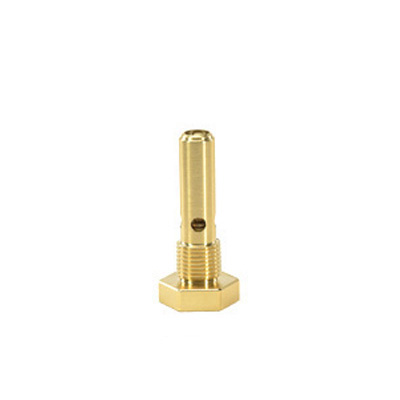
Saf-Air SA18 Drain Valve | Aircraft Spruce
Saf-Air SA18 Drain Valve SAF-AIR designed its line of flush mounted fuel drain valves to be an exact replacement for the Auto Valve F391 line of flush fuel drain valves. Unlike the Auto Valve, SAF AIR valves can be rebuilt. These valves off
rockyfatcat
Member
MS29513-006Have a part number...?

