I will be rebuilding my right master cylinder soon and want to be prepared for bleeding the system.
My RV4 has a bleed fitting at the high point in the line, located in the cheek cowl, aft of the firewall. Is this the normal location for a bleed valve (I always thought they were down on the caliper)?
With a bleed valve at the top, and the caliper undisturbed, will I be able to get all the air out by bleeding between that top valve and the master cylinder or do I still need to bleed at the caliper?
Thx!
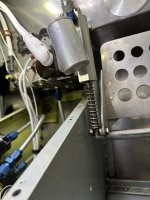
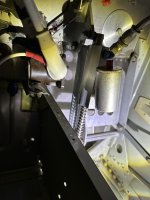
 That's inventive........not sure I've seen that before. Huh. There is a whole lot going on in that picture.....
 Back out and take a wider view of that area. Just curious as to what all IS going on there.........
 What is the reservoir attached to? Is that the starter solenoid next to it...?