

chrispratt
Well Known Member
After 16 years of trouble-free use, the brake master cylinders on my RV-8 needed an overhaul. For those of you who use the Grove brake master cylinders and are considering overhauling them, here’s a quick guide to what they look like inside and a few things to help prepare for the job. I hope this description and Tips will save you a little frustration for a job most of us will rarely need to do.
Before you start, order the overhaul kit, Grove part number 067-100, which consists of four O-Rings (Aircraft Spruce has these and I imagine others carry it as well). One kit per cylinder. You’ll need a snap-ring pliers for removal of the retaining ring on top of the cylinder. A dental pick or similar tool for removing the O-Rings. Have on hand a tube of Loctite 262 that you’ll need for reassembly (I couldn’t find the Loctite at the local hardware stores but found it on Amazon with a two-week lead time). And of course, whatever hydraulic fluid you use for the brakes. Plus, the usual tools, I found a punch came in handy, as did a pliers, and the usual tools you have on hand as an EAB builder.
Download the Master Cylinder and Maintenance guide from https://www.groveaircraft.com/.
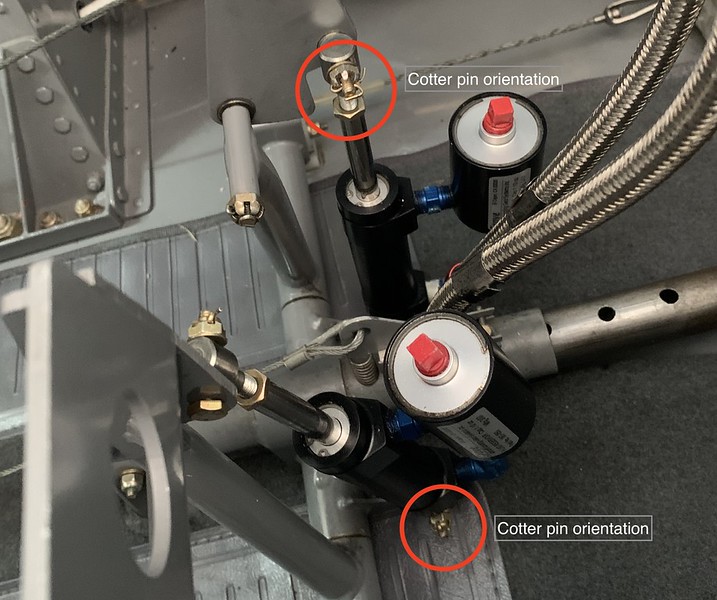
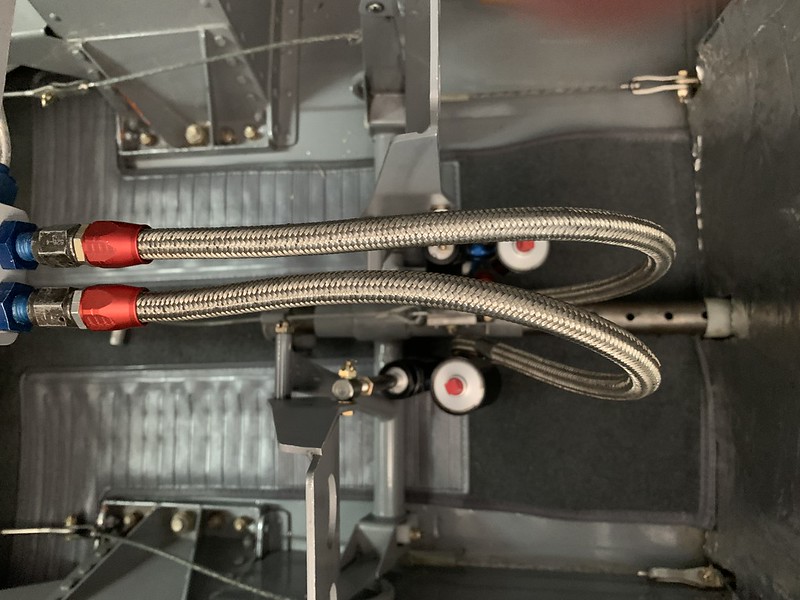
Removing the master cylinders was not nearly as bad as I thought it would be especially if you remove the forward baggage floor (itself a pain). From the baggage door you can easily reach the castle nuts and their cotter pins which is the only real challenge. Note their orientation for subsequent reinstallation.
TIP 1: When reinstalling, orient the left master cylinder castle nuts so they face you to make later removal and installation easier.
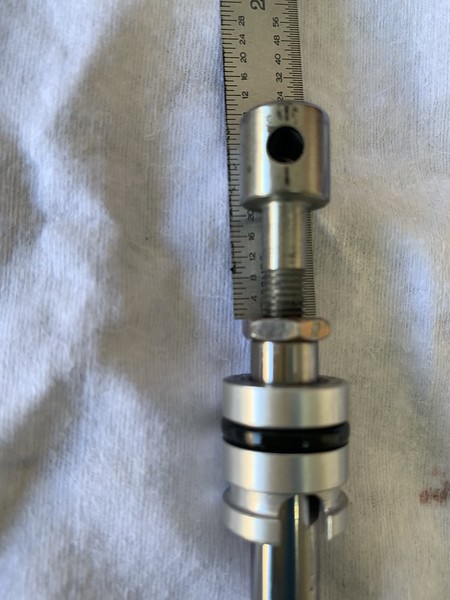
TIP 2: Make a note of the number of threads showing at the top of the master cylinder before disassembly so you can set this the same when you reassemble.
TIP 3: Note the orientation of the bolt hole at the top of the piston relative to the cylinder brake fluid ports so this will be the same on reassembly.

TIP 4: Wear safety glasses. You’ll thank me later.
Removing the ring seal requires three hands so it helps to have an assistant, at least for the five minutes this takes. Same is true on the reinstall. I found that a bench vice helps. Be sure to wear the safety glasses as residual hydraulic fluid may be lurking in the cylinder body.
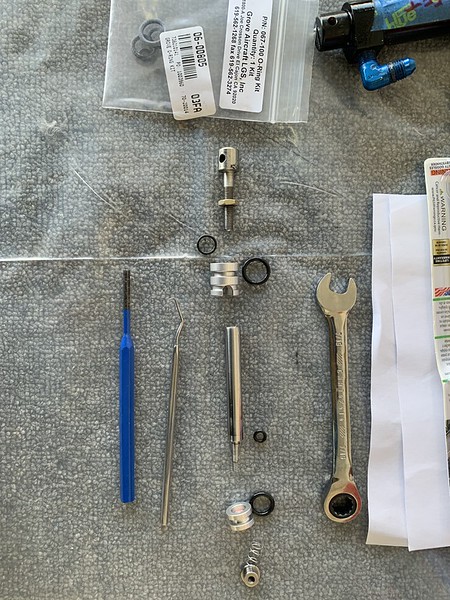
The photo below shows the disassembled unit removed from the cylinder. It’s actually beautiful – almost a work of art. You’ll easily see three of the four O-Rings needing removal plus there’s one hiding inside the rod support.
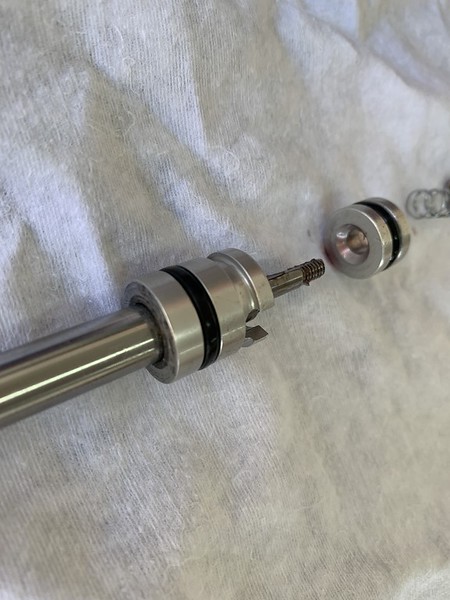
As you remove the spring guide at the bottom of the unit, note the orientation of the piston rod. On reassembly, the chamfered end needs to face the small O-Ring on the piston rod.
Use the dental pick to remove all the O-Rings, inspect the unit for corrosion, gouges, etc. If everything looks good, then clean it as instructed and install the new O-Rings. Reassemble per the instructions.
The rest is pretty straightforward other than the cursing that accompanies installing the cotter pins.
In my RV-8, perhaps in all RV’s, the brake lines are spaced very close together once assembled. Mine seemed to be rubbing together much more than I remembered when they were removed. This might take some experimentation. I finally found that swapping ends of one of the brake lines from top to bottom solved the problem.
Sorry for the lengthy description but as this is something you probably will seldom do, a little preview might help save you some of the frustration I ran into by not having all the items I needed right up front.
The end result was that my RV-8 brakes now hold better than ever, so it was all worth it.
Happy flying.
Chris
Before you start, order the overhaul kit, Grove part number 067-100, which consists of four O-Rings (Aircraft Spruce has these and I imagine others carry it as well). One kit per cylinder. You’ll need a snap-ring pliers for removal of the retaining ring on top of the cylinder. A dental pick or similar tool for removing the O-Rings. Have on hand a tube of Loctite 262 that you’ll need for reassembly (I couldn’t find the Loctite at the local hardware stores but found it on Amazon with a two-week lead time). And of course, whatever hydraulic fluid you use for the brakes. Plus, the usual tools, I found a punch came in handy, as did a pliers, and the usual tools you have on hand as an EAB builder.
Download the Master Cylinder and Maintenance guide from https://www.groveaircraft.com/.
Removing the master cylinders was not nearly as bad as I thought it would be especially if you remove the forward baggage floor (itself a pain). From the baggage door you can easily reach the castle nuts and their cotter pins which is the only real challenge. Note their orientation for subsequent reinstallation.
TIP 1: When reinstalling, orient the left master cylinder castle nuts so they face you to make later removal and installation easier.
TIP 2: Make a note of the number of threads showing at the top of the master cylinder before disassembly so you can set this the same when you reassemble.
TIP 3: Note the orientation of the bolt hole at the top of the piston relative to the cylinder brake fluid ports so this will be the same on reassembly.
TIP 4: Wear safety glasses. You’ll thank me later.
Removing the ring seal requires three hands so it helps to have an assistant, at least for the five minutes this takes. Same is true on the reinstall. I found that a bench vice helps. Be sure to wear the safety glasses as residual hydraulic fluid may be lurking in the cylinder body.
The photo below shows the disassembled unit removed from the cylinder. It’s actually beautiful – almost a work of art. You’ll easily see three of the four O-Rings needing removal plus there’s one hiding inside the rod support.
As you remove the spring guide at the bottom of the unit, note the orientation of the piston rod. On reassembly, the chamfered end needs to face the small O-Ring on the piston rod.
Use the dental pick to remove all the O-Rings, inspect the unit for corrosion, gouges, etc. If everything looks good, then clean it as instructed and install the new O-Rings. Reassemble per the instructions.
The rest is pretty straightforward other than the cursing that accompanies installing the cotter pins.
In my RV-8, perhaps in all RV’s, the brake lines are spaced very close together once assembled. Mine seemed to be rubbing together much more than I remembered when they were removed. This might take some experimentation. I finally found that swapping ends of one of the brake lines from top to bottom solved the problem.
Sorry for the lengthy description but as this is something you probably will seldom do, a little preview might help save you some of the frustration I ran into by not having all the items I needed right up front.
The end result was that my RV-8 brakes now hold better than ever, so it was all worth it.
Happy flying.
Chris

