

Draker
Well Known Member
For those of you Garmin VIRB owners like me who insist on hardwiring (non-Bluetooth) your camera audio/video/power to the airplane, you probably use Garmin's 010-11921-14 Audio-Video cable. Bad news! It's apparently no longer being manufactured, and if you need one, the secondary market has responded by jacking up the price: Here's one on eBay for $130!!!
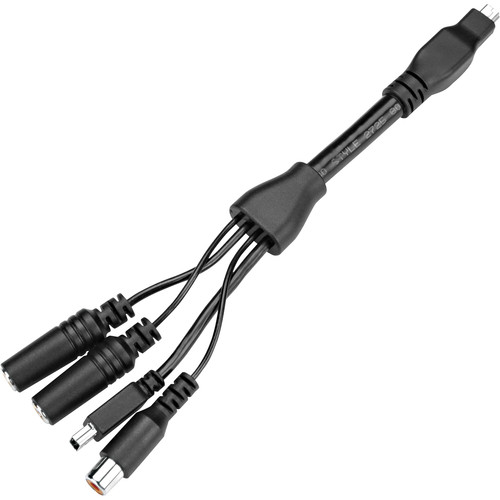
($130 for this? Are you kidding?)
You can DIY this cable!
First thing you need is the connector. It is a 10-pin USB Mini male plug, not a standard 5-pin USB Mini connector. The standard 5 pin cable will only transmit ship power and not audio or video! You need something like this:
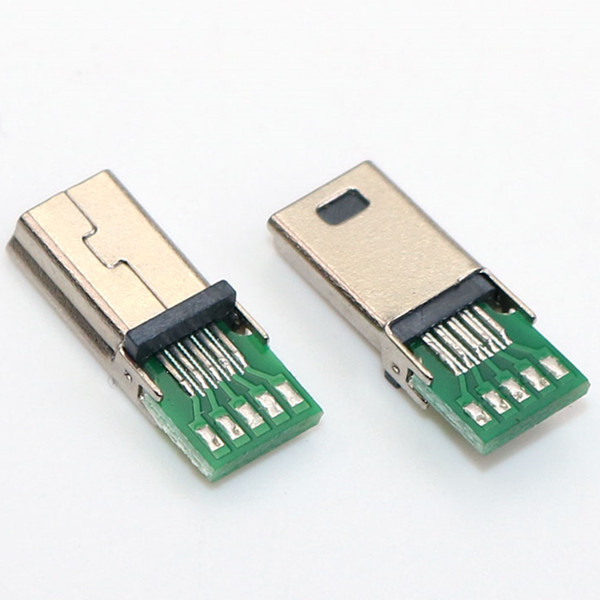
eBay link as of 2023
Or, if you want to be fancy, a ready-made cable like this might work (I didn't try this):
Here is the pinout:
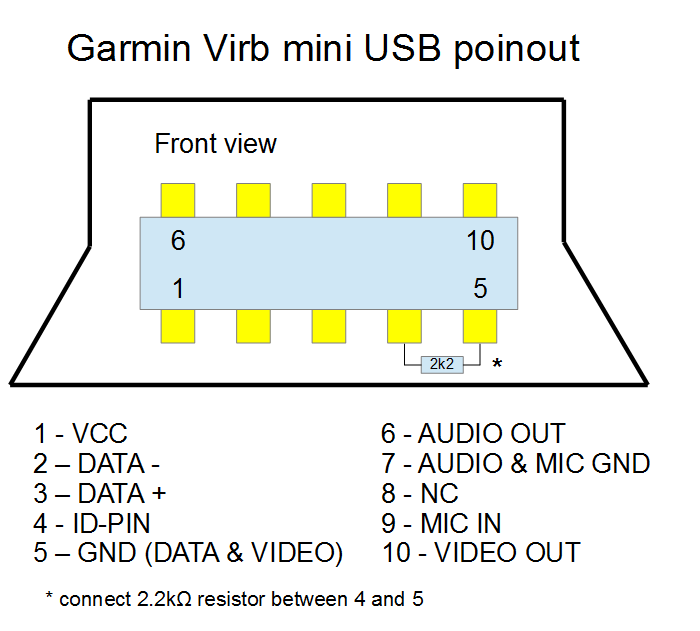
To replicate the Garmin cable, you need to connect the following pins (solder):
1- +5V from aircraft power (3A fuse should be fine)
4- 2,200Ω resistor connected to pin 5
5- Aircraft ground, Video ground, and other end of resistor
6- Audio out (mono)
7- Audio out ground and Audio in ground
8- Audio in ring (right)
9- Audio in tip (left)
10- Video out
You can also solder any wire shield to the connector's metal outer chassis. Not sure if this is strictly necessary.
TIPS
You can skip any input/output you don't want. I didn't need audio out so I just didn't attach it.
You will find the solder cups on the connector to be quite small, so tiny ~26g wire will be needed.
You will need to get clever about how you connect all three wires to pin 5. You'll want to separately connect them all to one wire and solder that wire by itself to the connector.
Once everything is soldered, verify your work with a multimeter before you plug in an actual camera!
Test it out, make sure all functions work as expected.
Finally, you might want to coat both sides of the soldered connectors with a glob of epoxy to provide some strain relief. Or even find a fancy backshell if that's your thing. Something to prevent motion because the solder joint is the only thing keeping the wires connected to the connector. At a bare minimum, protect it with heat shrink.
There you go. You just saved yourself over 100 bucks.
($130 for this? Are you kidding?)
You can DIY this cable!
First thing you need is the connector. It is a 10-pin USB Mini male plug, not a standard 5-pin USB Mini connector. The standard 5 pin cable will only transmit ship power and not audio or video! You need something like this:
eBay link as of 2023
Or, if you want to be fancy, a ready-made cable like this might work (I didn't try this):
Here is the pinout:
To replicate the Garmin cable, you need to connect the following pins (solder):
1- +5V from aircraft power (3A fuse should be fine)
4- 2,200Ω resistor connected to pin 5
5- Aircraft ground, Video ground, and other end of resistor
6- Audio out (mono)
7- Audio out ground and Audio in ground
8- Audio in ring (right)
9- Audio in tip (left)
10- Video out
You can also solder any wire shield to the connector's metal outer chassis. Not sure if this is strictly necessary.
TIPS
You can skip any input/output you don't want. I didn't need audio out so I just didn't attach it.
You will find the solder cups on the connector to be quite small, so tiny ~26g wire will be needed.
You will need to get clever about how you connect all three wires to pin 5. You'll want to separately connect them all to one wire and solder that wire by itself to the connector.
Once everything is soldered, verify your work with a multimeter before you plug in an actual camera!
Test it out, make sure all functions work as expected.
Finally, you might want to coat both sides of the soldered connectors with a glob of epoxy to provide some strain relief. Or even find a fancy backshell if that's your thing. Something to prevent motion because the solder joint is the only thing keeping the wires connected to the connector. At a bare minimum, protect it with heat shrink.
There you go. You just saved yourself over 100 bucks.
 I've worked in the wireless industry for too long and I think the more you know about the innards of Wi-Fi and BT stacks, the less you want to rely on them for anything.
