What's new
Van's Air Force

Don't miss anything! Register now for full access to the definitive RV support community.

Repainting Assembled Aircraft..

Tram

Well Known Member
So, probably the hardest part of buying an experimental is finding one that was painted "like you would have done it."

I have a good friend that paints high end motor homes for a living. He has been toying with getting into aircraft painting and offered to repaint one if I find one that needs it for the cost of materials.

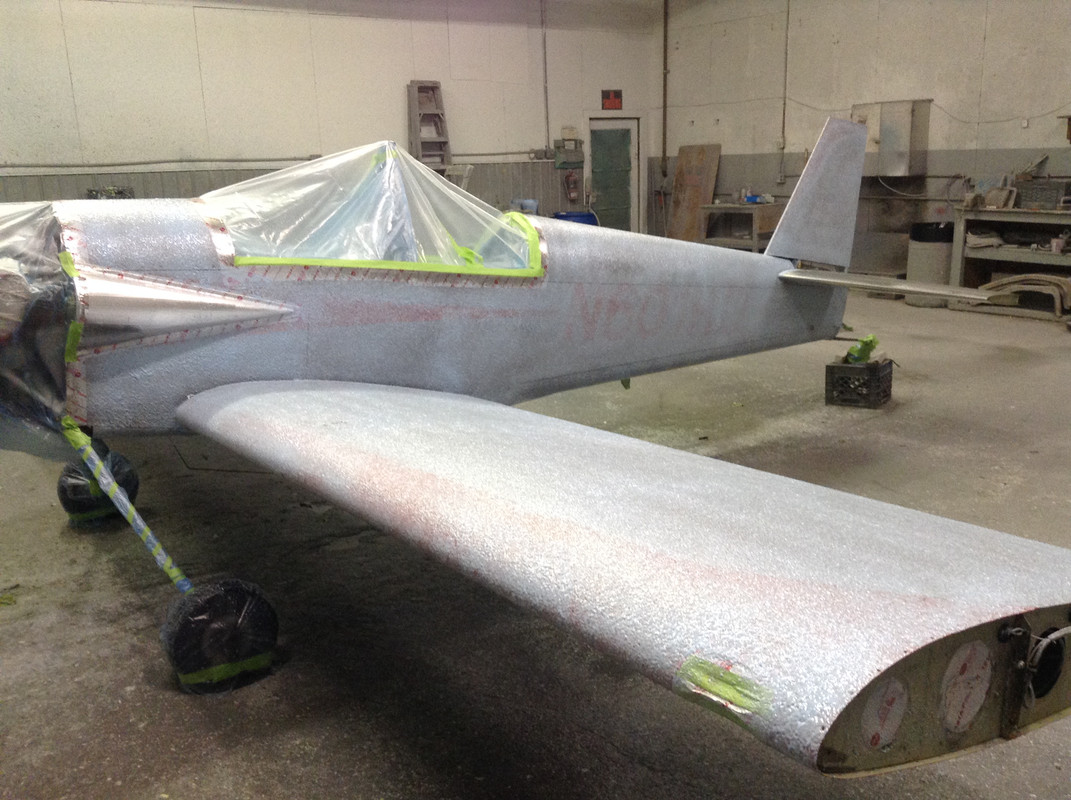
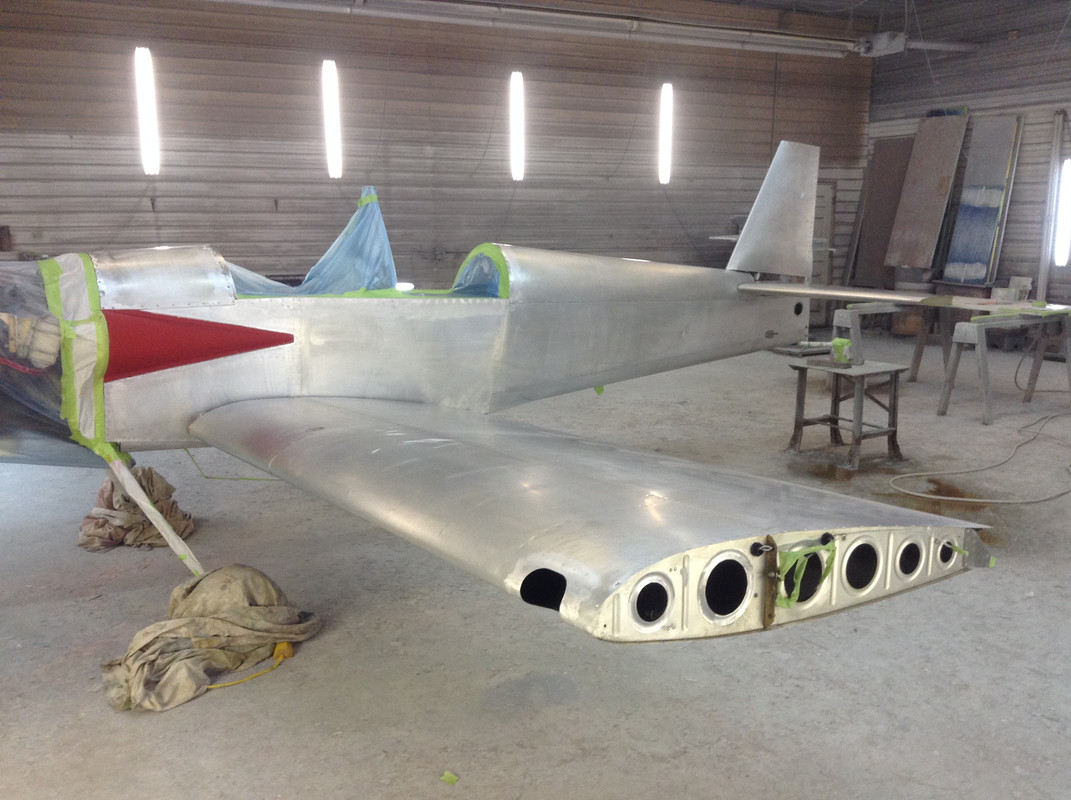
That said.. stripping it has to be a nightmare..

I think another question would be, for those of you who have done it - could it be done without a complete disassembly of the wings, etc.

Obviously control surfaces would need to be removed..

Just kinda thinking out loud and thought I'd get some thoughts from someone who has been down this road ahead of me.
 
I would say that 95%+ of RVs are painted in an 'assembled' state, as you mention. Very few are painted in sub-components before final assembly. Remove control surfaces, fairings, fiberglass components, etc yes - but no need to remove wings/tail for individual painting assuming the properly sized space.
 
I would say that 95%+ of RVs are painted in an 'assembled' state, as you mention. Very few are painted in sub-components before final assembly.

You're probably right. Wonder if it would be feasible to strip and repaint in that method.
 
I don't see why not. There are a few places that would be difficult, like the side of the fuselage in the narrow gap between the wing and fuselage. But no one will ever see in there, so perfection is not needed in there.

It would be important to protect bolted joints and wiring from the paint stripper, but that is also not difficult.

The most unpleasant aspect would be stripping the undersides of the wings and the underside of the fuselage.

They have pretty good strippers nowadays that are pretty environmentally friendly (meaning friendly to your lungs and skin). There is a water-based one that I bought at Home Depot that worked very well. Slather it on, cover it with Saran Wrap to keep it moist, leave it overnight, and the next day, the paint pretty much just wipes off.

Don't use paint stripper on fiberglass parts. You have to sand the paint off of those. Or, for high-temperature fiberglass parts, like the cowl, you can use a heat gun (carefully!) to soften/lift the paint and peel it off with a putty knife.

But you know, it is really not that difficult to remove the wings from an RV-7,8,9,10,12,14. The most difficult wings to remove are on the RV-6, because there are about 76 bolts that have to be removed. Also most likely a couple of bundles of electrical stuff passing through the spars.
 
Last edited:
One of the challenges of painting an airplane that is not common to most other jobs is spraying the underside of the wings and fuselage. The sprayer nozzle is much closer to the work than for the other parts, and the nozzle has to point up while the paint reservoir is vertical.
I had the deck in front of the windscreen repainted in my hangar a few years ago, and it was a big pain. I assume repainting your plane would be done in a proper facility -- to which your aircraft could be moved without disassembly.
 
I don't see why not. There are a few places that would be difficult, like the side of the fuselage in the narrow gap between the wing and fuselage. But no one will ever see in there, so perfection is not needed in there.

It would be important to protect bolted joints and wiring from the paint stripper, but that is also not difficult.

The most unpleasant aspect would be stripping the undersides of the wings and the underside of the fuselage.

They have pretty good strippers nowadays that are pretty environmentally friendly (meaning friendly to your lungs and skin). There is a water-based one that I bought at Home Depot that worked very well. Slather it on, cover it with Saran Wrap to keep it moist, leave it overnight, and the next day, the paint pretty much just wipes off.

Don't use paint stripper on fiberglass parts. You have to sand the paint off of those. Or, for high-temperature fiberglass parts, like the cowl, you can use a heat gun (carefully!) to soften/lift the paint and peel it off with a putty knife.

But you know, it is really not that difficult to remove the wings from an RV-7,8,9,10,12,14. The most difficult wings to remove are on the RV-6, because there are about 76 bolts that have to be removed. Also most likely a couple of bundles of electrical stuff passing through the spars.

Thanks. I'm giving it serious thought.
 
good timing on this post as I am hoping to repaint my RV4 in fairly near future. the paint is original from 93 with plenty of hangar rash and I have been doing some major cowl mods so that will need a repaint. I've been watching lots of videos on how to spray upside down and thinking a couple good wing jacks and secure tail stand would help get it in a much better position for painting
 
good timing on this post as I am hoping to repaint my RV4 in fairly near future. the paint is original from 93 with plenty of hangar rash and I have been doing some major cowl mods so that will need a repaint. I've been watching lots of videos on how to spray upside down and thinking a couple good wing jacks and secure tail stand would help get it in a much better position for painting

Pull the prop, chock the airplane securely, and lift the tail. Use a stand to hold the tail wheel up, but tie something very heavy to the tail spring to make sure it doesn’t tip over forward. As you lift the tail, it will be apparent as you approach the balance point.
 
No need to remove the wings. Mine is in the paint shop now, and I removed all the control surfaces, cowl, canopy, fairings, etc. Make sure they (or you) mask off things you don’t want paint on, like bearings, rudder cables, the gap between the wings and fuselage. Mine is being painted by an experienced shop, but I think this might be the first RV they’ve done. They weren’t aware of all the fiberglass parts - they are many. My belly and wing bottoms turned out nice with the tail elevated.

EE2445D9-0610-4C3D-A664-5A67BECBB271.jpg

642DE3E6-D131-4B3D-A38C-D00D0DB8EBFB.jpg

Colors go on this week - red on the bottom half with two different gray colored stripes.

There were two other airplanes in the shop with mine getting painted. A 172, and an older Piper Comanche. They both had to be stripped first. The 172 took 2-3 days before ready for etch/alodine, and seemed fairly easy. Paint came off as expected. The 60’s vintage Comanche was a different story. They’ve tried every costic nasty stuff invented (and still approved) to remove the old paint and there’s still about 25% of it still clinging on.

Stripping adds to the incredible amount of work required to paint an airplane. Most of the certified airplanes (Cessnas) don’t have as much fiberglass as we do. Removing the paint from those parts with their compound shapes will add an extra layer of work that will make you appreciate a really nice paint job. I spent a lot of time trying to make my fiberglass look perfect, but until you start spraying primer or paint, you don’t realize what you have. Even after I sprayed primer on my gear leg fairings, which looked great at that point, after spraying the top coat, about a million pinholes popped out. They had to be re-sanded and then filled, primed/painted again. If you strip and paint yours yourself, expect to spend north of $6,000. for paint and materials. That’s what a painter-friend of mine did recently on a used RV8. It looks absolutely beautiful now, but it took a huge amount of work and lots of time.
 
The best way to strip the airplane is with it complete. The only things that I would remove prior to stripping are the wheel pants and gear leg fairings. Make sure to mask up anything you don’t want stripper on or in. Mask the canopy triple extra good. For masking I use 3M foil tape, regular masking tape, 4 mil plastic sheeting, and heavy duty aluminum foil.
 
My -4 was stripped a couple of weeks ago in preparation for new paint. Only the control surfaces, cowling, etc. were removed. Here are some photos.

Control Surfaces:
IMG-3875.jpg


The assembled aircraft:
IMG-3897.jpg


Almost ready for primer:
IMG-4036.jpg
 
Holy ****. I thought those were pictures of the carpet padding on some saw horses. Wow. I bet you freaked out when you saw that!
 
The best way to strip the airplane is with it complete. The only things that I would remove prior to stripping are the wheel pants and gear leg fairings. Make sure to mask up anything you don’t want stripper on or in. Mask the canopy triple extra good. For masking I use 3M foil tape, regular masking tape, 4 mil plastic sheeting, and heavy duty aluminum foil.

Why would you NOT remove the wing-body fairing and the empennage fairing?
 
After being in the Industrial paint removal and metal cleaning business for 34 years; I'd say you did great! What was the paint system being removed, what kind of stripper was used and how was it applied?
 
My -4 was stripped a couple of weeks ago in preparation for new paint. Only the control surfaces, cowling, etc. were removed. Here are some photos.

I did not duplicate the photos, but WOW that is beautiful crinkle!!!! You have to be happy with the result. It makes my lungs burn just looking at it. Oh - I forgot my organics respirator. :D

What stripper product did this??

edit: Oops I see Boyd already asked the right questions.
 
Last edited:
I can’t take any credit for this work. I brought my plane to a paint shop, wrote a check and get periodic photos showing progress. At this point, the plane has been stripped, alodined, primed, and the first topcoat color started.
 
My painter is old school, but I used Pre-Kote late in the build on parts I primed in my shop. It seems to have held up well over the past 20+ years. When I built a new HS and elevators last year, I used Pre-Kote to prep the inside surfaces of the skins before priming. Only time will tell, but so far so good.
 
When Meta-Flex (PreKote) came out I was a little hesitant. After a few test sprays I was a believer. After talking to a tech rep, he told me the one drawback to it is that it does not strip off. That’s ok by me. I hope that I’m retired when those airplanes come back around for another paint job.
 
Back
Top