gmcjetpilot

Well Known Member
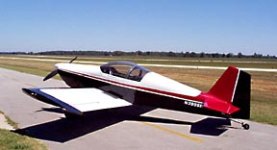
I am doing one solid color. I will paint the plane myself. I was all set on single stage. I am now reconsidering.

With base clear you have move chance to correct mistakes and should have a bit more long lived. Although modern single stage epoxy urethans have anti UV in it. Remember old cars pre clear that got oxidized.

Single stage epoxy urethane is nice. My first RV I had "pro" painted with Jet Glo. It looked greet 20 yrs later when I sold it. I do remember the two trim color strips had an edge you could feel with hand. Not visible unless looking at it close, but could feel it. Base clear you can clear over trim and make it look nicer. I think if I were to go fancy graphics base clear would be better. Since I am not....

If you have good prep, good equipment, technique both will look fine. The single stage takes longer to flash off and may be more subject to get contaminated while wet. I will do my best DIY spray both. Still base coat clear might have an advantage. The down side is more coats (and weight) for base/clear.
Base / Clear observations:
The base coat is very thin. Color is the governing criteria. Weight is probably a wash with single stage.
Clear coats can be near perfect out of the gun like Porche paint. But—-
Temperature,solvent type, solvent percent, pressure, gun setup WILL ALTER THE OUTCOME. Careful discipline is important.
Yes, cut and buff is a bailout, BUT—-
You will probably add more paint weight to get the finish better or add insurance for cut and buff process.
IF you cut through clear into base, you have choice, patched up results or start over 😒
Timing between base and clear is a specification to manage. You see a lot of peeled clear coat on repaired cars. Body shops say it is cheap paint, paint supplier claims poor technique.
Trim stripe tape edge- You are not painting a street rod or show bike. Think this through ! Weight ? Time between base to clear ? Sand the older color and clear both with your stripe ? If I sand the base edge too much on the stripe before clear, what next, patch it ? start over ? If you just clear the stripe you still get a tape edge like single stage.
Lastly, base clear is the only way to go for metallics to avoid Tiger Striping ( flow lines ). Your experience and discipline will show in the uniformity of color, reflectivity etc. consistent distance from surface, speed of movement, actual pressure at the gun, full trigger pull and pass BEYOND the end of the part all affect the look . Blowing into cavities , brackets etch change the color and a light fog ( think weight / orange peel) is warranted.
 
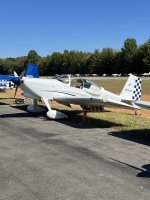
Same approach, single color (white). I used the PPG single stage paint process and the cut and buff process described in DanH's sticky, made my amateur paint job look reasonable. I then used vinyl for the striping etc. Still looking good after 14 years and I can touch up the paint with an aerosol can. Paint available at local auto paint supply store so easy access.IMG_4658.JPG
 
Single stage for benefit of follow up tweaks years from now. Have repainted cowl, wheel pants, leg fairings, spinner, Wing tips new windscreen etc since 1992 original. Not as simple a process with clear.

1715786158457.jpeg
 
Last edited:
If metallic no question base coat, clear coat. If not and it will be in a hangar the simplicity of single stage is great. A car I painted 30 years ago Acrylic Enamel still looks awesome today.
 
I painted my RV-6 with PPG Concept single stage 25 years ago. After the one or two times a year I hit it with spray-n-wipe detailer it still looks freshly painted. There is no telling how many decades a hangared single stage paint job will continue to look nice. The key to paint longevity is to not store the aircraft outside.


399SB-6.jpg
 
Single stage is best IMHO. A lot easier to fix something in the future if needed. If you have your heart set on base/clear then I recommend either Sherwin Williams Sky Scapes or AkzoNobel 4400.
 
Curious your thoughts on the SkyScapes as a base clear system? At our shop we’ve always used Jetglo and AcryGlo conventional with the occasional auto base/clear for certain projects. Curious how SkyScapes compares.
Appreciated, Chris
 
I am doing one solid color. I will paint the plane myself. I was all set on single stage. I am now reconsidering.

With base clear you have move chance to correct mistakes and should have a bit more long lived. Although modern single stage epoxy urethans have anti UV in it. Remember old cars pre clear that got oxidized.

Single stage epoxy urethane is nice. My first RV I had "pro" painted with Jet Glo. It looked greet 20 yrs later when I sold it. I do remember the two trim color strips had an edge you could feel with hand. Not visible unless looking at it close, but could feel it. Base clear you can clear over trim and make it look nicer. I think if I were to go fancy graphics base clear would be better. Since I am not....

If you have good prep, good equipment, technique both will look fine. The single stage takes longer to flash off and may be more subject to get contaminated while wet. I will do my best DIY spray both. Still base coat clear might have an advantage. The down side is more coats (and weight) for base/clear.
What color are you planning?
 
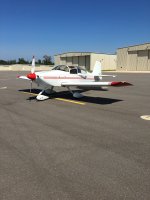
Solid Red.


THANKS EVEREYONE...My concern was fixing and touching up with single stage. Your input really helps. Going forward w/ single stage. Why? $20,000, paint quotes.
Red is a perfect solid one color on an RV imo. Keep in mind single stage red can vary in coverage depending on the shade. A tack/first coat in light gray really helps and can reduce excessive costs of red chasing good coverage.
 
I would also suggest reading DanH's sticky on painting with urethane and the cut and buff process, an extra coat of paint over the rivet areas helps prevent you cutting through the paint.
 
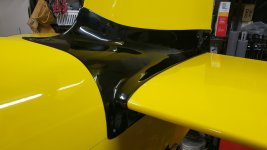
Fiberglass parts are all single stage. Kirker EnduroPrime & UltraGlo
Aluminim (yellow) is vinyl wrap. I plan to remove and re-wrap a different color when it ages. 5-7 years. That's why I chose black for the fiberglass.
 

Attachments

  • 20240210_153551.jpg
    20240210_153551.jpg
    2 MB · Views: 20
I don't mean to hijack this thread. But how do I determine what kind of paint is on my aircraft?

I have a RV project that didn't get a fantastic paint job way back when. It has a red/white paint job that looks ok from 20 feet away.

I can't see stripping it all off and starting from zero. But I must do some fiberglass repairs to the cowling and I'll repaint it when I'm done. So I'm thinking about sectioning it out, taping it off, and freshening up some of the other sections.

I'm not shooting for grand champion, but would like it to look nicer in case I decide to sell it later.
 
Curious your thoughts on the SkyScapes as a base clear system? At our shop we’ve always used Jetglo and AcryGlo conventional with the occasional auto base/clear for certain projects. Curious how SkyScapes compares.
Appreciated, Chris
It’s a good system. Metallics are easier and the clear is a lot nicer than AcryGlo.
 
I don't mean to hijack this thread. But how do I determine what kind of paint is on my aircraft?

I have a RV project that didn't get a fantastic paint job way back when. It has a red/white paint job that looks ok from 20 feet away.

I can't see stripping it all off and starting from zero. But I must do some fiberglass repairs to the cowling and I'll repaint it when I'm done. So I'm thinking about sectioning it out, taping it off, and freshening up some of the other sections.

I'm not shooting for grand champion, but would like it to look nicer in case I decide to sell it later.
OP here, so all the paint stuff applies to you. Your question is how to tell what is on it now? Get an expert to look at it. The old days of enamel and lacquer compatibility not likely. There is water base and VOC paint. Who knows. Is it peeling off? Is it dull? Is it orange peal. Is it just the color scheme not your cup of tea?

Without seeing it you can make it look better waxing, buffing and more waxing? No way to tell online what you have especially w/ pictures. New paint you have two ways.

Your next question to strip old finish and how, or seal. Best to strip it down to bare metal and fiberglass. That would be a good thread to start, how to strip paint off.

In my past recollection of aircraft paint shops from two decades ago stripper (chemicals) on metal. Not sure if EPA allowes still or what they do in 2024. You sand finish off fiberglass parts typically. Fiberglass you don't want to cut into the plies, so knock it down, scuff and clean like crazy and spray SEALER. Basically sealer is a primer, a mid substrate that adheres to old paint/primer and is compatible with your new top coat. It's a lot of work, but done right gets good results. Primer and paint adds weight. A paint job SWAG I recall is 30lbs. If adding onto existing it will be more.

The quick and dirty and heavy way is sand the whole airframe down and spray a compatible sealer on, prime and paint. How do you know if sealer is compatible? Test it. Talk to the manufacturer of products.

A Pro paint job is $20k with bare plane, no stripping. Stripping will be much much more. EPA, hazards mat disposal, time and materials...

Do you really need new paint or just want new paint? Even if you do it yourself, it's going to be many $1000's and 300 hours? You may end up with similar results as original. Consider vinyl wrap (about weight of paint). If you are doing it for resale only might not be worth it. You may get more but much more? New buyer may not like your new paint color choices and want to redo it anyway. Depending on the plane engine, prop, instruments *glass*, fit, upholstery, you might not get much more. Just fly it. Paint will not make it fly better.

If you have 4 grand and 400 hours you might get that show quality. Than again it's DIY your results will very.
 
Last edited:
OP here, so all the paint stuff applies to you. Your question is how to tell what is on it now? Get an expert to look at it. The old days of enamel and lacquer compatibility not likely. There is water base and VOC paint. Who knows. Is it peeling off? Is it dull? Is it orange peal. Is it just the color scheme not your cup of tea?

Without seeing it you can make it look better waxing, buffing and more waxing? No way to tell online what you have especially w/ pictures. New paint you have two ways.

Your next question to strip old finish and how, or seal. Best to strip it down to bare metal and fiberglass. That would be a good thread to start, how to strip paint off.

In my past recollection of aircraft paint shops from two decades ago stripper (chemicals) on metal. Not sure if EPA allowes still or what they do in 2024. You sand finish off fiberglass parts typically. Fiberglass you don't want to cut into the plies, so knock it down, scuff and clean like crazy and spray SEALER. Basically sealer is a primer, a mid substrate that adheres to old paint/primer and is compatible with your new top coat. It's a lot of work, but done right gets good results. Primer and paint adds weight. A paint job SWAG I recall is 30lbs. If adding onto existing it will be more.

The quick and dirty and heavy way is sand the whole airframe down and spray a compatible sealer on, prime and paint. How do you know if sealer is compatible? Test it. Talk to the manufacturer of products.

A Pro paint job is $20k with bare plane, no stripping. Stripping will be much much more. EPA, hazards mat disposal, time and materials...

Do you really need new paint or just want new paint? Even if you do it yourself, it's going to be many $1000's and 300 hours? You may end up with similar results as original. Consider vinyl wrap (about weight of paint). If you are doing it for resale only might not be worth it. You may get more but much more? New buyer may not like your new paint color choices and want to redo it anyway. Depending on the plane engine, prop, instruments *glass*, fit, upholstery, you might not get much more. Just fly it. Paint will not make it fly better.

If you have 4 grand and 400 hours you might get that show quality. Than again it's DIY your results will very.
Thanks. I appreciate the info. I am not a painter, but I worked full time at Robinson Helicopter doing fiberglass/repairs while I went through A&P school. I have seen all kinds of paintwork, including the complete paint strip of decommissioned Airforce1, and complete paintjobs on Delta jets. I have been an mechanic and an inspector at repair stations doing Passenger to Freight conversions on 737’s and 757’s, so I have a familiarity with the techniques.

My project has an engine cowling that will require repair and repainting. The left wing has places where the white paint has some obvious thick and thin spots. I have some intimate knowledge about the weight of paint on a small light general aviation aircraft. My other plane is polished aluminum because, like you said 30 pounds of paint

As I am going to paint parts of it anyways, I thought I’d ask a few questions. I am NOT going for fantastic, just parts of it better.
 
It’s been my experience that a basic paint job on an RV weighs about 19-22 pounds on average. The chances of an RV being pain in lacquer are slim. To be sure, take a paper towel with MEK or acetone on it and rub a small spot. If nothing happens then you have a nice modern material on your plane. The only times I see lacquer or old enamel is 60’s and early 70’s Cessnas and Pipers.