LettersFromFlyoverCountry

Well Known Member
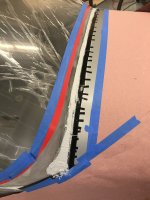
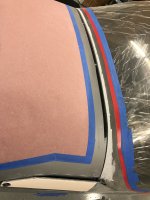
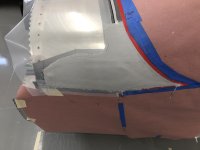
I'm preparing to start on the fiberglass fairing. I've bonded and sanded the foam block. I've cut out the templates and put down two strips of electrical tape.

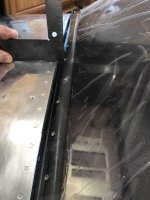
Here's the thing. The forward edge of the canopy lies a bit below the forward skin and panel at the far left and right edges. If I bridge the fiberglass, there'll be a void.canopy.jpg
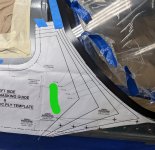
 
I'm preparing to start on the fiberglass fairing. I've bonded and sanded the foam block. I've cut out the templates and put down two strips of electrical tape.

Here's the thing. The forward edge of the canopy lies a bit below the forward skin and panel at the far left and right edges. If I bridge the fiberglass, there'll be a void.View attachment 63034
Bob:

If I understand correctly, the forward edge of your canopy is below the aft edge of the avionics cover. Like in my attached picture from my project?

If so, I can explain what I did to address it.

Brett
Columbus, IN


5A0BA5F8-E3FF-46DA-8B2C-2597CD0AE582.jpeg
 

Bob:

My goal was to raise the top surface of the canopy that was below the avionics cover to be at the same height as the avionics cover so that the fiberglass would smoothly transition. I used epoxy mixed with microballoons to create a paste that could be used to fill this void.

But, first I needed to create a “mold” to define where the epoxy paste was to go and not go.

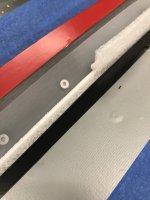
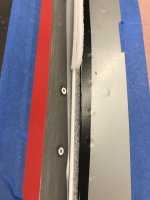
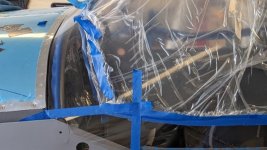
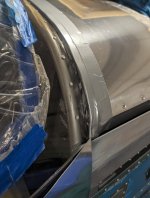
To define the forward edge of the epoxy paste I wedged “sheet foam” between the aft side of the instrument panel and the forward edge of the canopy/canopy frame. Then I used a razor blade to trim this foam to match the contour of the avionics cover. Next, using the top of avionics cover as a reference and squeegee/straight edge I filled in this void with epoxy paste. Finally, after curing I removed the foam.

The pictures hopefully provide additional explanation.

Let me know if you have questions.

Brett
 
Let me know if you have questions.

Brett
Brett, this looks like a very elegant solution. My question revolves around the foam. If I understand correctly, the foam creates support over which you're putting the epoxy with micro. But how is the epoxy bonding to the canopy if it goes on over the foam. And how did you get the foam out once the epoxy cured? Or is the foam basically being used as a "dam" to keep the mixture from running down onto the panel? In which case I still have a question of how the foam is removed without creating a mess?

Thanks for this.canopy 2.jpgcanopy 3.jpg
 
Last edited:
Brett, this looks like a very elegant solution. My question revolves around the foam. If I understand correctly, the foam creates support over which you're putting the epoxy with micro. But how is the epoxy bonding to the canopy if it goes on over the foam. And how did you get the foam out once the epoxy cured? Or is the foam basically being used as a "dam" to keep the mixture from running down onto the panel? In which case I still have a question of how the foam is removed without creating a mess?

Thanks for this.View attachment 63052View attachment 63053

Bob:

The epoxy paste is aft of the foam sheets and on top of the canopy. Yes, the canopy is roughed up to allow the epoxy to stick to it.

Wedging the foam sheet in place creates the gap between the canopy / instrument panel and keeps the epoxy paste in place so that it can’t leak into the cockpit.

Also, the epoxy didn’t stick to the foam. You can try a sample test prior to doing to determine if the epoxy will stick to your foam. Finally, I used more than one layer of foam sheet. Since only the aft layer touches the epoxy, the forward layers are only touching each other.

PM me if you would like to have a phone discussion.

Brett
 
Got it. Very good. I see your technique now. Very elegant, indeed. I had the perfect foam hanging around here somewhere too. Of course, I can't find it now. :*)