What's new
Van's Air Force

Don't miss anything! Register now for full access to the definitive RV support community.

Panel replacement

dsteed

I'm New Here
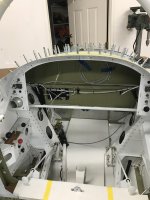
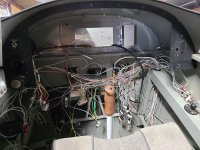
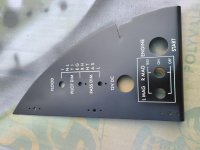
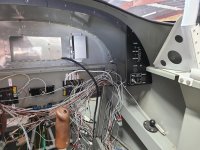
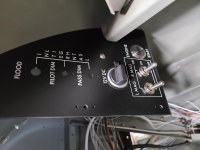
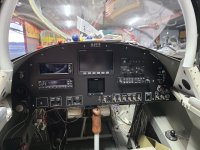
I’m helping my friend replace the three pieces of the instrument panel in his early model -8. The side panels are attached to the mounting flange with rivets. We want to paint the panel before installing it so my thought was to drill out the rivets holding the original panels and install nut plates in the mounting flange so that we can mount the new panel with flush mount screws.

Any reason that this won’t work or isn’t advisable? Any other suggestions would be appreciated.
 
If planning to use flush screws then the panel will need to be thick enough for countersinking, that may be a problem depending on the proposed screw size. An alternative would be to use #8 screws with pan heads (AN515) or truss heads (AN526), which would be more typical than flush I think.
 
In general a screw can’t replace a rivet. You can rivet after paint if you are careful.
 

Attachments

  • 49148585-AAE9-4A5B-893D-1835D0DA6A8A.jpg
    49148585-AAE9-4A5B-893D-1835D0DA6A8A.jpg
    279.4 KB · Views: 101
RV8 Side panel mod

I think the side panels on the RV8 instrument panel should be treated like the gear tower mods made by many builders. Those panels should be installed with screws and nut plates. Eventually many owners will want to make changes to their panels, including the side panels. Much easier to take the old side panels out if they have been installed with screws, then just fabricate a new one.
 
An effective option is to leave the side panels as they are, overlay a piece of 0.032” or 0040” aluminum. Drill the new switch, breaker and such holes through both the original side wings and the overlay. Add a few 3/32” flush rivets as needed. Add the same thickness of aluminum to the top of the panel flange. This way the panel is flush.

Carl

Carl is a wise man. No disassemble as Johnny 5 would say.

To make it even easier, order the side panels instead of spending the time making them. You will have to cut the flange off the bottom but a few seconds on the bandsaw beats trying to cut and fit a scratch piece hands down.

Not only will it save you time and fitting frustration but the thicker stock will be more advantageous when it comes to mounting.

And they can be painted and labeled prior to installation…….
 
I cut out the old side panels to be just enough to have nut plates attached in the right spots for new side panels to fit right on top of the old one without drilling out any rivets. It was simple, easy and it looks great. I then just had new nut plates set on the new side panels to attach the center panel. There isn’t enough of a misalignment with that set up to matter at all. It worked great for me.
 
I cut out the old side panels to be just enough to have nut plates attached in the right spots for new side panels to fit right on top of the old one without drilling out any rivets. It was simple, easy and it looks great. I then just had new nut plates set on the new side panels to attach the center panel. There isn’t enough of a misalignment with that set up to matter at all. It worked great for me.

MajorPayne, could you post a picture? I'm building anew and would like to build in the removeable side wings from the start. Would love to see some inspiration.
 
Sure no problem.

I don’t have a picture of the exact dremel cut of the old side panel but you can see from the permanent marker where I made the cuts to recess for my switches. I also glasses over the holes for the new side panel had for the rivets I never set.

I imagine if you are building new you could have nut plates where the rivets are, or you can rivet some sort of reinforcement to then screw on side panels. I did a retrofit so thats why I did mine this way.

If you look close one screw matching the others on the panel holds down the side panel. The switches and additional screws from the center panel make it so strong you’d have no idea it’s placed on top like this unless you removed the panel.

I reused the nut plates on the old side panel as just a little sliver coming straight down off the top if you can see the permanent marker there too. Essentially it sandwiches the new side panel between the old and the center panel.
 

Attachments

  • 1000001636.jpg
    1000001636.jpg
    427.8 KB · Views: 62
  • 1000001642.jpg
    1000001642.jpg
    629.5 KB · Views: 50
  • 1000001626.jpg
    1000001626.jpg
    431.4 KB · Views: 55
  • 1000001622.jpg
    1000001622.jpg
    199.6 KB · Views: 50
  • 1000001602.jpg
    1000001602.jpg
    368.8 KB · Views: 67
Last edited:
Back
Top