

All,
I'm in the process of wrapping up my build and I'd like to:
1) Make the lower wheel fairing and wheel pant one piece.
2) Then, split the assembly into fore and aft parts (a total of two pieces per pant).
I've seen this done on multiple RVs, but not on the RV-14 (taildragger)
With the current assembly, I'll have to remove 14 screws just to check the air or to put air in the tire. Additionally, I'll like the look of the single piece with the spit in the middle.
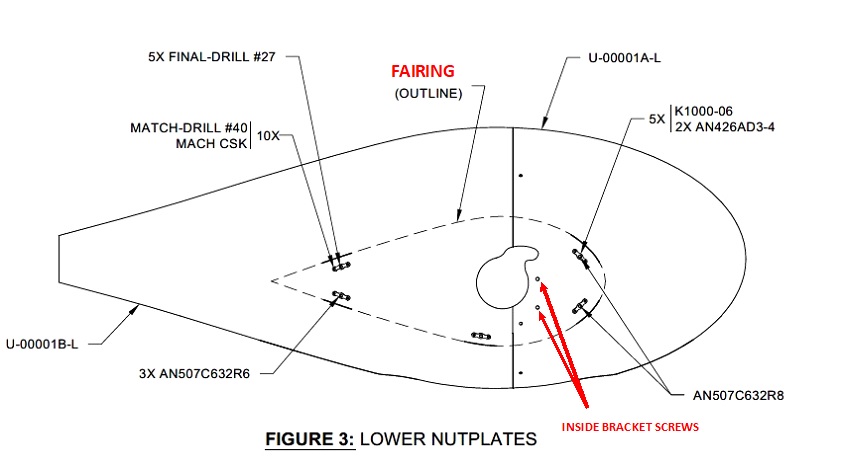
At issue is the screws for the inside bracket are under the the lower fairing. (see picture below).
Note: The RV-14 has a different set-up than the RV-14A and apparently other RVs.
Questions:
I would rather not spend $400 on Airstop tubs with 90 degree stems. Also, had the tires balance by Antisplat, would need that done again if I sprung for the tubes.
Picture below:
Thanks,
Fred
I'm in the process of wrapping up my build and I'd like to:
1) Make the lower wheel fairing and wheel pant one piece.
2) Then, split the assembly into fore and aft parts (a total of two pieces per pant).
I've seen this done on multiple RVs, but not on the RV-14 (taildragger)
With the current assembly, I'll have to remove 14 screws just to check the air or to put air in the tire. Additionally, I'll like the look of the single piece with the spit in the middle.
At issue is the screws for the inside bracket are under the the lower fairing. (see picture below).
Note: The RV-14 has a different set-up than the RV-14A and apparently other RVs.
Questions:
- Is there something simple I'm missing here?
- Has anybody done this?
- If so, would you mind sharing some pictures or insights?
I would rather not spend $400 on Airstop tubs with 90 degree stems. Also, had the tires balance by Antisplat, would need that done again if I sprung for the tubes.
Picture below:
Thanks,
Fred

