

ChiefPilot
Well Known Member
Copied from my virtual hangar thread at Mike S's suggestion
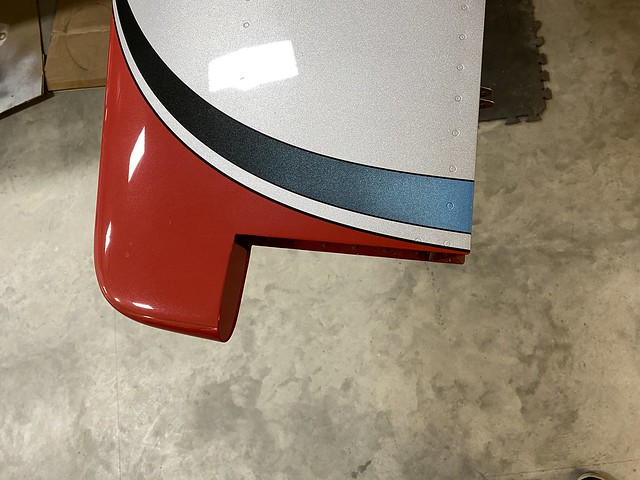
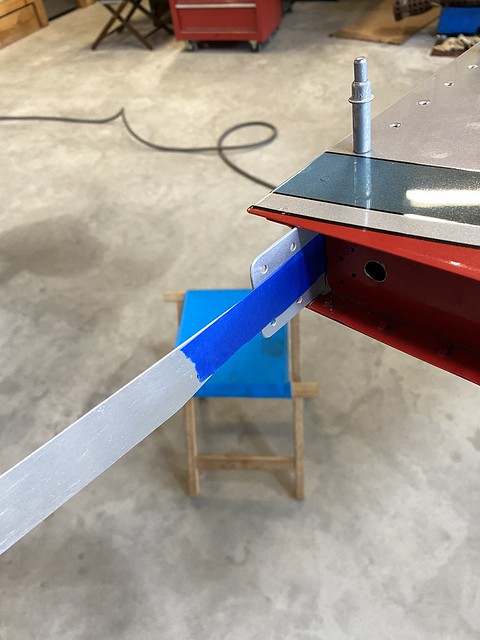
Well, there they were. Cracks. Not very big, and only around four of the 16 rivets, but no more flying until this was addressed. A complicating factor is, of course, disturbing the paint. The design on my horizontal tail means a simple touch up and re-clear would be impossible if I were to remove all the rivets required to peel back the skin as outlined in the SB instructions:
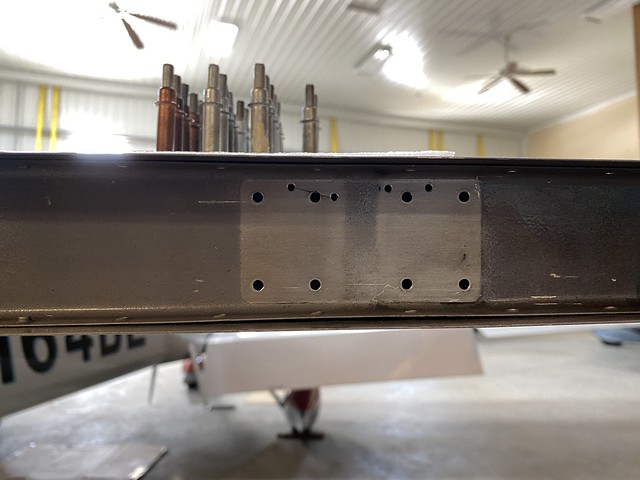
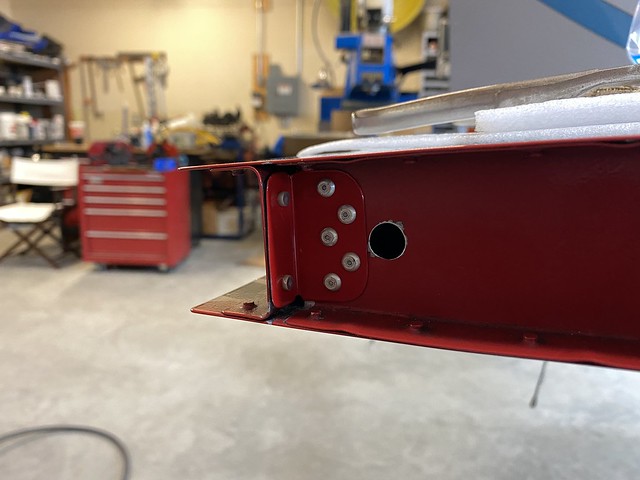
But first things first. Drill off the hinge brackets and stop drill the cracks:
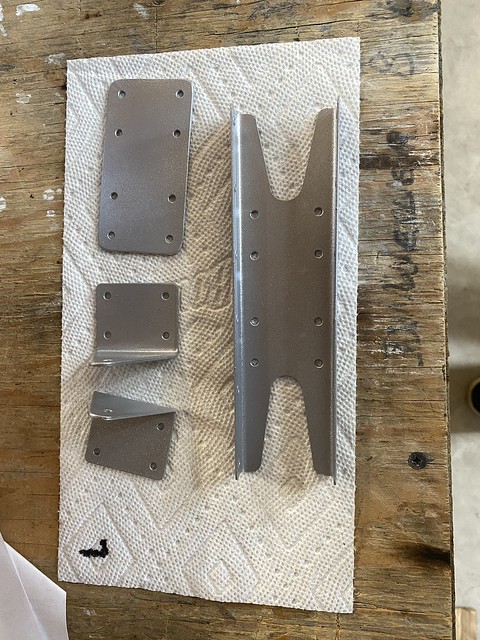
Next step is to fit the parts, but how to get the repair doubler in place without unzipping the skin? I recalled a section in AC43-13B that dealt with flange repair. Having done an earlier service bulletin on the horizontal stab where the root ribs were removed, the flange cut off, and a new flange added gave me the idea that something similar might work here.
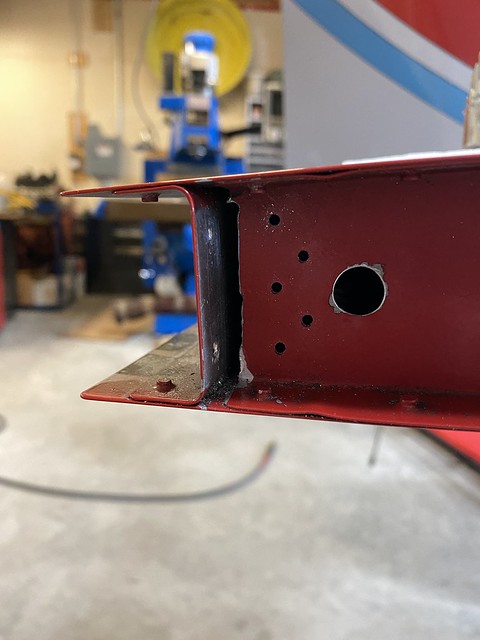
I used a Dremel tool with a carbide cutting bit along with a piece of thin stainless. Removing the two AN-470 rivets attaching the tip rib flange, I slide the SS inside to protect the rear spar and zipped the flange right off (but I practiced on scrap a bunch first). The picture makes it look rougher than it was and I actually ended up with a nice edge after deburring.
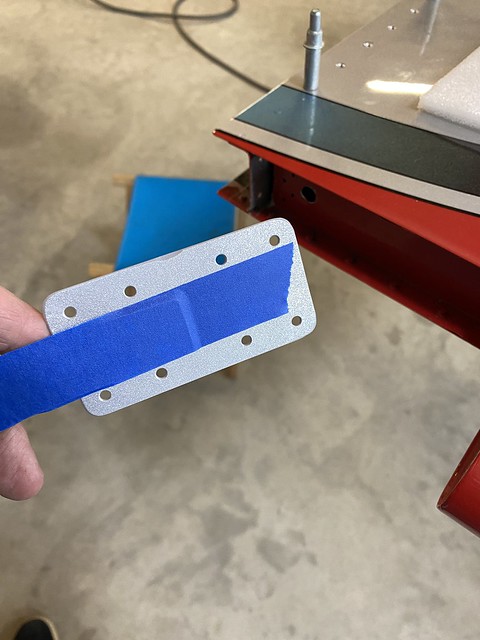
Then using masking tape and a strip of aluminum to hold the repair doubler, I was able to slide the repair doubler in place. This would let me install and remove the doubler for match drilling, and by pushing the strip of aluminum inwards after final assembly it would peel the masking tape off the repair doubler:
Since this was a repair using existing holes, I opted for oversize Cherrymax 3243 rivets and drilled the hinge bracket holes through as required, ensuring a precise fit for the rivets. After fitting and match drilling everything together, I removed all the pieces. Everything got de-burred, primed/painted, and prepped for final installation. I used an in/out deburring tool on an electric screwdriver for the holes in the rear spar as well.
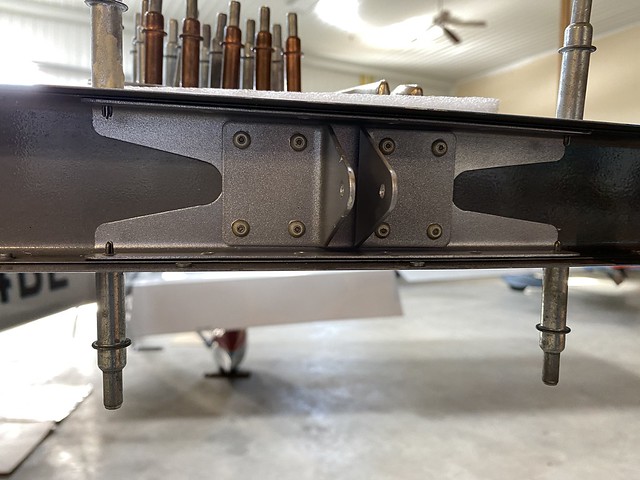
The Cherrymax rivets went in pretty easily, but I had to modify my pneumatic puller a bit due to tight clearances. But once that was done, everything came together nicely:
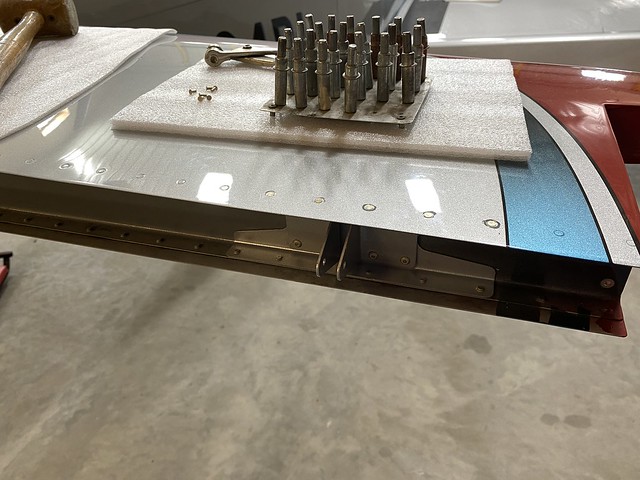
I then squeezed the AN426 rivets holding the nested doubler, spar, and skin together. This was pretty trivial - it's kind of hard to mess up squeezing these so long as you have the right length rivet:
At this point, it was time to clean out the inside of the stab and remove all the chips and rivet tails. This was surprisingly easy - I used a vacuum attachment over the tip rib where I removed the flange and an air gun blowing in the tooling hole on the tip rib. A borescope inspection showed a couple of rivet tails which wouldn't fit through the opening created by removing the rear flange, so I fished them out with some music wire covered with double-sided tape via the tooling hole.
After that, I fabricated/fit the repair flange following the guidance from AC43-13b. Once that was done, I removed it then deburred it and the mating surfaces and primed/painted it. It was installed with Cherrymax 3213 and AN470 rivets (the photo makes it look like there is a gap between the repair flange and the rear spar - there isn't; it's just an odd shadow):
I still need to repair the paint on the top/bottom skins where the nested doubler was installed but that will be relatively simple (sand, blend the color coat, re-clear the entire stab) once warmer weather rolls around. Otherwise, pretty straight forward.
Well, there they were. Cracks. Not very big, and only around four of the 16 rivets, but no more flying until this was addressed. A complicating factor is, of course, disturbing the paint. The design on my horizontal tail means a simple touch up and re-clear would be impossible if I were to remove all the rivets required to peel back the skin as outlined in the SB instructions:
But first things first. Drill off the hinge brackets and stop drill the cracks:
Next step is to fit the parts, but how to get the repair doubler in place without unzipping the skin? I recalled a section in AC43-13B that dealt with flange repair. Having done an earlier service bulletin on the horizontal stab where the root ribs were removed, the flange cut off, and a new flange added gave me the idea that something similar might work here.
I used a Dremel tool with a carbide cutting bit along with a piece of thin stainless. Removing the two AN-470 rivets attaching the tip rib flange, I slide the SS inside to protect the rear spar and zipped the flange right off (but I practiced on scrap a bunch first). The picture makes it look rougher than it was and I actually ended up with a nice edge after deburring.
Then using masking tape and a strip of aluminum to hold the repair doubler, I was able to slide the repair doubler in place. This would let me install and remove the doubler for match drilling, and by pushing the strip of aluminum inwards after final assembly it would peel the masking tape off the repair doubler:
Since this was a repair using existing holes, I opted for oversize Cherrymax 3243 rivets and drilled the hinge bracket holes through as required, ensuring a precise fit for the rivets. After fitting and match drilling everything together, I removed all the pieces. Everything got de-burred, primed/painted, and prepped for final installation. I used an in/out deburring tool on an electric screwdriver for the holes in the rear spar as well.
The Cherrymax rivets went in pretty easily, but I had to modify my pneumatic puller a bit due to tight clearances. But once that was done, everything came together nicely:
I then squeezed the AN426 rivets holding the nested doubler, spar, and skin together. This was pretty trivial - it's kind of hard to mess up squeezing these so long as you have the right length rivet:
At this point, it was time to clean out the inside of the stab and remove all the chips and rivet tails. This was surprisingly easy - I used a vacuum attachment over the tip rib where I removed the flange and an air gun blowing in the tooling hole on the tip rib. A borescope inspection showed a couple of rivet tails which wouldn't fit through the opening created by removing the rear flange, so I fished them out with some music wire covered with double-sided tape via the tooling hole.
After that, I fabricated/fit the repair flange following the guidance from AC43-13b. Once that was done, I removed it then deburred it and the mating surfaces and primed/painted it. It was installed with Cherrymax 3213 and AN470 rivets (the photo makes it look like there is a gap between the repair flange and the rear spar - there isn't; it's just an odd shadow):
I still need to repair the paint on the top/bottom skins where the nested doubler was installed but that will be relatively simple (sand, blend the color coat, re-clear the entire stab) once warmer weather rolls around. Otherwise, pretty straight forward.

