What's new
Van's Air Force

Don't miss anything! Register now for full access to the definitive RV support community.

Painting inside of cabin top

Carl Froehlich

Well Known Member
For the first RV-10 I put in a foam backed headliner in the cabin top. It look great until the new owner move the plane to Florida - it failed under the Florida sun.

For this RV-10 I want to top coat the cabin top with the same PPG single stage paint as the rest of the interior. I’d appreciate recommendation on how to prep the surface.

Thanks,
Carl
 
Carl, I painted mine and am pleased with the results. First I used a 60 grit flap wheel on a grinder to remove any high spots and wrinkles. Then I went through the typical fiberglass finishing process - micro filler to fill any depressions, sand to shape, epoxy wipe to seal it. High build primer over that, sand and paint.

I added a modest amount of flattener to the paint and shot it to leave a very orange pealy texture. Both things were intended to reduce glare and fingerprints.

I did all of this with the cabin top off the airplane.
 
I did all of my major flaw repair with poly filler, but did not fill pinholes. Then shot two coats of epoxy primer, Then waited about 36-48 hours (SPI primer has a 7 day window for cross linking) for that to cure enough that solvents from future coats would not melt the epoxy. This is a critical step that allows the primer to form a bridge over the pinholes. If you don't give it enough time, the solvents from thenext application will cause the bridge to collapse and the pinhole reappears. Then shot 4 coats of 2K primer and blocked with 220. Keep shooting more 2K and repeat if necessary. Once flat and pleasing, I shot two more coats of epoxy primer (SPI version covers 220 grit pretty well - at least for a surface that doesn't get direct sunlight) and that was my final coat. Clearly final step will be different for a your top coat plan. The beauty of the SPI epoxy primer for this type of surface is that the sheen is just a hair matte of semi-gloss, which I really like for interiors. Secondary benefit - it is tough as nails and you almost can't scratch it off with a screwdriver. My 6 has almost 1000 hours and the floor is top coated with this epoxy primer. Absolutely no visible wear where my heels constantly rub under the rudder pedals.

FYI, the SPI epoxy primer is about the best you will find in the market and is quite affordable compared to the name brands, A LOT of PPG adn Dupont shops use the SPI epoxy. It has quite the following out there. I promise you won't be disappointed.
 
Last edited:
Not sure how fancy you need to get

...with prep or with paint products.

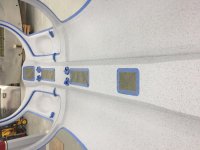
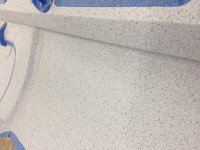
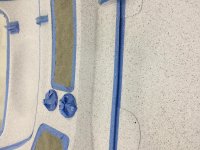
I sanded mine smooth, filled a few irregular spots and resin'd over the foil tape antennas I installed in the top (VOR/GS and Comm 2) and then brushed on flat gray latex house paint, followed by judicious application of splatter paint (Rustoleum American Accents "Stone" textured finish) in an aerosol can and a top coat of clear urethane (rattle can again) to create a faux Zolotone finish that has held up well for two years and looks just as I hoped. Clear coat was done because the black specks in the textured paint are water-soluble even after drying and will smear if not protected.

Pics should be on here in an old thread somewhere if interested. Not my idea; shamelessly copied.
 
Thanks for the replies. I never used a flap wheel before but that makes sense.

Side note - I’ll never again use Smooth Prime for anything.

Carl
 
Bill, your post/pictures seem to answer my question but I’ll ask anyway.
Can the doors be fitted to completion (or close enough) without the canopy being fully riveted on. I want to have the canopy removable as long as possible due to ease of access and the fact that I want to prep/finish/paint the canopy and doors as a set at the same time and I want them to be off the fuselage when that happens.

My answer is yes. I clecoed on the cabin top, fitted the doors and windows, then pulled the cabin top and doors and finished (painted) them. Subsequently I screwed, riveted, and glued the cabin top to the fuselage and installed the windows. The fit of the doors didn't change.
 
My answer is yes. I clecoed on the cabin top, fitted the doors and windows, then pulled the cabin top and doors and finished (painted) them. Subsequently I screwed, riveted, and glued the cabin top to the fuselage and installed the windows. The fit of the doors didn't change.

Thanks Kyle.
 
For the first RV-10 I put in a foam backed headliner in the cabin top. It look great until the new owner move the plane to Florida - it failed under the Florida sun.

For this RV-10 I want to top coat the cabin top with the same PPG single stage paint as the rest of the interior. I’d appreciate recommendation on how to prep the surface.

Thanks,
Carl

I’m curious to why the headliner failed if you know. Was it a heat or humidity issue? Was the aircraft kept outside? I’m thinking about moving south, which is why I’m asking.

I just used some filler and sanded until it was smooth and painted it. Geoff used it to make his headliner molds. I ended up covering the nice paint job and smooth finish with one of his headliners.
 
Side note - I’ll never again use Smooth Prime for anything.

Carl, I'm assuming you are referring to the Poly Fiber UV Smooth Prime?

https://www.aircraftspruce.com/catalog/pnpages/09-28280.php?gad=1&gclid=CjwKCAjwm4ukBhAuEiwA0zQxk5eWlz5v94V87o-1LzpEi33SN9ZAlifhZssVf0wiUxpMn4QU4kKNSBoC7CUQAvD_BwE

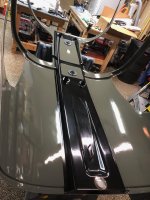
Curious what your aversion to this product is? That's what I used for final prep on my cabin top (before primer and paint) and thought it worked great! Been flying for 2.5 years in South TX heat with no issues (so far).
 

Attachments

  • IMG_1528.jpg
    IMG_1528.jpg
    458.8 KB · Views: 87
  • IMG_1529.jpg
    IMG_1529.jpg
    392.9 KB · Views: 91
Last edited:
Back
Top