What's new
Van's Air Force

Don't miss anything! Register now for full access to the definitive RV support community.

Second set of eyes before cutting wing for Duckworks lights

UnPossible

Well Known Member
Hey - I'm just hoping for a second set of eyes that have done this before before I cut a big hole in a perfectly good wing.

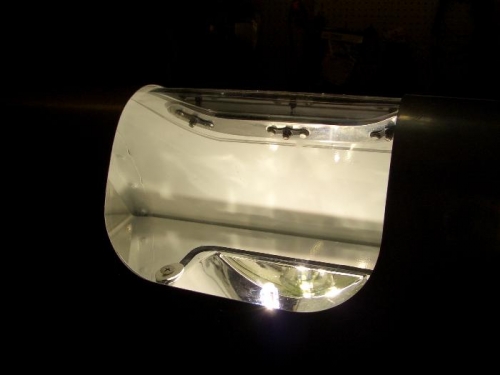
Below is the hole I've layed out for installing the duckworks HID lights from Vans.... looks to me like the majority of the hole is on the lower half of the wing. Please let me know if anything looks funky before I cut this tomorrow.

Thanks,
Jason

11qq0bc.jpg
 
Just looking... the underside, why is the radius past your line? Looks a little deep on the underside. Maybe not... Also, set the lenses on the leading edge and get a starting fit.
 
Last edited:
Just looking... the underside, why is the radius past your line? Looks a little deep on the underside. Maybe not... Also, set the lenses on the leading edge and get a starting fit.

sorry for any confusion... the lower horizontal line doesn't mean anything... I just used it to to measure back 2.5" from the rivet line.
 
Then you should be fine... just keep a little clean up room for straightening out the edges. I'm sure you'll do a great job.
 
Looks good.

I know how you're feeling. My plane was flying for 6 months before I installed my lights. That first cut into a perfectly good wing was quite nerve wracking. :eek:

After installing the first light, it was a lot easier to cut into the other wing.
 
I just did this job on my RV-9A leading edges. Marked off the hole via the template. Made sure that the plexi covered the marked off area.
Used a unibit to get a starting hole in the leading edge. Bought an air powered body saw from Harbor Freight for less than $20 (and blades). Used the air saw to cut out the hole (very noisy, but easy to control). Tip is to put a nice thick layer of tape around the hole before cutting. The guard on the saw will mar up the aluminum next to your cutting line. Finished off the hole by using a file, then hit it with some sand paper and a scotchbrite polish wheel.

Cutting the Plexi lens to fit was more nerve wracking. I used a band saw to get a rough shape, then finished it off on the grinder. Finally sand paper and a little bit of scraping on the edges to round them off.

It took me a couple of evenings to do this. Duckworks claims 45-90 minutes!
 
I found that using one of the cheap air nibblers from harbor freight works great for the initial cut. Then use a ~2" sanding drum on and electric drill to get it to near final dimensions. Finish up with a file inbetween the cornes to ensure a straight edge, final cleanup with a small deburring wheel and scotch-brite pad. I think it took me maybe 15 minutes to cut and finish the hole. I covered the plexy in a layer of masking tape and did a rough cut then took it to size with my belt sander. I finished the plexy off by wet-sanding to a fine edge finish.

I polished the reflector and painted the inside of the wing bay white. I also rolled-my-own conversion to HID. I have two lights (one in each wing). I think this thing will be visable from space...

Edit: A quick note, if the kit still comes with four small bits of double-sided tape to attach the doubler to the lens, toss that tape and replace it with a larger piece that covers the entire doubler. Punch holes in it for the nutplates. This will spread the load out better, otherwise the doubler will flex in between the bits of tape and the ends of the doubler can contact the plexy.

FP15112009A0005H.jpg
 
Last edited:
Well - like the rest of my build, the worring was 10x worse than the actual work. I made the initial cut with a dremel and a cut-off disc. A few more minutes with a dremel and a sanding wheel, followed up by the scotch-brite wheel and it was done.... on to cutting the lens.

Thanks,
Jason


mk84ro.jpg
 
I am considering putting a Duckworks kit in the finished wing of my RV-4 with riveted on wingtips. I see that everyone installing them here is doing so with the wingtips off. Is it possible to do the cutting, drilling, mounting and wire routing without removing the wingtip?
 
I don't know how much different the 4 is from the 7 but I would think it could be done without too much cussing. After you cut out the lens hole you will need to rivet 2 nutplates to each of the ribs to mount the light bracket. Using the provided template to locate the nutplate holes can be done through the lens hole. Riveting the nutplates might be tight unless you use pulled rivets. Wiring should be pretty straight forward depending how you route the wires.
 
Back
Top