What's new
Van's Air Force

Don't miss anything! Register now for full access to the definitive RV support community.

Stripped Nutplate, sort of

MarkCFI

Active Member
I finally am getting around to installing my Skybeacon and Skysensor. I removed the Grimes nav lights and they were held on with 8-32 machine screws. 6-32 is what fits in the new lights.

The wingtips were riveted on so it’s a bigger job than I would like to do right now to remove them and replace the Nutplates.

Has anyone ever filled and existing Nutplate with epoxy and drilled and tapped? Or potentially used a 4-40 helicoil ? They only need to torque to 10 inch pounds.

The 8-32 machine screws are just slightly too big to fit through the SkyBeacon.

Any options appreciated.

Maybe tricky but you could make 8-32/6-32 studs by running a 6-32 die over a long 8-32 screw then cut the head off. Just a temporary till you remove the tips.
 
Enlarge holes

Can you slightly enlarge the holes in the Skybeacon so the #8 scews will fit? It looks like it is a simple plastic housing. Uavionix support should be able to advise if it is safe to do that.

I don't think that filling the hole with epoxy and tapping #6 would be strong enough. Perhaps putting in a 5/32(?) pop rivet and then knocking out the mandrel and drilling and tapping would work. Could be tried first on a test piece off the plane.
 
Last edited:
Thanks

Both good ideas. My next step is an email to uAvionix but I wanted to try to avoid drilling them out. It “looks like” there a small aluminum boss in the circuit board so could be drilled. But……

It’s ever so slightly too small

The tips are riveted on instead of screws so it’s a fairly significant job to pull them.

Thanks to you both again
 
Just replace the nut plate. !/?

Thanks

Both good ideas. My next step is an email to uAvionix but I wanted to try to avoid drilling them out. It “looks like” there a small aluminum boss in the circuit board so could be drilled. But……

It’s ever so slightly too small

The tips are riveted on instead of screws so it’s a fairly significant job to pull them.

Thanks to you both again

I would not use a kludge solution if possible. So it is in the tip, it has a hole with wires and a riveted nut plate . . . if that is the case then the nut plate can be accessed and replaced. Use Hanson 3/32 pull rivets, CS. Then string the plate through the wire hole with safety wire. I have done several this way and is easier to do than describe, it's a puzzle that has a solution. Let me know if you need a few and what length. They are available but a bit hard to locate a source.

Now, if it is glassed in, . . . . .nevermind . .
 
Stripped Nutplate - Sort Of (Test)

I tested the OP's suggestion of filling the -8 anchor nut with epoxy, or equivalent
(I used 3M ScotchWeld 2216, thickened with powdered Aluminum), drilling the pilot hole (.1065) for a 6-32 thread, and then threading same.

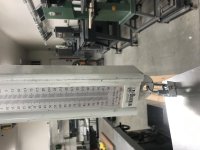
I used a mechanical inline scale (granted, not the most accurate - but does give a good "relative" indication). The attached pic shows the assembly as tested.

Result: I tightened the screw to what I considered an acceptable level (didn't have my small torque wrench at hand), and pulled to 50 lbs + with no apparent loss of performance. I repeated this process several times - no change in results.

My suggestion, based on the above is: Make sure the anchor nut thread area is clean and without any contaminate that might compromise the epoxy adhesion.

Use a suitable epoxy, 3M, JB Weld, G-Flex, or ?, with enough appropriate filler material to make it "non-sag", to make sure it stays in the nut plate thread body without "oozing" out during the cure period.

Make sure cure period is adhered to - I super cured my sample by elevated heat over the period recommended by 3M.

YMMV - But I bet not much.

For light, non structural loading, I would not be afraid to use this process.

HFS
 

Attachments

  • Anchor Nut - #8 to #6 Mod.jpg
    Anchor Nut - #8 to #6 Mod.jpg
    244 KB · Views: 203
All of these options appreciated. Will follow up with uAvionix guidance and if I can’t ream (great advice vs. drill) I’ll pick one of these options.

The nutplates do look like they are glassed inside. I will affirm.

I also found a blind fastener called a “click bond” and if push come to shove I think I could fish that in and pull tight.

In full disclosure, I bought this RV-4 last September and got my checkout in Portland in December. I have about 11 hours in my plane to date. Weather being the limiting factor up here in upstate

I appreciate all of this advice. I did not think of many of these options.
 
Back
Top