What's new
Van's Air Force

Don't miss anything! Register now for full access to the definitive RV support community.

Fuel tank leak test question

JeremyL

Well Known Member
Hey guys, just a quick question to perhaps ease my mind and maybe tell me to “build on”. I leak tested my left tank last night with the vans test kit and a condom instead of a balloon. I pressurized and drenched the entire tank with a mix of dawn and water and didn’t seem any noticeable leaks after spraying, staring, spraying staring for about 2 hours, but the condom lost pressure after about 1-2 hours. My question is, how noticeable are the leaks if there are any? I did have a leak around the fuel pick up seal cap which made bubbles that moved and got progressively larger until they burst. Is that what I’m looking for? Or is it less noticeable? This is my first go at sealing/testing a tank and probably shocked I actually produced a leak free tank the first go at it. Thanks in advance.
 
Hey guys, just a quick question to perhaps ease my mind and maybe tell me to “build on”. I leak tested my left tank last night with the vans test kit and a condom instead of a balloon. I pressurized and drenched the entire tank with a mix of dawn and water and didn’t seem any noticeable leaks after spraying, staring, spraying staring for about 2 hours, but the condom lost pressure after about 1-2 hours. My question is, how noticeable are the leaks if there are any? I did have a leak around the fuel pick up seal cap which made bubbles that moved and got progressively larger until they burst. Is that what I’m looking for? Or is it less noticeable? This is my first go at sealing/testing a tank and probably shocked I actually produced a leak free tank the first go at it. Thanks in advance.

PM your email address to me and I’ll send a video of a leak I found a couple of years ago.
 
I recommend the final leak test is by adding ~5 gallons of 100LL to each tank.

With the tanks off the wings you can rotate the tanks on all three sides;
- Top up
- Vertical (leading edge up)
- Top down

Keep a vent path open for all positions. Let the tank sit in each position for a month or so. The objection is to find the weeping rivet that will not show themselves with the soapy water test.

I built a total of 11 tanks. Sure enough tank #11 had a leak when resting with the top down. Much easier to fix before paint.

Carl
 
What Carl said

When I built my -4 tanks years ago I did the initial balloon test and then followed that with the 100LL test, which is the real final testament. I have done several fuel tank rebuilds for others and always use the 100LL, 5 gallon check, one sitting level flight attitude, one standing on the root rib, and one sitting on the rear baffle AKA vertical flight. The rear baffle and root rib is where the majority of leaks start happening based on what I have seen.
 
I sound like a broken record, but:

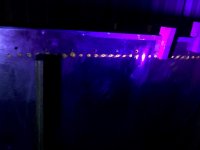
Use car gas and add some AC Delco fluorescent leak test dye (oil and gas, not AC system). That and a UV flashlight are all available most anywhere including Amazon. Probably less than $30 for everything. You can then burn the gas in your car. Any leak will light up like a disco/reveal itself much faster than waiting for a blue dye stain.
 

Attachments

  • Tank UV leak check.jpg
    Tank UV leak check.jpg
    291.1 KB · Views: 148
I sound like a broken record, but:

Use car gas and add some AC Delco fluorescent leak test dye (oil and gas, not AC system). That and a UV flashlight are all available most anywhere including Amazon. Probably less than $30 for everything. You can then burn the gas in your car. Any leak will light up like a disco/reveal itself much faster than waiting for a blue dye stain.

How long do you wait on the dye to reveal a leak?
 
I let it go a week before installing backplate. Then another week after that installation. No leaks. Put some in a known leak (slow stain only level). I could see dye within six hours. Might have been faster but i didn’t look before i turned the lights off to leave later that night.
 
I made a monometer out of a piece of tubing and partially filled the tube with water. I pressurized the tank to 18" of water head height, which is about 0.6 psig. I had to put duct tape over the fuel caps to prevent them from leaking. I then left the tank pressurized for a couple of days. It made a very nice barometer. The water column increased/decreased but it correlated nicely with atmospheric pressure changes which gave me confidence the tank was not leaking. The change in atmospheric pressure would have easily deflated a condom. I've had fuel in the tanks now for four months and no leaks, so I must have done something right.
 
Calling it leak free

After fixing a minor leak around the test kit items and securing the condom better. The pressure to the condom increased and decreased based on the temperature and pressure of the surrounding environment for about 4 days straight. Combined with zero bubbles found during the entire test period, I am happy to call the left tank air tight and from all available evidence, “leak free”. Thank you everyone for the input and Kyle, thank you for the bubble video.
 
Water left in tank after pressure testing

Not an RV, but local Mooney after a tank leak repair --- shop did not drain all water --- owner fueled tank, and, getting ready to fly next day, found quart of water in the tank and sumps.
 
Back
Top