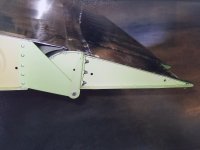
I have a -4 that has a trim tab on the left aileron and still has a heavy right wing. I also can see the left flap trailing edge is .5” recessed from the bottom of the fuse compared to the right flap trailing edge which is flush.
I would like to go through the rigging top to bottom following vans suggestions but I’m not sure how I should level the plane. Are there any instructions in the -4 plans (have the USB) on how to level and begin checking? Do I need some jacks that go into the tie down locations under the wings or just wheel it up onto a proper size shim for the left/right level?
Should I be leveling front/back to center the bubble or be about 3 degrees nose low which I think is close to level flight attitude?
There are some great threads on how to perform the measurements so I planned to leverage those but if anyone wants to share more info in this thread, happy to take a look at the suggestions too.
One thing I haven’t found yet is, what do I do if the wing incidence is off between right and left wing? If they were drilled with different incidence each side (if that is my conclusion), what is my remediation? Vans instructions linked above say “fix it” but I thought drilling the spar was a one shot deal. So then do I just raise/lower one aileron as the only possible bandaid?


