
Van's Air Force
You are using an out of date browser. It may not display this or other websites correctly.
You should upgrade or use an alternative browser.
You should upgrade or use an alternative browser.
Rudder trailing edge
- Thread starter Mycool
- Start date

wirejock
Well Known Member
same part
X2 gents! Same place. Same time.
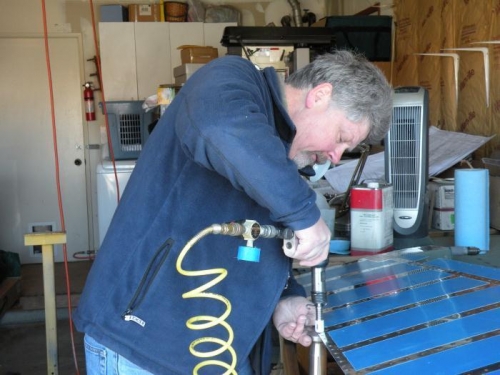
I actually broke from the mold a bit and used proseal to secure the ribs to the skin on a piece of sacrificial particle board. I'm really happy with the result. The ribs are stuck solid so I can back rivet easily.
I'll be at the trailing edge in a few days.
Best of luck.
Good afternoon gents,
I am getting ready to start the rudder, and was curious to see what the preferred method of keeping trailing edge straight. Pinch with two angles or cleco to straight edge like a piece melamine? I want to get it perfect!
X2 gents! Same place. Same time.
I actually broke from the mold a bit and used proseal to secure the ribs to the skin on a piece of sacrificial particle board. I'm really happy with the result. The ribs are stuck solid so I can back rivet easily.
I'll be at the trailing edge in a few days.
Best of luck.
tkatc
Well Known Member
I used the two angle method. I drilled every hole and clecoed. Then I drilled every other hole in the angle with a step drill to allow my pneumatic squeezer dies to fit through. I started every other rivet with the squeezer and then removed the angles. It was PERFECTLY straight. I then proceeded to back rivet the remaining rivets and then final set all rivets. The result was pretty good but I do have a slight wave near the top. The finesse comes at the end as you set the rivets completely. Go slow and alternate.
rzbill
Well Known Member
I used the two angle method. Go slow and alternate.
I used angle. It was a piece of aluminum architectural angle from Lowes or the Depo. I cannot count how many times I used this piece of angle during construction. If it could have fit in the toolbox, it should have lived there.
Anyway, I thought it was fitting that the very last vestiges of this angle were turned into my lightweight (drilled) chocks. Full circle from beginning to end.
")
I also used a single large angle from home depot. Give the pro-seal extra time to set up just to be sure - I think I left it a week to 10 days. You'd be surprised how solid it feels with the pro-seal cured. After that I followed the instructions for riveting, back riveting every 10th rivet, then slowly filling in the gaps. I set each rivet just very lightly at first, then worked back and forth slowly setting them further. You will see there is a technique to slowly 'rolling' the back rivet set as you rivet to set the rivet into the dimple neatly. I finished them all off with the mushroom set on the factory head which created near-perfect shop heads.
I have screwed up a lot of other things, but I can say that using this method I ended up with a perfectly straight trailing edge!
Chris
I have screwed up a lot of other things, but I can say that using this method I ended up with a perfectly straight trailing edge!
Chris
Andrew M
Well Known Member
Angle and glue
I clecoed mine to an angle and bonded with hysol 9309na. Clecos dipped, and angle coated in pledge to keep from sticking. Let cure. After setting the rivets, I covered the tails with packing tape and filed down to almost flush. The tape protects the skin. Poor mans rivet shaver. Photos start at about number 40 in link with my signature.
I clecoed mine to an angle and bonded with hysol 9309na. Clecos dipped, and angle coated in pledge to keep from sticking. Let cure. After setting the rivets, I covered the tails with packing tape and filed down to almost flush. The tape protects the skin. Poor mans rivet shaver. Photos start at about number 40 in link with my signature.
longranger
Well Known Member
Prosealed wedge and 100% clecoed to a heavy hardware store aluminum angle: http://www.mykitlog.com/users/displ...&project=2052&category=7324&log=143002&row=31
After curing for 9 days, I riveted per plans, except that I used a 3-lb bar and a back riveting set. http://www.mykitlog.com/users/displ...&project=2052&category=7324&log=144022&row=24
The result is straight to the naked eye, but a taut thread shows 0.050 concave on the left side - half of what the instructions say is acceptable.
just be patient
I glued mine with T-88 epoxy, clecoed to a good (2x2) piece of angle aluminum (Lowes or Home Depot). Once it is cured, it's pretty hard to get a warp as long as you set the rivets (I did every 5) a little at a time until they have the nice mushroom set that fills the dimple.
One of those things (like the tanks) that are scarier perparing than the actual task. Good luck!
wirejock
Well Known Member
Rudder
How is your rudder progressing?
Mine is completely preassembled and ready for priming.
I bought a 6' piece of 2" angle and match drilled it using the wedge then clecoed it to the final assembly to test for straight edge. It looks perfect so hopefully the proseal method will hold it in place when I get to that point.
I'll post results later.
Good afternoon gents,
I am getting ready to start the rudder, and was curious to see what the preferred method of keeping trailing edge straight. Pinch with two angles or cleco to straight edge like a piece melamine? I want to get it perfect!
How is your rudder progressing?
Mine is completely preassembled and ready for priming.
I bought a 6' piece of 2" angle and match drilled it using the wedge then clecoed it to the final assembly to test for straight edge. It looks perfect so hopefully the proseal method will hold it in place when I get to that point.
I'll post results later.
longranger
Well Known Member
How is your rudder progressing?
Mine is completely preassembled and ready for priming.
I bought a 6' piece of 2" angle and match drilled it using the wedge then clecoed it to the final assembly to test for straight edge. It looks perfect so hopefully the proseal method will hold it in place when I get to that point.
I'll post results later.
If you used the wedge to match drill the angle, check the straightness of the line of holes with a taut thread. The wedge has some flex, even fore/aft.

wirejock
Well Known Member
messed up part
Dangnabbit! All that worry over the trailing edge and I messed up the rudder horn brace. The edge holes ended up too close to the edge. It's cheaper and easier to order another and "do over". I did manage to counter sink the AEX wedge so it's good to go. Part should be here in a few days. Cut, drill, debur, dimple and prime and the rudder goes together. One step closer!
Dangnabbit! All that worry over the trailing edge and I messed up the rudder horn brace. The edge holes ended up too close to the edge. It's cheaper and easier to order another and "do over". I did manage to counter sink the AEX wedge so it's good to go. Part should be here in a few days. Cut, drill, debur, dimple and prime and the rudder goes together. One step closer!
I have not read all the previous post, but I wanted to let you know of what I wished I had installed on the trailing edge of my rudder. A tab so it can be bent if necessary to make the rudder fly straight when the airplane is flying.
Just a thought maybe you have it already. Sorry if I spoke out of turn.
Dave
Just a thought maybe you have it already. Sorry if I spoke out of turn.
Dave
N941WR
Legacy Member
Not to worry, the airplane will fly straight, no trim tab is needed.
Van's match hole technology is just amazing!
Another way to do this is to grind down some rivet sets at the proper angle and squeeze all the rivets. The trick is to put the clecos and rivets in from different sides. Check out my build site for details.
Van's match hole technology is just amazing!
Another way to do this is to grind down some rivet sets at the proper angle and squeeze all the rivets. The trick is to put the clecos and rivets in from different sides. Check out my build site for details.
Last edited:
rzbill
Well Known Member
Not to worry, the airplane will fly straight, no trim tab is needed.
Van's match hole technology is just amazing!
.
+1 for centered ball and no tab on the rudder.
Mycool
Well Known Member
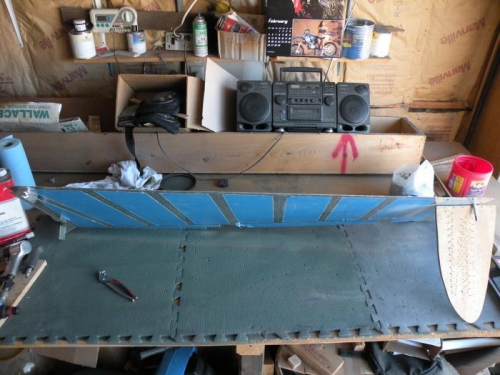
Trailing edge drying.
I ended up purchasing two 1" angles at lowes and sandwiched th training edge. I originally had angles non mirrored because I thought I would make the whole inch flange straight, I was wrong, by doing this it created a nice even bow from end to end within he .1" tolerance, however for me this was unacceptable so while installing the trailing edge I made a last second change up and mirrored angles so that they formed a "T". What I learned was that because of the tapered training edge and Cleo's pulling it flat "T'ing" the angles is the only way and keeping them thin helped. As of now the rudder's trailing ege is drying and I am extremely happy with he results. It looks like the edge varies less than a .01". Almost perfect! Thank you everyone for input and advice!
I ended up purchasing two 1" angles at lowes and sandwiched th training edge. I originally had angles non mirrored because I thought I would make the whole inch flange straight, I was wrong, by doing this it created a nice even bow from end to end within he .1" tolerance, however for me this was unacceptable so while installing the trailing edge I made a last second change up and mirrored angles so that they formed a "T". What I learned was that because of the tapered training edge and Cleo's pulling it flat "T'ing" the angles is the only way and keeping them thin helped. As of now the rudder's trailing ege is drying and I am extremely happy with he results. It looks like the edge varies less than a .01". Almost perfect! Thank you everyone for input and advice!

