What's new
Van's Air Force

Don't miss anything! Register now for full access to the definitive RV support community.

SB 00036 false alarm

Burf09

I'm New Here
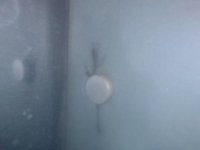
After scoping my RV 6 we thought I had a crack. Had lots of eyes on it and everyone agreed it was a crack. I’ve attached a photo from the scope.
After removing the skin and the hinge bracket it was easy to see it wasn’t a crack. It was just dirt. We cleaned and inspected and sure enough there was no crack. We are going to install the repair kit anyway since we already have it opened up. Anyone else find anything similar?
 

Attachments

  • 588FBC92-BEDF-43F0-938A-E599EB051BF1.jpeg
    588FBC92-BEDF-43F0-938A-E599EB051BF1.jpeg
    14.8 KB · Views: 199
Since there are different procedures for having cracks or not when applying that SB I would follow up with some dye penetrant on that thing that looked like a crack then looked like it wasn't.
 
not so sure it is a false alarm

Dirt does not tend to form well defined lines on the part surface like that.....unless there is a crack under it. Think what you are seeing is the black streaks (aka: aluminum dust) that form from the fretting of the two edges of a crack. And yes, the "dirt" can easily be wiped off......the crack stays, and will generate more over time.

As Vince suggested, a dye penetrant test should be done to confirm.
 
Last edited:
I agree with what's already beed said; given where thats at and the fact that there isn't really much way that dirt/oil/soot that could find its way in there, it's hard to imaging that's anything other than aluminum dust caused by the two sides of a crack fretting together.

Hey, I''ve been wrong plenty of times, but die penetrant will tell you for sure, one way or the other.
 
I agree that dye penetrant is the next step. You really want to know if it is a crack so you can stop drill it if it is. You don't want to hide it under a doubler and then not be able to see it if you haven't stop drilled it.
 
Sure looks like other pictures of a crack

I've looked at just about all of the RV HS crack pictures that have been posted in various threads and that sure looks like the ones I've seen. And given that it's a tailwheel airplane with the shop heads on the forward side of the spar, the odds are not in your favor.
 
And given that it's a tailwheel airplane with the shop heads on the forward side of the spar, the odds are not in your favor.

Pure conjecture. It’s a shame these assumptions are being made after all of the posts explaining the statistical irrelevance of the data.
 
a dye penetrant test should be done to confirm

The enlarged tooling hole being the size it is (but for the guys having the lightening holes on the outer rib...), how should one go about doing that dye penetrant test then :confused:
 
The enlarged tooling hole being the size it is (but for the guys having the lightening holes on the outer rib...), how should one go about doing that dye penetrant test then :confused:

The original poster said he already removed the skin.
 
Thank you

Thanks for the input. With the skin and hinge bracket off we can’t see or feel a crack. Will try the dye to see if anything shows up. Thanks.
 
he already removed the skin

Yep, my bad for not reading properly.

My question came as I also had 1 rivet showing dirt lines (not the same, lighter and more like a star pattern, unfortunately pics are gone), though not as clearly defined as the OP's.
I cleaned the marks with solvent and cotton buds, and nothing is visible anymore...
 
After scoping my RV 6 we thought I had a crack. Had lots of eyes on it and everyone agreed it was a crack. I’ve attached a photo from the scope.
After removing the skin and the hinge bracket it was easy to see it wasn’t a crack. It was just dirt. We cleaned and inspected and sure enough there was no crack. We are going to install the repair kit anyway since we already have it opened up. Anyone else find anything similar?

I had a couple rivets on both sides that looked exactly like that, I thought for sure they were cracks. Removed the hinges and no cracks. Did dye penetrate and still no cracks. I’m thinking the oil from lubing the bearings penetrated to the inside and followed cracks in the primer. All of the suspicious rivets were on the side close to the bearing.
 
Further to Burf09 original post, following comments may be helpful:
. after resizing the tooling holes in the end ribs of the H Stab to 7/16", and inserting the borsoscope, we found what we thought were cracks originating at 2 rivets on the port outboard elevator hinge bracket
. we showed the pics to several RV drivers on our field and to our local AME;
concensus, yup they are cracks
. ordered the RV6 Non Prepunched repair kit
. opened up bottom skin enuf to get our eyes directly on the "cracks" and to drag a pointed punch around the periphery of the 2 rivets with the "cracks""
. there was punch did not "Catch" as it went across the "cracks"....hmmm
.so one of our crew rubbed his bare finger across the "cracks" and VOILA he rubbed the "cracks " off....they simply disapppeared.....THERE WERE NO CRACKS
. the "cracks" were actually dust/dirt deposited on oil, which wept thru the 2 rivets and spread in the classic form of "cracks"

Suggestion:
.insert a piece of coat hangar with a piece of rag soaked with brake cleaner on the end, thru the 7/16" boroscope hole and wipe the suspected crack to be sure its not just dirt deposited on oil that has wept thru a rivet hole ...the oil comes from lube -ing your rod end bearings every annual inspection
. then re - boroscope to see if your rivets are still there.
 
Last edited:
This is interesting for sure. I did an inspection on an RV8 that looked exactly like the OPs photo. I was sure it was cracked. Cleaned with cotton swabs taped to a piece of piano hinge and acetone. Checked again no crack. I thought no way there has to be something generating that line. I used the same trick to apply dye to the area then wiped off with swabs again. (this was a pain to say the least). Took a soda straw and directed developer to the affected rivet. No cracks. I would swear that would have been a crack. Obviously some of these are but I wonder if some are being miss diagnosed. Very difficult to do a dye check with everything closed up.
Ryan
 
Very interesting.

I am in a similar situation. Black squiggly line- telltale sign of a crack. Wiped clean with swab dipped in acetone and flew for about 5 hours. Black squiggly line has reappeared.

The thing is, the “crack” does not originate from any rivet, like most others. It is a horizontal line that is about 3/4” long and parallel to bottom edge of hinge bracket. Only 330 hours and occasional “gentlemen” aerobatics (3.5g). Doesn’t make sense.


https://flic.kr/ps/3TgWZT
 
Last edited:
Very interesting.

I am in a similar situation. Black squiggly line- telltale sign of a crack. Wiped clean with swab dipped in acetone and flew for about 5 hours. Black squiggly line has reappeared.

The thing is, the “crack” does not originate from any rivet, like most others. It is a horizontal line that is about 3/4” long and parallel to bottom edge of hinge bracket. Only 330 hours and occasional “gentlemen” aerobatics (3.5g). Doesn’t make sense.


https://flic.kr/ps/3TgWZT

See skylor's crack and his conjecture:

 
Last edited:
Steve Smith. What are your thoughts on the material grain directions of these spars? Any link to why some crack and some haven’t?
 
Steve Smith. What are your thoughts on the material grain directions of these spars? Any link to why some crack and some haven’t?

The short answer is "I don't know."

I doubt there is any variation of grain direction in the parts made by Vans. The sheet metal parts are all cut out on numerically controlled punch and cut machines. They feed whole sheets into the machine, and it cuts out a whole bunch of parts that are nested together to minimize waste. So whatever grain direction the HS spars have, they are surely all the same.

I think the influence of grain direction on material properties, especially crack propagation, is very particular to the alloy and the rolling processes. Others here probably know a lot more about that than I do.
 
Back
Top