-POSTING RULES

-Advertise in here!
-
Today's Posts
|
Insert Pics
Keep VAF
Going
Donate methods

Point your
camera app here
to donate fast.
VAF on Twitter:
@VansAirForceNet
|

01-12-2010, 10:53 PM
|
|
|
Join Date: Aug 2005
Location: Estacada, OR
Posts: 787
|
|
Several years ago at Van's Homecoming I saw a beautiful panel that looked like wood but was some kind of laminate material, maybe like you would see on a counter top. Did not look chintzy; looked like a fancy wood. I have looked at counter top laminates in the last couple years and haven't found anything that looked nearly as good.
__________________
Richard Scott
RV-9A Fuselage
1941 Interstate Cadet
|

01-13-2010, 09:09 PM
|
 |
|
|
Join Date: Nov 2005
Location: Zeeland, Michigan
Posts: 417
|
|
Walnut Burl
I had mine made by Aero Enhancements. I don't think they are still producing the overlays. The Walnut Burl veneer is glued to a black plastic base (approx. 3/16"), the type was applied on the veneer and then covered with some type of clear acrylic. I gave him my CAD file used to cut the panel and it matched perfectly. When I did a google search it looks like they are still is business but not producing the overlays.
[IMG]  [/IMG]
[IMG]  [/IMG]
Gary
N715AB
700 hours
|

01-14-2010, 11:13 AM
|
 |
Senior Curmudgeon
|
|
Join Date: Sep 2005
Location: Dayton Airpark, NV A34
Posts: 16,616
|
|
These folks were at Golden West this year, really nice looking stuff.
http://www.pfluegers.com/
__________________
Mike Starkey
VAF 909
Rv-10, N210LM.
Flying as of 12/4/2010
Phase 1 done, 2/4/2011 
Sold after 240+ wonderful hours of flight.
"Flying the airplane is more important than radioing your plight to a person on the ground incapable of understanding or doing anything about it."
|

04-19-2022, 03:10 PM
|
 |
|
|
Join Date: Mar 2019
Location: KBVS
Posts: 298
|
|
**necrothread alert** :-)
On my Mk I panel (following some bad advice) I did a fiberglass layup with a veneer overlay, using West Systems 207 clear hardener. A test layup was done on a part cockpit part called a "diamond plate" over 6061 aluminum, and while I scrapped the fiberglass panel a long time ago the diamond plate is still there, and has held up with no changes. Both were vacuum bagged for 12 hours, then 3 coats of satin poly applied, and came out well.
I also took the panel down and had a sign shop laser print/burn burn an osprey into the panel before sealing, the size and location was limited by his machine, so next time I'll have it done on the glove box door.
I'm planning on doing the same to the new panel (this time using 2024T3 aluminum), sometime this summer. Lot of effort, but it's worth it to me, and I'm having fun.
__________________
SeaRey builder lurking to get ideas to make his plane better, and keep his build from stopping like a gear down landing in water.
Dues paid for 2023
http://seareybuild.blogspot.com/
Last edited by Steve Crewdog : 04-19-2022 at 03:41 PM.
|

04-19-2022, 03:12 PM
|
 |
|
|
Join Date: May 2005
Location: Savannah, GA
Posts: 1,830
|
|
Well... time for a stick in the mud opinion. The panel's primary function is functionality, not beauty. Anything over the top can be a visual distraction.
__________________
RV-9A at KSAV (Savannah, GA; dual G3X Touch with autopilot, GTN650, GTX330ES, GDL52 ADSB-In)
Previously RV-4, RV-8, RV-8A, AirCam, Cessna 175
ATP CFII PhD, so I have no excuses when I screw up
|

04-19-2022, 03:23 PM
|
|
|
Join Date: Feb 2018
Location: Incline Village Nv
Posts: 374
|
|
Transparent glass layer
Never tried it on Aluminum, this comes from boatworking...
I like to carefully wet out a layer of woven glass over my laminates. If you are careful you won't be able to see the glass under your clear coat.
In my experience this arrests a lot of what the wood will try to do with temperature and moisture. Partially because of the glass and partially by the sealing action of the epoxy.
If I tried that I would get the best bond I could on the aluminum with a compatible primer system before epoxying the laminate.
__________________
Vincent 'Duck' Wawrzynski
LtCol USMC (Ret)
F-18/F-5/F-16, AH-1/UH-1/CH-53/CH-46, C-130/AN-2
RV-7 complete with all the gadgets
Aviation Safety/Accident Inspector/Investigator
San Jose State University Av Faculty, CFI/GFI S/M (I)
|

04-19-2022, 03:29 PM
|
 |
|
|
Join Date: Mar 2019
Location: KBVS
Posts: 298
|
|
Quote:
Originally Posted by smithhb
Being a veneer woodworker and cedar-strip canoe builder, working with veneers is really straightforward and guaranteed to produce a satisfying final product. The keys are as follows:
1. Start with a good quality veneer (see http://www.rockler.com/product.cfm?page=2215)
2. Get a good glue, either contact cement or Titebond Cold Press for veneer http://www.rockler.com/product.cfm?page=2220
3. Either a stain (your choice) or not. I prefer to not stain because the wood will darken over time from UV exposure. Stained wood will just be that much darker.
4. A good clear coat protectant. Preferably lacquer. Almost any other clear coat will yellow over time. The clear coat MUST be sprayed with at least four light coats with sanding between the coats. (Spray two coats before sanding).
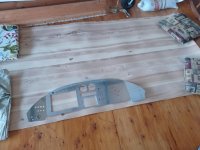
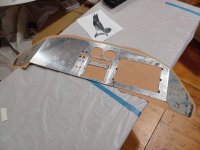
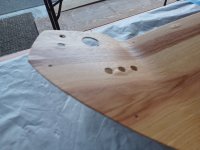
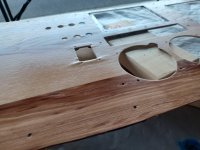
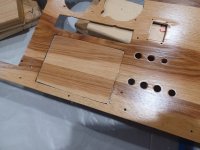
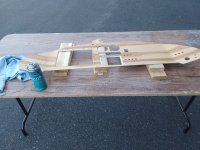
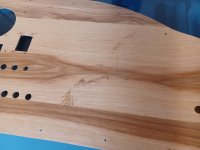
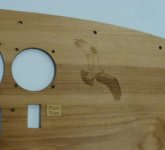
5. The panel must have ALL holes and switch cut-outs already cut out. Clean the panel well to remove any grease, oils, etc. (Remove any switches or instruments first (duh). Lay the clean aluminum panel on a flat surface.
6. Lay out the veneer (dry) onto the panel and orient. Use a single sheet of veneer if possible. Avoid having to book match any edges. Allow for at least .25" overlay on the panel edges. You can trim excess with scissors. 7. Remove the panel.
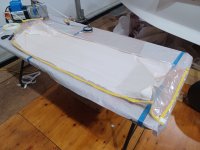
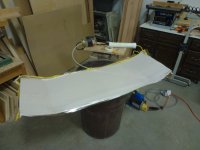
8. LIGHTLY dampen the veneer with water using a sponge until the veneer is completely wetted (DO NOT thoroughly soak!). Lay a flat board or sheet of plywood over the veneer and allow to dry (2-3 hours) Add weights to the plywood to really press the veneer down tightly or you will get bubbling of the veneer. Wetting will raise the grain and pre-shrink the veneer. It will also help the veneer flatten out.
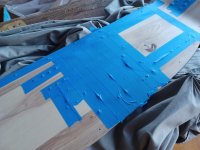
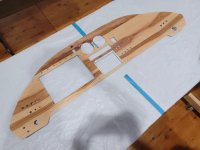
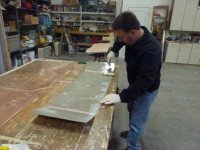
9. Lay out the panel on butcher paper on a flat surface. Use a roller and apply the Titebond over the entire surface of the panel. Repeat to the BACK of the veneer. Place the veneer on to the panel and roll the veneer (using a clean roller) from the inside outward toward the panel edges (removes any bubbles and assures a good bond. Cover veneered panel with butcher paper and plywood. Weigh down and allow to dry at least 24 hours.
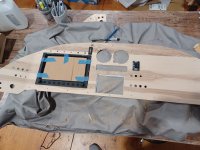
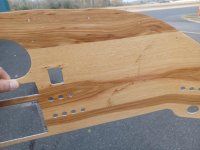
10. Remove weights and plywood, flip panel over and use a sharp exacto knife to trim around instrument holes and switches. Edges can be cleaned up with a dremel tool and sandpaper.
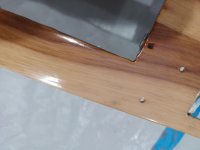
11. Flip panel over. With veneer side up, lightly sand with 320-400 grit paper to remove any raised grain. Blow away any sawdust. Lightly wipe with a damp sponge to thoroughly remove residual sawdust. (Surface must be absolutely clean before next step.)
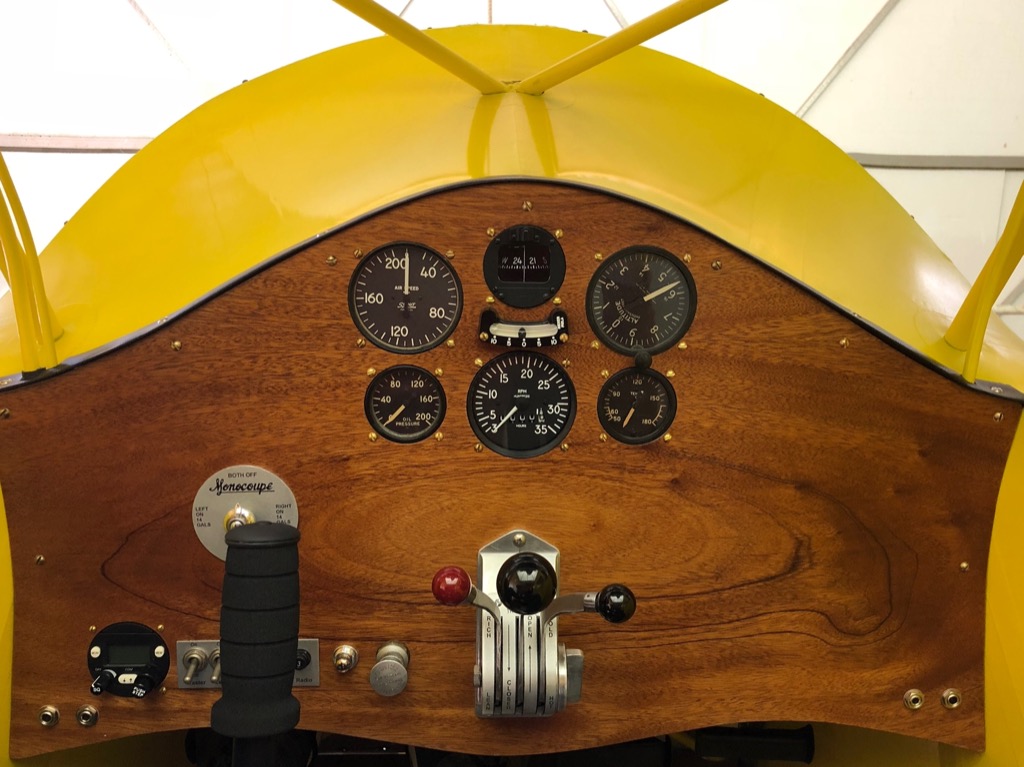
12. Spray first (light) coat of lacquer. Allow to dry at least 15-20 minutes. Apply labels (Depending on veneer color you would use white lettering on a dark veneer or black lettering on a light veneer. Labels should be printed on clear background.)
13. Apply second coat. Lacquer should be dry enough to sand (320 grit) within 30-60 minutes depending on humidity. (BTW, humidity should be below 70%). Repeat until you have desired look (4-8 coats). REMEMBER, multiple layers of thinner coats will be better than 2-3 heavy coats. Sanding must be followed with a damp wipe to remove any contaminants. Sand lightly to rough up the surface for good adhesion of successive coats.
https://vansairforce.net/community/s...1&postcount=13
|
To save others from searching.
__________________
SeaRey builder lurking to get ideas to make his plane better, and keep his build from stopping like a gear down landing in water.
Dues paid for 2023
http://seareybuild.blogspot.com/
|

04-19-2022, 03:31 PM
|
 |
|
|
Join Date: Mar 2019
Location: KBVS
Posts: 298
|
|
Quote:
Originally Posted by wawrzynskivp
Never tried it on Aluminum, this comes from boatworking...
I like to carefully wet out a layer of woven glass over my laminates. If you are careful you won't be able to see the glass under your clear coat.
In my experience this arrests a lot of what the wood will try to do with temperature and moisture. Partially because of the glass and partially by the sealing action of the epoxy.
If I tried that I would get the best bond I could on the aluminum with a compatible primer system before epoxying the laminate.
|
Duck, do you lay out the glass after you've mounted and let dry the veneer, in lieu of a poly finish? I built a CLC 17LT wood kayak a long time ago and am using the experience I gained from that build on the panel. But now that I think about it, I still used a few coast of poly over the glass deck on top for UV protection.
Thanks,
Steve (also "Duck")
__________________
SeaRey builder lurking to get ideas to make his plane better, and keep his build from stopping like a gear down landing in water.
Dues paid for 2023
http://seareybuild.blogspot.com/
|

04-19-2022, 03:51 PM
|
|
|
Join Date: Feb 2018
Location: Incline Village Nv
Posts: 374
|
|
Quote:
Originally Posted by Steve Crewdog
Duck, do you lay out the glass after you've mounted and let dry the veneer, in lieu of a poly finish? I built a CLC 17LT wood kayak a long time ago and am using the experience I gained from that build on the panel. But now that I think about it, I still used a few coast of poly over the glass deck on top for UV protection.
Thanks,
Steve (also "Duck")
|
Substrate-Epoxy-Laminate(veneer)-Epoxy-Glass-Epoxy-UV stable topcoat (varnish/poly of some kind) Absolutely must cover up the epoxy.
Can be done iteratively with a gravity press if the veneer is really flat, otherwise a vacuum bag is kind of a must. I wouldn't try doing it all at once, get the laminate bonded then go on to the glassing later.
__________________
Vincent 'Duck' Wawrzynski
LtCol USMC (Ret)
F-18/F-5/F-16, AH-1/UH-1/CH-53/CH-46, C-130/AN-2
RV-7 complete with all the gadgets
Aviation Safety/Accident Inspector/Investigator
San Jose State University Av Faculty, CFI/GFI S/M (I)
Last edited by wawrzynskivp : 04-19-2022 at 03:54 PM.
|

04-19-2022, 05:00 PM
|
 |
|
|
Join Date: Mar 2006
Posts: 377
|
|
Quote:
Originally Posted by gmpaul
Here's the question: has anyone had any luck in applying wood veneer to an aluminum panel and how did you do it?
|
I did this on my 1932 Monocoupe 110. Followed advice and recommendations from other antique plane restorers that had gone before me. Panel blank was 0.063 aluminum. Fit, cut and drilled all holes first. Scuffed aluminum with scotch brite pad. Cleaned with acetone. I used rubber cement. Brushed on both the panel and the back side of the veneer. Let it get tacky (plenty of advise on the internet on how to do this). Carefully position on veneer where you want it (get the best features of the veneer piece). Used a heavy rubber roller (sold at wood/veneer shops) to roll out any air bubbles. Weighted it down with a board and some weights. Let it dry. Carefully back drill holes using a wood board underneath. I cut 90% of the instrument holes out with a razor knife, then finished with drum sander on Dremel tool. Light sanding. Varnish with PolyFiber polyurethane clear varnish (which is what I had to use on the rest of the airframe woodwork). Multiple thin coats with plenty of dry time between coats, you don't want to solvent saturate the veneer.
6 years so far in AZ weather extremes and so far holding up.

__________________
Dave Binkley
RV-6, O-360-A1A, C/S
1932 Monocoupe 110, Warner 145 ( http://gobinkley.com)
Sedona, AZ
|
Thread Tools |
Search this Thread |
|
|
Display Modes |
Linear Mode
|
Posting Rules
|
You may not post new threads
You may not post replies
You may not post attachments
You may not edit your posts
HTML code is Off
|
|
|
All times are GMT -6. The time now is 08:11 PM.
|