Merry Christmas Everyone. Santa gifted me time in the garage to work on the plane. I'm working on the ailerons and am at the point of dimpling the parts and getting ready for final assembly. My question is related to dimpling/countersinking the counterbalance and leading edge skin. This is what is in the directions:
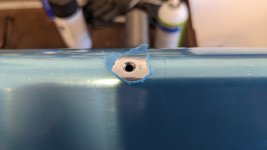
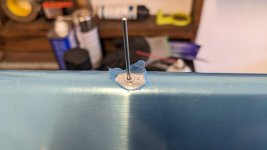
I'm concerned about trying to dimple the leading edge skin because that would be in the bend and the way i see it would cause a flat spot or damage the skin. Can I assume from this statement that if I countersink the counterbalance pipe only, that dimpling the skin is not necessary and that it will "deform sufficiently" to leave a finished surface?
Disassemble the parts, deburr, dimple and prime as needed. Machine countersink the holes in the counterbalance pipe. The countersink need not be 120° to match that of the rivet heads. The .020” skin and the aluminum blind rivet will deform sufficiently to contour to a 100° countersunk hole
I'm concerned about trying to dimple the leading edge skin because that would be in the bend and the way i see it would cause a flat spot or damage the skin. Can I assume from this statement that if I countersink the counterbalance pipe only, that dimpling the skin is not necessary and that it will "deform sufficiently" to leave a finished surface?