What's new
Van's Air Force

Don't miss anything! Register now for full access to the definitive RV support community.

Greg’s RV-9A

Biggiesauls

Well Known Member
Patron
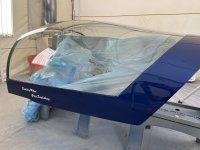
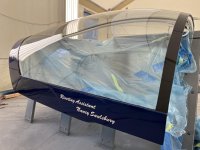
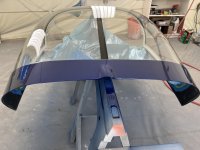
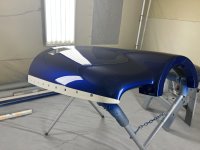
Sometimes it’s the simplest things that bring out a big grin…. An RV grin in this case.

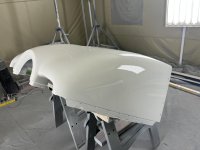
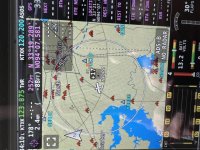
Task for today was to pull the fuselage out of the garage and start sanding on the cowl to spinner fit. Metal roof on the garage prevents gps lock and vhf radio reception. So while the plane was out in the open I turned on the master and avionics. After a couple minutes imagine my surprise to see a plane on the screen near my location. ADSB-in works! Grin ! I heard the plane pass overhead and I put my headset on and heard that plane call the tower which is about 5 miles north. Radio works! Another, bigger grin!

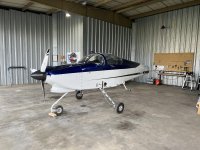
I’m ready to get this bird finished!
 

Attachments

  • IMG_1335.jpg
    IMG_1335.jpg
    584.6 KB · Views: 199
Same here. When I saw airplanes show up on my AFS screen for the first time I was ecstatic! When I used my radio for the first time I was ecstatic! You get the point. It continued a 7 year history of me saying "I can't believe this". Now my phase 1 is almost done and I can roam about the country saying "I can't believe this"!
 
Canopy skirt painted and lettered

Earlier in this build I chose to do a one piece fiberglass canopy skirt and use Sikaflex to attach it to the plexiglass and metal frame. I had spent a lot of time smoothing out the glass and this paid off when it came time to paint it! Very little prep time. After laying down 2 coats of SPI epoxy primer, very little sanding was required and no filler was required.

1st coat of blue went on, followed by 2 more coats to get good coverage. An hour was waited before laying down the stencil for names/titles on the sides of the canopy. Once stencils were applied the rest of the skirt was masked off and Alpine White paint was sprayed on the lettering stencil. After 15 minutes stencil mask was removed. Results were very good! After a 30 minute wait 3 coats of clear went down. After another hour wait all remaining masking was removed including the original plexi protective film.

After over a year of plexi under rap… no scratches!

Happy camper!
 

Attachments

  • IMG_1358.jpg
    IMG_1358.jpg
    263.8 KB · Views: 264
  • IMG_1357.jpg
    IMG_1357.jpg
    283.3 KB · Views: 261
  • IMG_1359.jpg
    IMG_1359.jpg
    239.9 KB · Views: 193
Cowl

More paint work, engine cowl. It seemed like the prep and sanding would never end.

Last item to paint will be fuselage this weekend. One bite of the elephant at a time….
 

Attachments

  • IMG_1430.jpg
    IMG_1430.jpg
    192.2 KB · Views: 128
  • IMG_1431.jpg
    IMG_1431.jpg
    189.6 KB · Views: 126
Greg,
I used to put mine together in the front yard just to get reactions from the neighbors. It was a good excuse to get to know them better and for them to learn people building experimental are not all nuts. Some are, but not all!

Have fun. I cant wait to see yours all together.
 
The big move

Milestone event today. Move the fuselage from the home garage to the hanger. Nervous but the towing company did very well.

Let the final assembly begin!
 

Attachments

  • IMG_1501.jpg
    IMG_1501.jpg
    329.9 KB · Views: 127
  • IMG_1503.jpg
    IMG_1503.jpg
    476.8 KB · Views: 161
Finish work

Installed horizontal and vertical stabilizers. Torques fasteners. No surprises so far. Progress on the “new” factory floor.
 

Attachments

  • IMG_1507.jpg
    IMG_1507.jpg
    418.2 KB · Views: 169
Back
Top