What's new
Van's Air Force

Don't miss anything! Register now for full access to the definitive RV support community.

Fuel Tank Removal

Timinfla2

Active Member
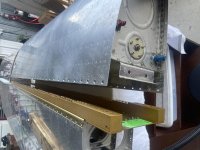
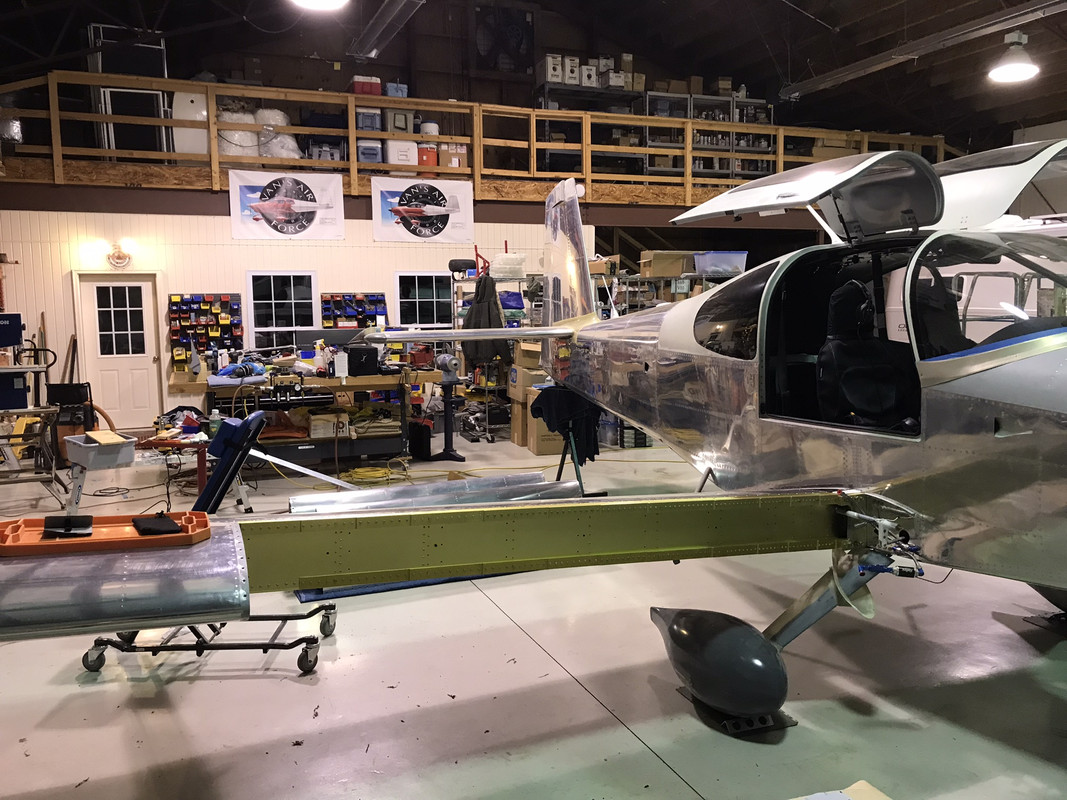
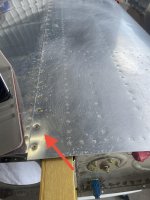
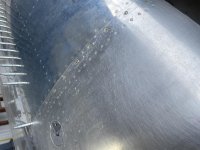
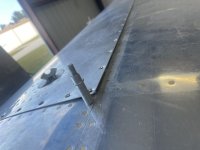
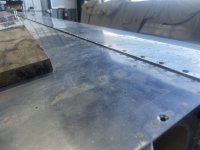
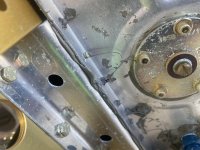
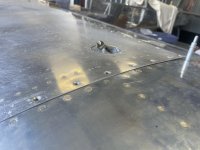
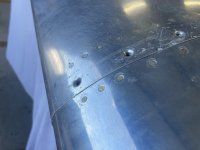
Hey folks. I received my SkyDesign ER Tanks and I’m beginning to work on them today. For those of you who have been following along I have a set of wings that have pressure tested fuel tanks already installed but we haven’t put the bottom skins on yet. So before we put the bottom skins on I obviously want to swap out the standard tanks with the new ER tanks. The first step in that according to the sky design instructions are to remove the existing fuel tank. Because I wasn’t involved in installing the original fuel tanks I’m going through the plans and I’m not exactly sure how to uninstall these things. Is it safe to assume I start by unscrewing the screws I see here?

Thanks for any advice.
 

Attachments

  • IMG_2610.jpg
    IMG_2610.jpg
    363.9 KB · Views: 135
  • IMG_2611.jpg
    IMG_2611.jpg
    373.3 KB · Views: 120
Just did this last week

Pull all the #8 screws along the spar and splice strip. (I’d leave one at each corner on the top until the last minute). You might need to slide a thin piece of aluminum between the tank and the splice strip to unstick any proseal that might be here - it doesn’t take much to make it difficult to remove.

Ideally you have two people (or three) but you can do it yourself. The tank likes to stick at the forward dimples along the splice strip. Have one person inboard pulling and another outboard (pull through the filler opening). You might have to rock a bit back and forth inboard and outboard to break it loose. Don’t rock too much as you will pinch the tank leading edge against the outboard wing skin. Another tip is a soft hammer and block of wood against the raised tank skin at the back - tap until you get noticeable clearance from the tank and aft wing skin. You may have to tap at the bottom too. Two people pulling and one tapping with the block of wood was required on one of my two tanks.

Good luck!
 
Last edited:
There are also 7 <edit> sets of three An3 bolts securing the tanks to the spar. You access them through the access panels on the underside of the wing. You must remove those in addition to the screws on the exterior.
 
Last edited:
There are also 7 pairs of An3 bolts securing the tanks to the spar. You access them through the access panels on the underside of the wing. You must remove those in addition to the screws on the exterior.

Oops, forgot those. Even missing one of the 21 bolts will make it impossible to remove the tank!
 
Oops, forgot those. Even missing one of the 21 bolts will make it impossible to remove the tank!

I can never forget them. When my QB wings arrived in 2008, my inspection revealed that every one of those bolts (both wings) was one size too long. It was obvious, they all had 3 or 4 full thickness washers under the bolt heads. I replaced every one with the correct grip length.
 
First off, drain the the tanks. Then remove the wing root filler plates and the inspection hole covers on the bottom of the wing. Next there are the 21 bolts that secure the tanks to the spar. You won't be able to see all of them, and some can only be removed by "feel". It will go faster if you pull the aileron tube but it is possible to pull the tanks with the push rod installed. Then there are the 200 screws around the perimeter of the tank.

The dimples around the tank perimeter will tend to hold the tank in position and may have to be coerced with a plastic putty knife or?

That should get you started...

-Marc
 
My preferred method to get the outboard end out over the dimples in the splice strip is to get a small piece of timber say 2x2x1 and gently lift the tank skin around 1/8 and tap it out with a rubber mallet and the wood block.
You’ll have to put the new tank on and off again at least a few times in order to get the skin gap nice.
When you do this for fitting the gap leave the splice rib out. That makes the tank go on and off much easier.
Definitely do all of this with the bottom skin off the wing!

Now you tell me. Probably should suggest this to Ken for another revision to the instructions. It does make sense and would allow you to final trim the outboard skin as well as the tank skin for the proper gap.

I may end up drilling off the splice strip, as I think this is a great idea.
 
Well here I am still trying to get my old tanks off but I think there's light at the end of the tunnel.

I swear some of those screws were JBWelded in place! They would NOT come out. So I had to drill off the heads and I'm going to drill out and replace the nut plates when I have the tank off.

Anyway, onward and upward! I appreciate the tip on the Splice Strip!
 
So I'm not exactly sure what I'm doing wrong here... I have all of the screws removed and all of the bolts removed. That sucker feels like it's welded on! I imagine there's some pro-seal making things difficult?

I'm trying to get the tank to separate from the wing, I tried pulling it from the tank hole opening and then I tried lightly tapping the lip of the skin with a block and mallet... Not even budging.

The top skin seems to have plenty of gap away from the spar but going around toward the leading edge on the splice it seems not to want to separate from that at all.

It appears that there is some pro seal (pictured) that is sticking the tank to the spar perhaps on the inboard side but maybe i'm not seeing it the right way?

Any ideas on how to convince this sucker to move?
 

Attachments

  • IMG_2692.jpg
    IMG_2692.jpg
    195.2 KB · Views: 89
  • IMG_2693.jpg
    IMG_2693.jpg
    213 KB · Views: 82
  • IMG_2694.jpg
    IMG_2694.jpg
    363.4 KB · Views: 122
  • IMG_2695.jpg
    IMG_2695.jpg
    258.1 KB · Views: 73
  • IMG_2696.jpg
    IMG_2696.jpg
    206.6 KB · Views: 73
How many spar/z bracket bolts did you remove? The answer must be 21 per tank.

After that, yes, it could be proseal, but nobody in their right mind installs a tank with wet proseal.
 
The third pic in post #12 it appears that bolts are still installed.
Like Richard said... are all the bolts out?

My neighbor was trying to get the cylinder head off his V8 and it wouldn't budge so he used a hydraulic jack. Broke the jack, there was a bolt that he missed, so don't use a jack! ;)
 
Like the others said, 21 bolts. Some of them can only be reached by going through the inspection panel and then through an adjacent rib. You can see them, it's all done by feel.

-Marc
 
Last edited:
And if you think you’re cursing now, wait until you refit those bolts.
Lifetime memories of holding an awl for alignment and a bolt in the same hand,
through the access hole and two ribs, blind.
Good times 👍
 
I will re-check the bolts again when I get to the hangar today. It would not surprise me if I missed something.

Here's thing you guys are going to get a kick out of - the wing isn't even finished/installed! Bottom skins are still off so i probably have the easiest tank removal task in the history of man and yet I'm still buggering it somehow!

Thanks for the advice, I'll recheck ALL bolts and screws are out, I thought I had yesterday but perhaps my eyes were tired that late in the day.
 
There is one set of bolts inboard of the tank. You captured and posted a photo of 'em with proseal smeared in the area. Don't forget those 3...
 
There is one set of bolts inboard of the tank. You captured and posted a photo of 'em with proseal smeared in the area. Don't forget those 3...

You're spot on those are the three that seem to be the problem! I'll update when I hit the hangar today :) Thanks for the sharp eye!~
 
I wonder what to do with the tanks after I remove them. Are they something that folks would buy if I put them in the classifieds?
 
I wonder what to do with the tanks after I remove them. Are they something that folks would buy if I put them in the classifieds?

I think if you do a leak test on them and they pass, at some point someone will post here with a tank leak who might want a new tank or two. The question is whether you want to wait on "that guy" and maximize your profit or if you're looking to "move them" and clear up some shop space.
 
I think parts value is fair provided they don’t leak. I have 100h on mine leak free so I know mine are good.
You guys have a larger market to here so someone will buy them. I suspect there’ll be a relatively active market for them as the ERs become more prevalent.

I haven’t actively tried to sell mine as yet.
If I can’t get rid of them I’ll make a coffee table out of them.
That’ll be popular at home :D
 
Yea mine are slow build and they don't leak - which makes me question my sanity over removing them just to put on ER's but nobody ever had a problem calling me crazy...

I'll see if they move on the classifieds.
 
Welcome to the club of Looney Tunes

Yea mine are slow build and they don't leak - which makes me question my sanity over removing them just to put on ER's but nobody ever had a problem calling me crazy...

I'll see if they move on the classifieds.

Tim, if you are crazy for retrofitting your RV-10, you have joined a great (and growing) group of lunatics. :D

Some of us did this to perfectly good, flying airplanes. As I've said in other threads - this mod is not terribly difficult on a flying airplane, relatively straightforward on QB wings and to me, a no-brainer on a new SB wing.


Cray, you're my hero, happy to be in any club you find yourself in!
 
Back
Top